Table of Contents
Are you thinking about canceling your Shopify subscription? You’re not alone! While Shopify is a popular and reputable eCommerce platform, it’s not necessarily the best fit for everyone.
Maybe you’re looking for a platform with more customizable features, or perhaps you’ve found a more affordable option elsewhere. Whatever your reasons, we’re here to help you navigate the process of canceling your Shopify subscription.
In this guide, we walk you through and show you some simple steps on how to cancel Shopify subscription. Whether you’re just started your Shopify store for less than a month or a seasoned Shopify seller, canceling a subscription can be daunting. But don’t worry, we’ve got you covered!
Let’s get started!
Things to consider before cancelling Shopify subscription
Before you cancel your Shopify subscription, there are a few important things to consider.
First and foremost, it’s crucial to understand the terms of your subscription and any cancellation policies that may apply. Depending on your Shopify subscription plan and the contract length, canceling early may incur fees or penalties.
Another factor to consider is your reasons for canceling.
Are you unhappy with Shopify’s features or customer service? Or are you simply looking to switch to a different eCommerce provider?
Understanding your reasons for canceling can help you make an informed decision and ensure you choose the best path forward for your business.
It’s also important to have a plan to transition your business to a new platform. This may involve exporting your data from Shopify, setting up a new website, and transferring any existing customer information or orders. Be sure to take your time to plan and prepare for this transition can help ensure a smooth and successful migration.
| You might also be interested in: |
How to cancel Shopify subscription in 4 easy steps
Now that you’ve considered your options and decided to cancel your Shopify subscription, it’s time to get started. The good news is that the cancelation process is quite straightforward and can be completed in just four easy steps.
Regarding canceling your Shopify subscription and closing your store, it’s important to remember that once you take this step, you won’t be able to reopen it in the future.
We don’t want you to feel stuck in a decision you might regret later on, so we suggest hitting the pause button on your subscription for now.
Step 1: Prepare Your Account
Before canceling your Shopify subscription, there are a few housekeeping things to address. First, ensure you have no outstanding balances or charges on your account. Shopify will email you a final invoice when you cancel during a billing cycle, so settling any remaining balances beforehand is important.
Additionally, it’s recommended that you back up and export your site data. Shopify claims that they keep your data for two years after cancellation, but you’ll need to purchase a new plan if you want to access it after closing your store.
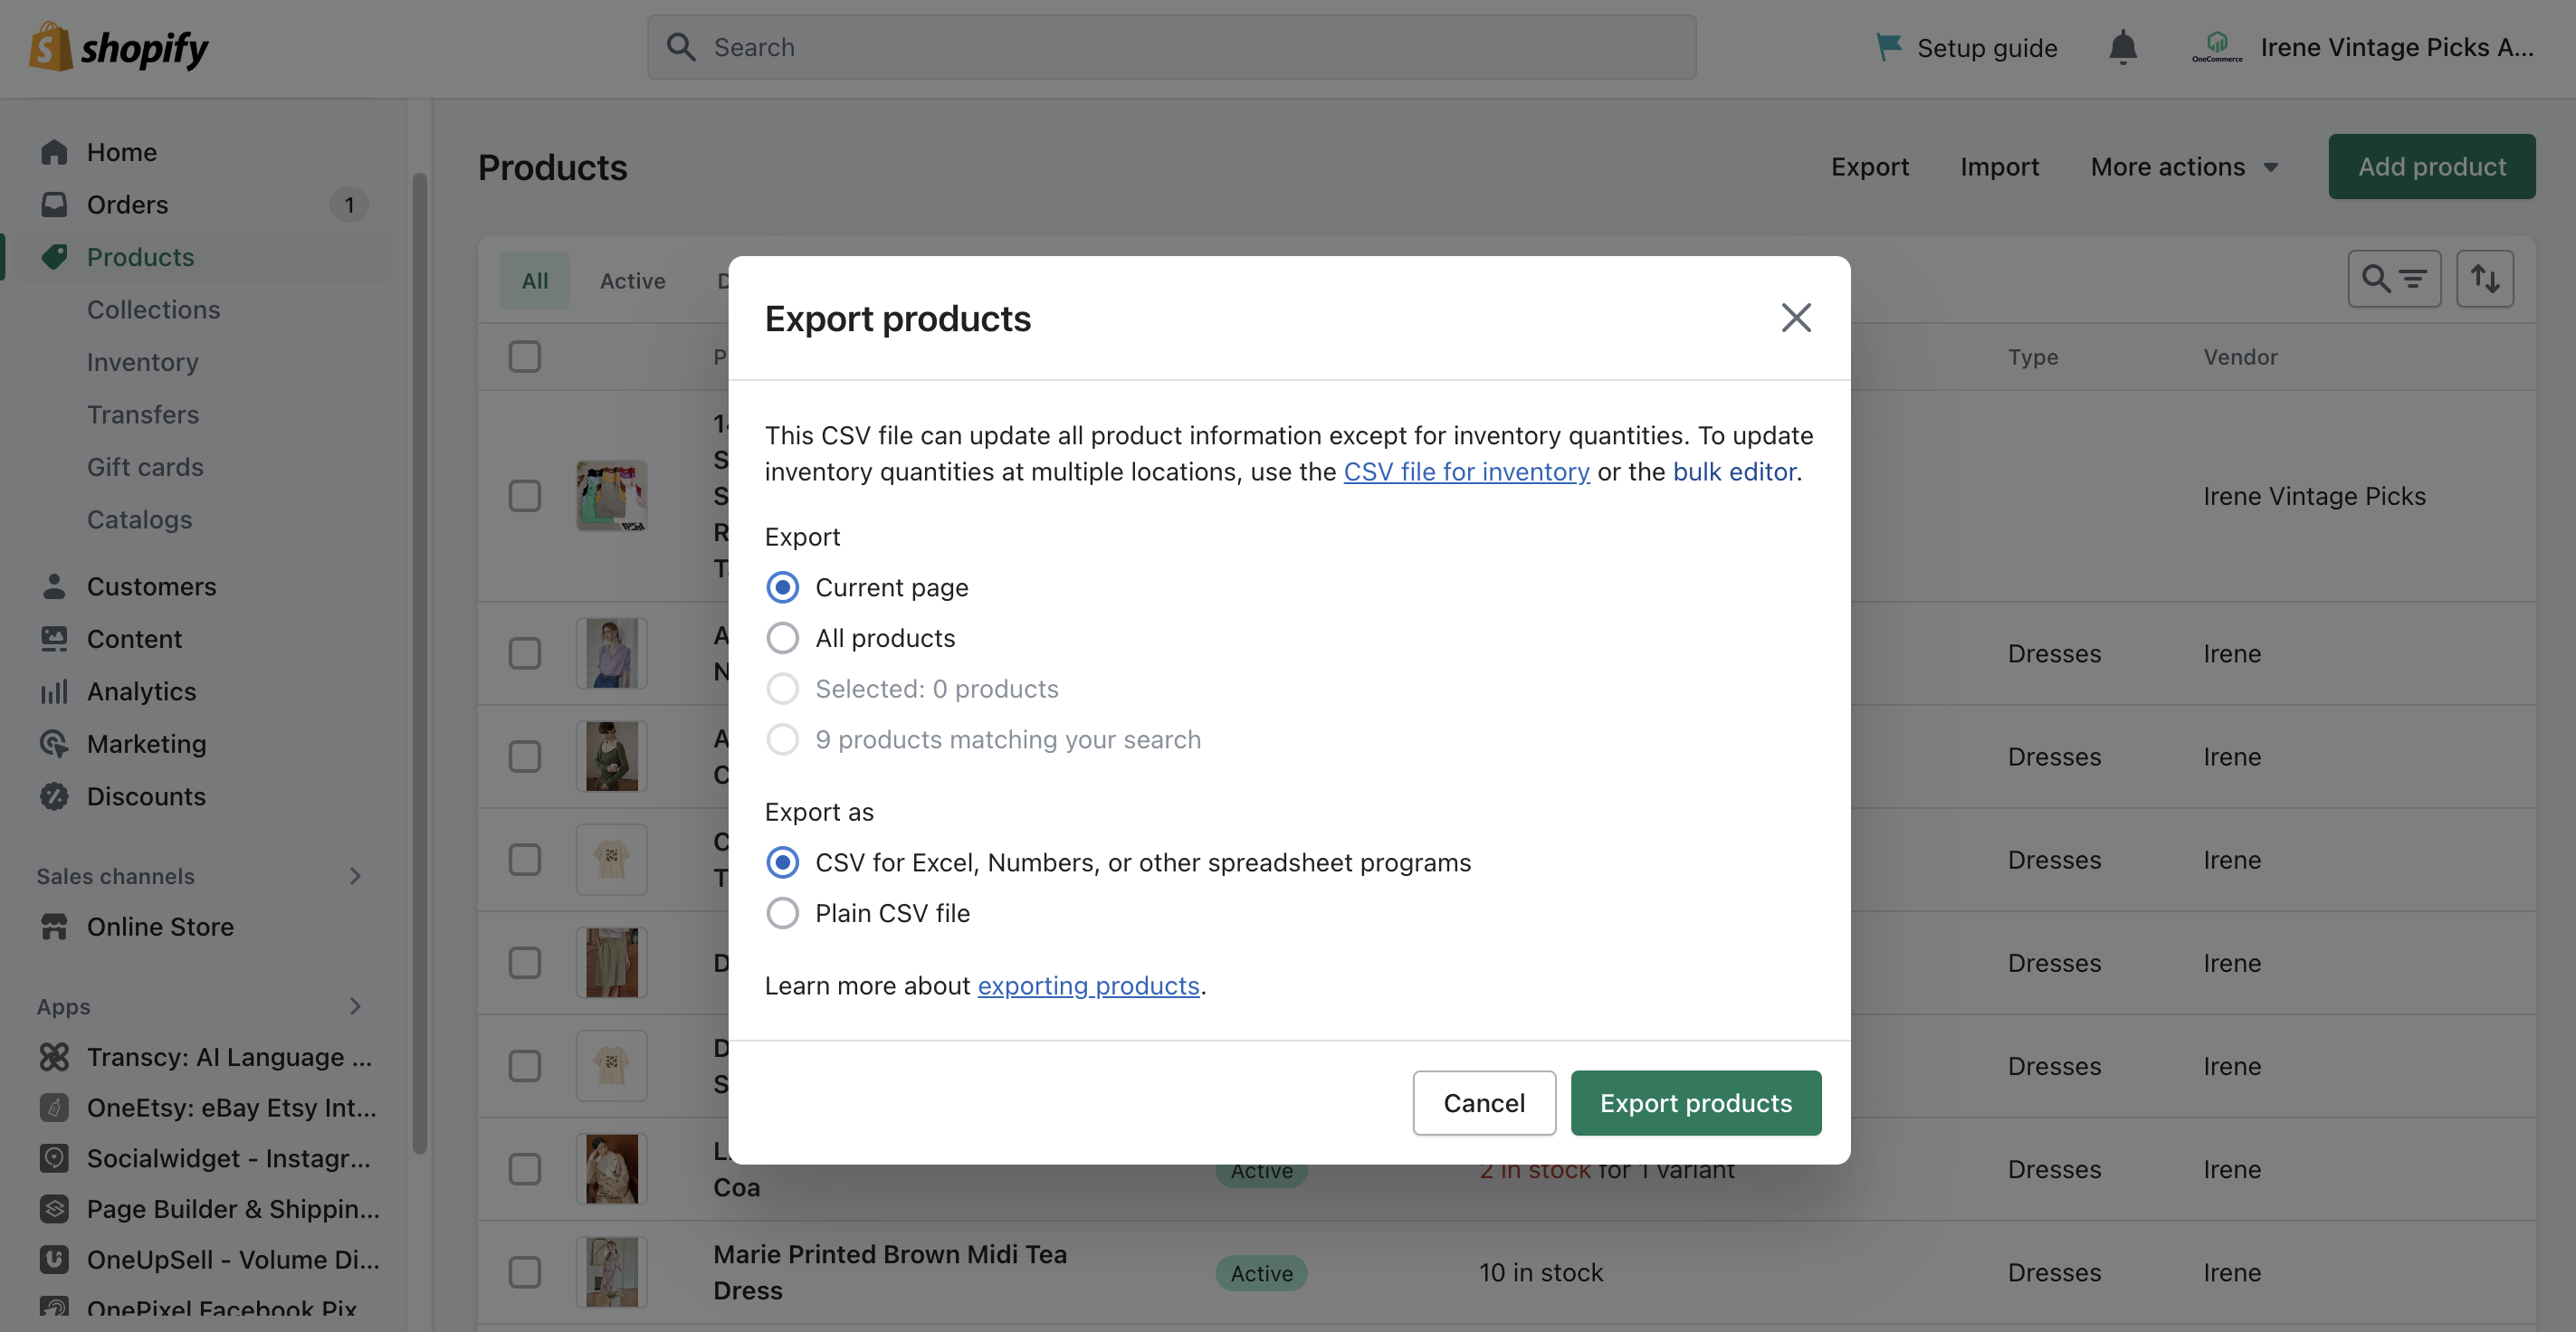
To export your store data, navigate to your Shopify account and select Products > All Products. From there, select all your products and choose the Export button to create a CSV file with your data.

In the popup that appears, choose All products and your preferred export file format. Then, click Export products:
Step 2: Uninstall Applications
The next step in canceling your Shopify subscription is disconnecting and uninstalling any third-party applications or services from the Shopify App Store. Some apps may still charge you even after closing your store, so removing them is important.
To do this, go to Apps section of your Shopify account dashboard. Here, you can have an overview of all the apps currently installed on your site. Go through each one and select the Uninstall option to remove them from your account.
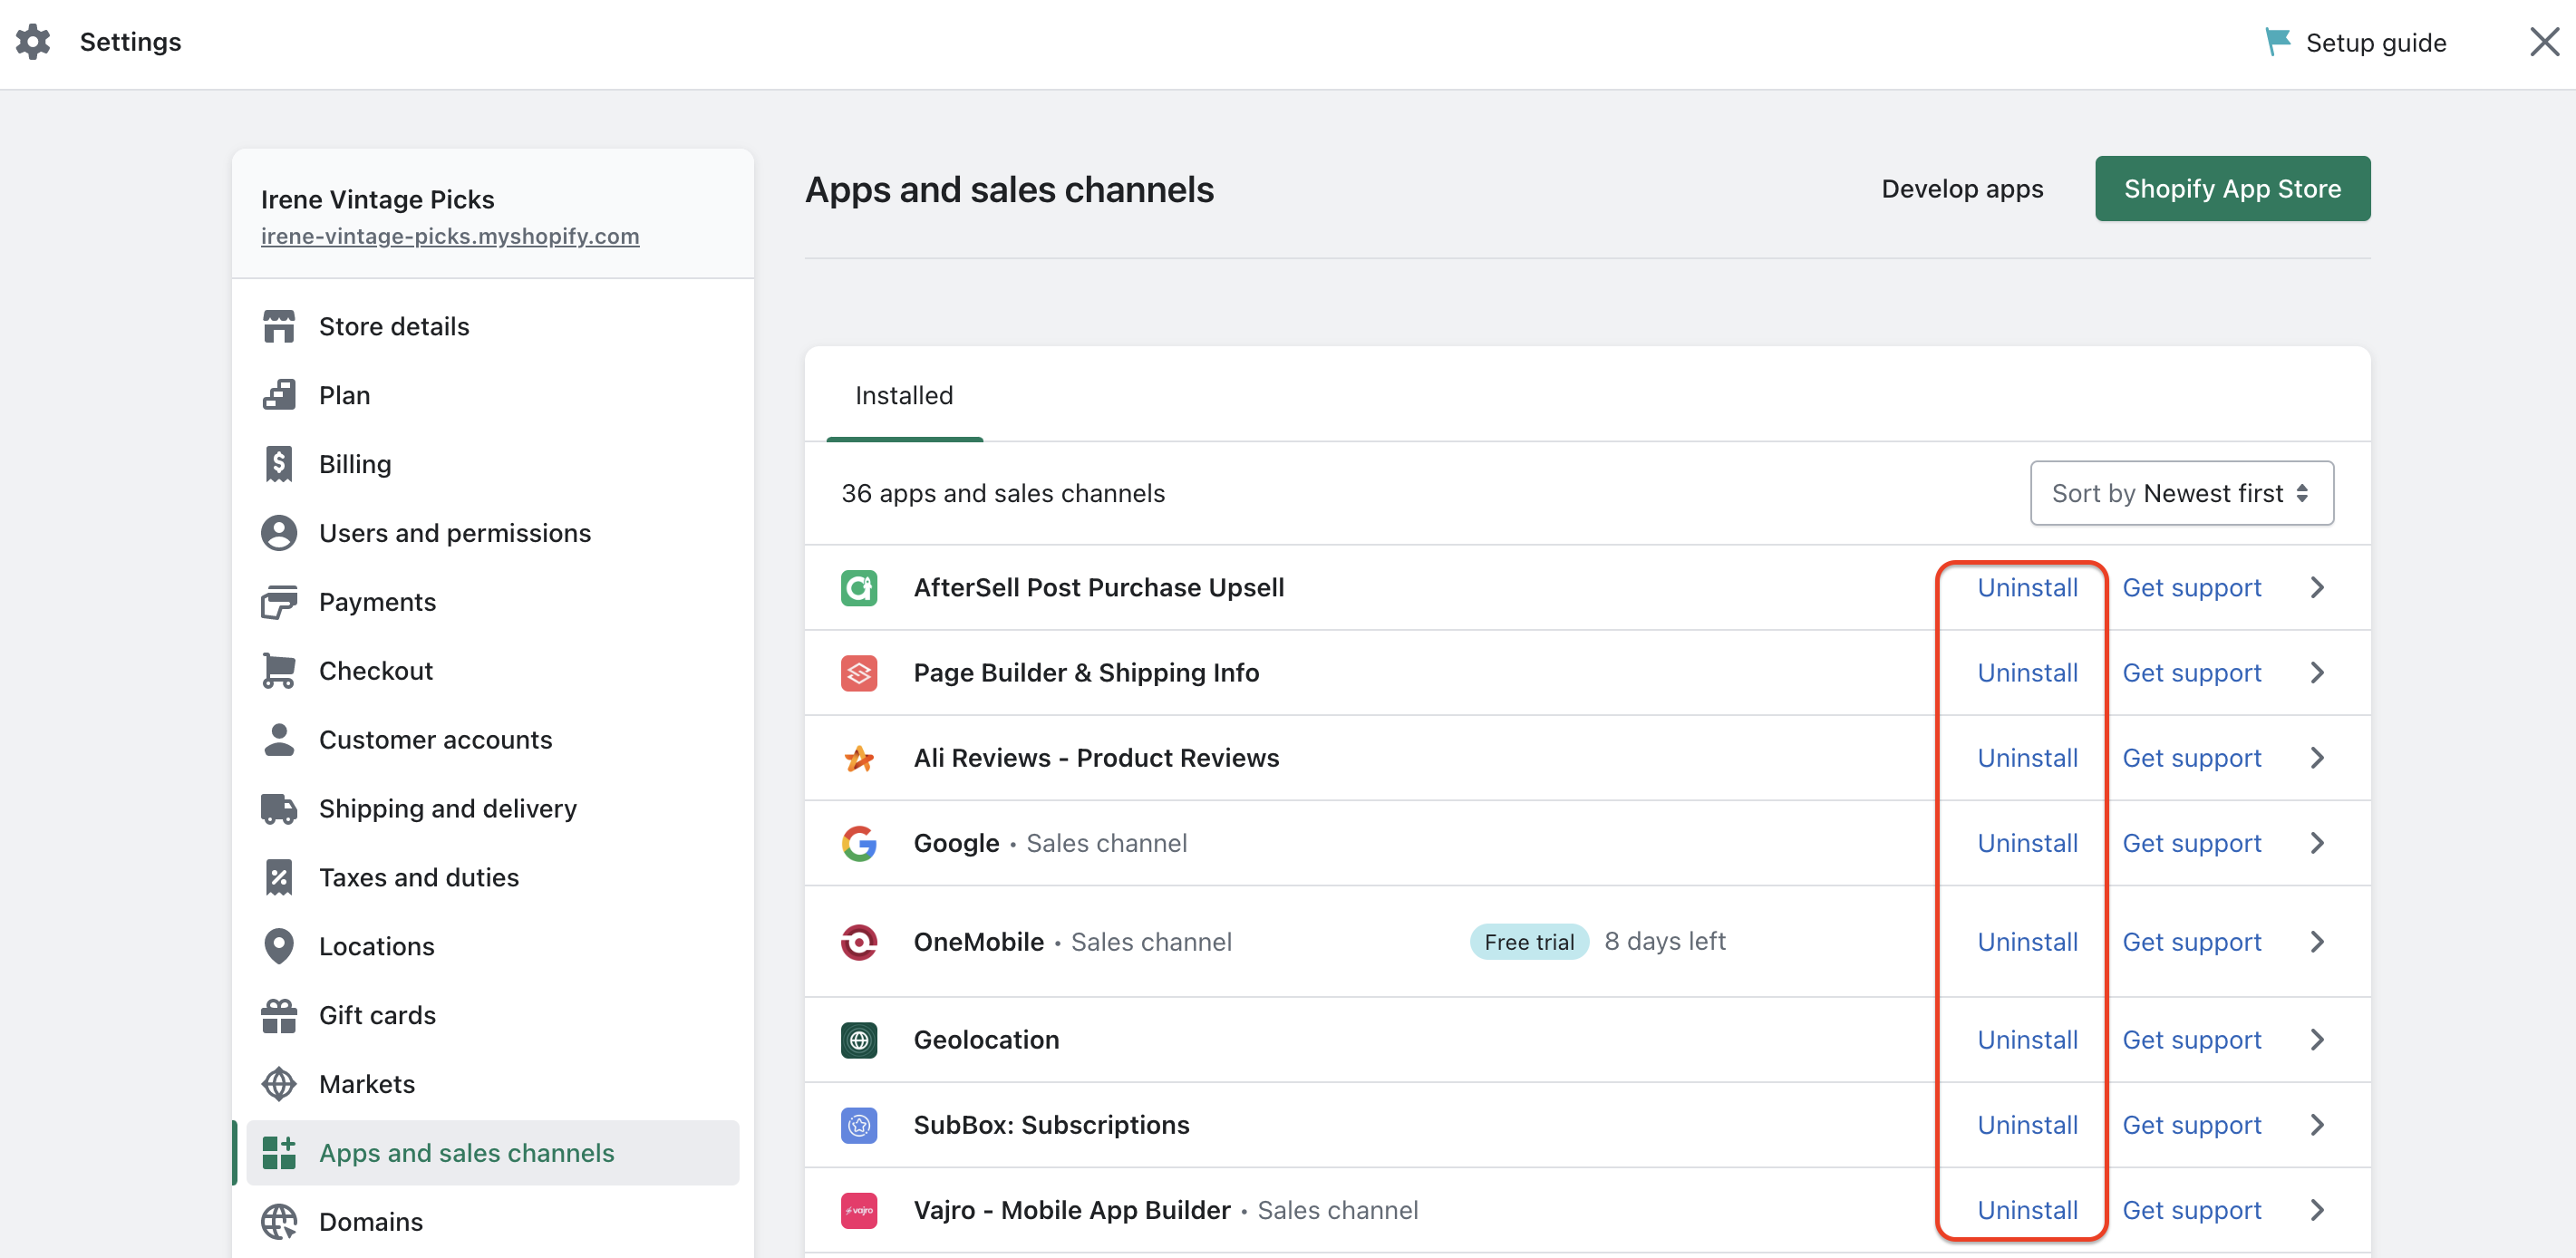
Be sure to double-check for any apps with recurring charges, as you’ll want to cancel them before deleting them.
Step 3: Transfer Your Custom Domain
If you purchased a custom domain name through Shopify, it’s essential to transfer it to another registrar before canceling your Shopify account. Shopify won’t automatically renew your domain name. You risk losing it if you don’t transfer it.
You can access your domain’s DNS settings in your Shopify admin panel, including TXT, MX, and CNAME records:
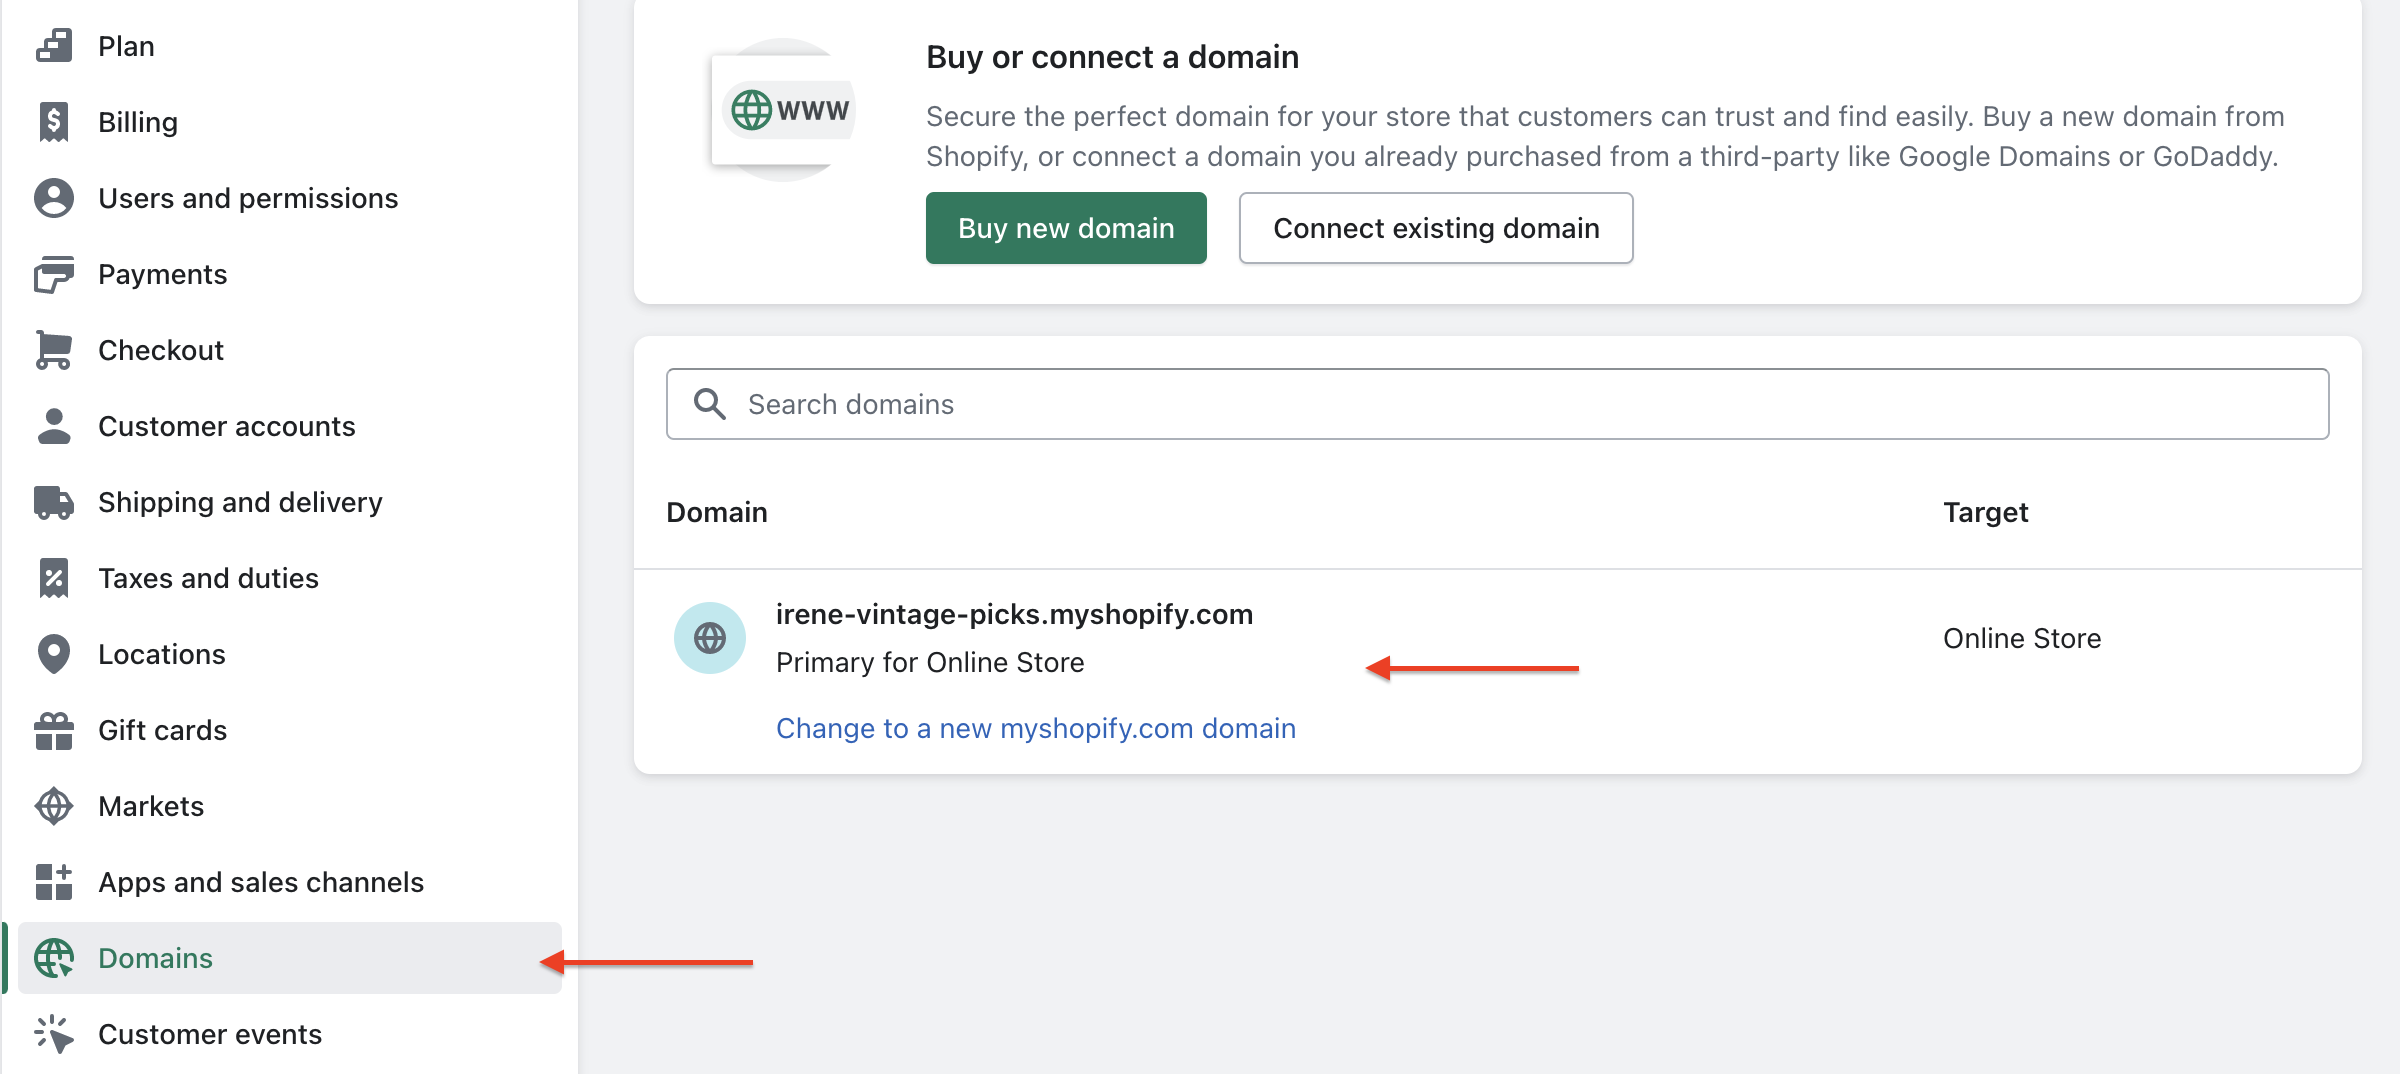
Before transferring your domain, make sure it has been more than 60 days since you purchased it through Shopify. The process for transferring your domain will be dependent on how you obtained it.
To be more specific, if you connected a third-party domain to Shopify, you could remove it from the Shopify domain list by selecting the Remove button.
Then, update your DNS settings with your new hosting provider. If you purchased your domain from Shopify, you must transfer its management to another hosting platform or registrar.
| Read more: Top 10 Shopify Competitors & Alternatives That Worth Looking Into |
Step 4: Deactivate Your Store via Shopify Settings
Once you’ve completed the previous steps, it’s time to close your Shopify store.
To do this, navigate to Settings in your Shopify account, then select Plan. At the bottom of your screen, under your plan details, click on the Deactivate store button.
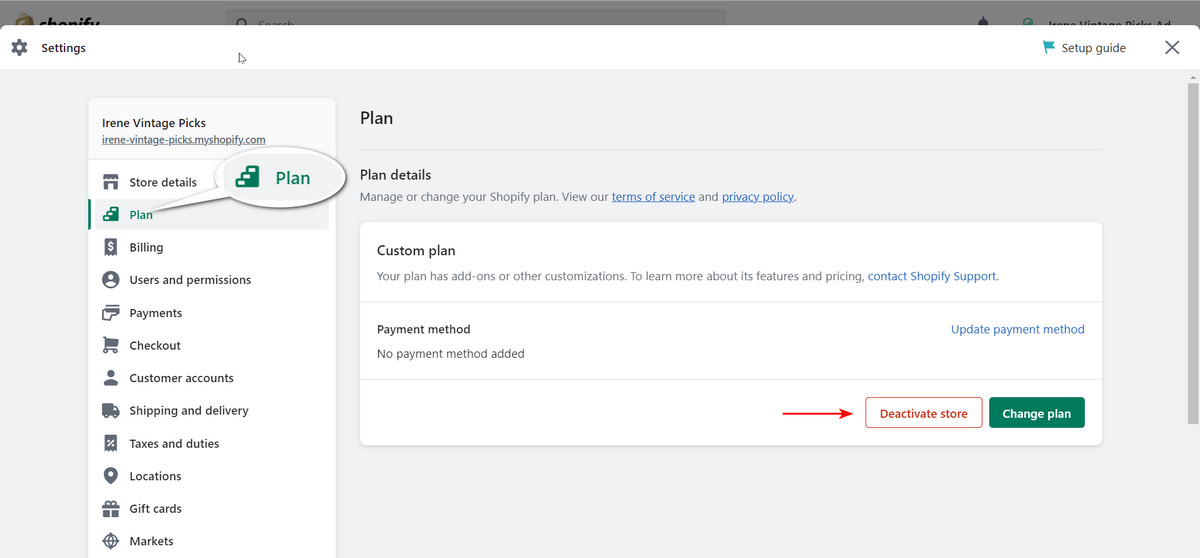
You’ll be asked to provide a reason for deactivating your account, and then you’ll need to re-enter your password.
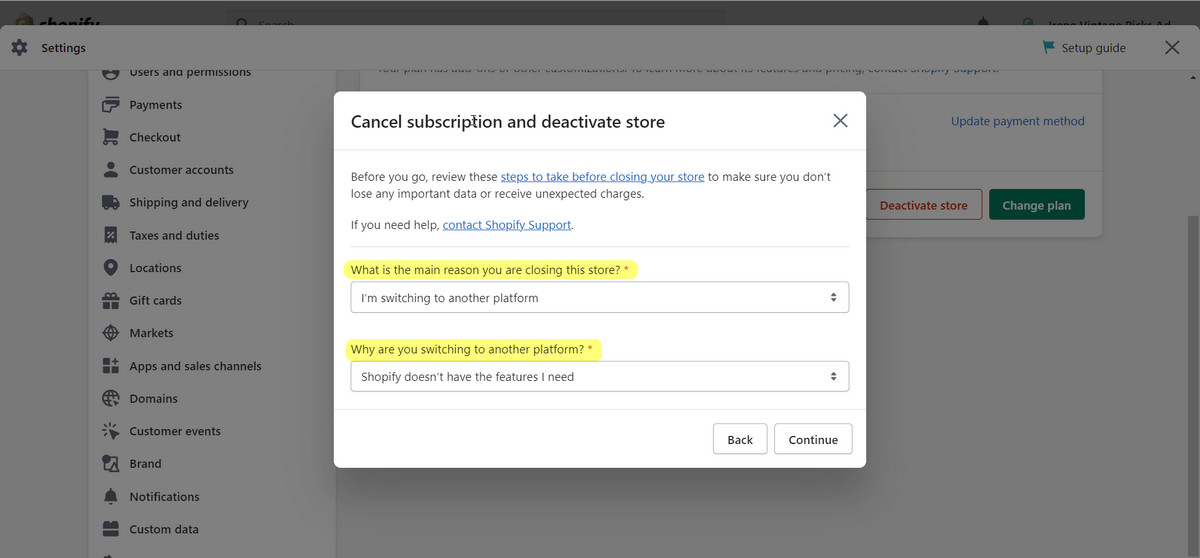
After you’ve entered your password, select Deactivate now. If successful, you should see a page confirming that your store is now deactivated.
You can also view information about your past payments and download payment records by selecting View your past bills from the drop-down menu.
Remember that when you cancel your Shopify account and close your store, you cannot reopen it in the future. Therefore, transferring your custom domain, uninstalling applications, and exporting your store data before canceling your account are important.
Do you still need help with how to do the above 4 steps? Here’s a tutorial video for better visualization:
Final words
Canceling your Shopify subscription is a straightforward process, and you can complete it in just a few steps. Remember to take care of any outstanding balances, export your data, uninstall third-party applications, transfer your custom domain if necessary, and finally, deactivate your store through the Shopify settings.
Following these steps will ensure a smooth cancellation process and help you avoid any unwanted charges in the future.
If you are still trying to decide whether to cancel your Shopify subscription, consider pausing it until you are absolutely sure. Remember that canceling your subscription means losing your store and the potential revenue it can generate.
We hope this guide on how to cancel Shopify subscription has been helpful to you. Be sure to start canceling today if you no longer need the service!
