Table of Contents
When you run your business on Shopify with a wide variety of products, you need to categorize them into smaller collections. As a result, customers can navigate through them and find their wanted items with the least effort. This is when Shopify sub-collections come in handy.
Sub collections will give customers better access to your best sellers and seasonal products and eventually lead to higher sales. In this blog, I will show you how to create Shopify sub-collections.
What are the Shopify sub-collections?
Sub collections, also known as sub-categories, are tools that assist your customer’s buying journey. Sub collections help organize your site’s structure by creating child collections nesting within parent collections, for instance.
They categorize your products into different sub-sections based on different characteristics such as size, appearance,…
Let’s say, this Shopify store, Suta, sells a wide variety of clothes. They have major categories like sarees, blouses, men’s wear, accessories,… which appear on top of the page. The smaller categories will appear when you navigate into each category. For instance, in the “BLOUSES” section, there are four more categories: “ALL BLOUSES”, “NEW COLLECTIONS”, “SHOP BY SLEEVES”, and “SHOP BY NECKLINE”.
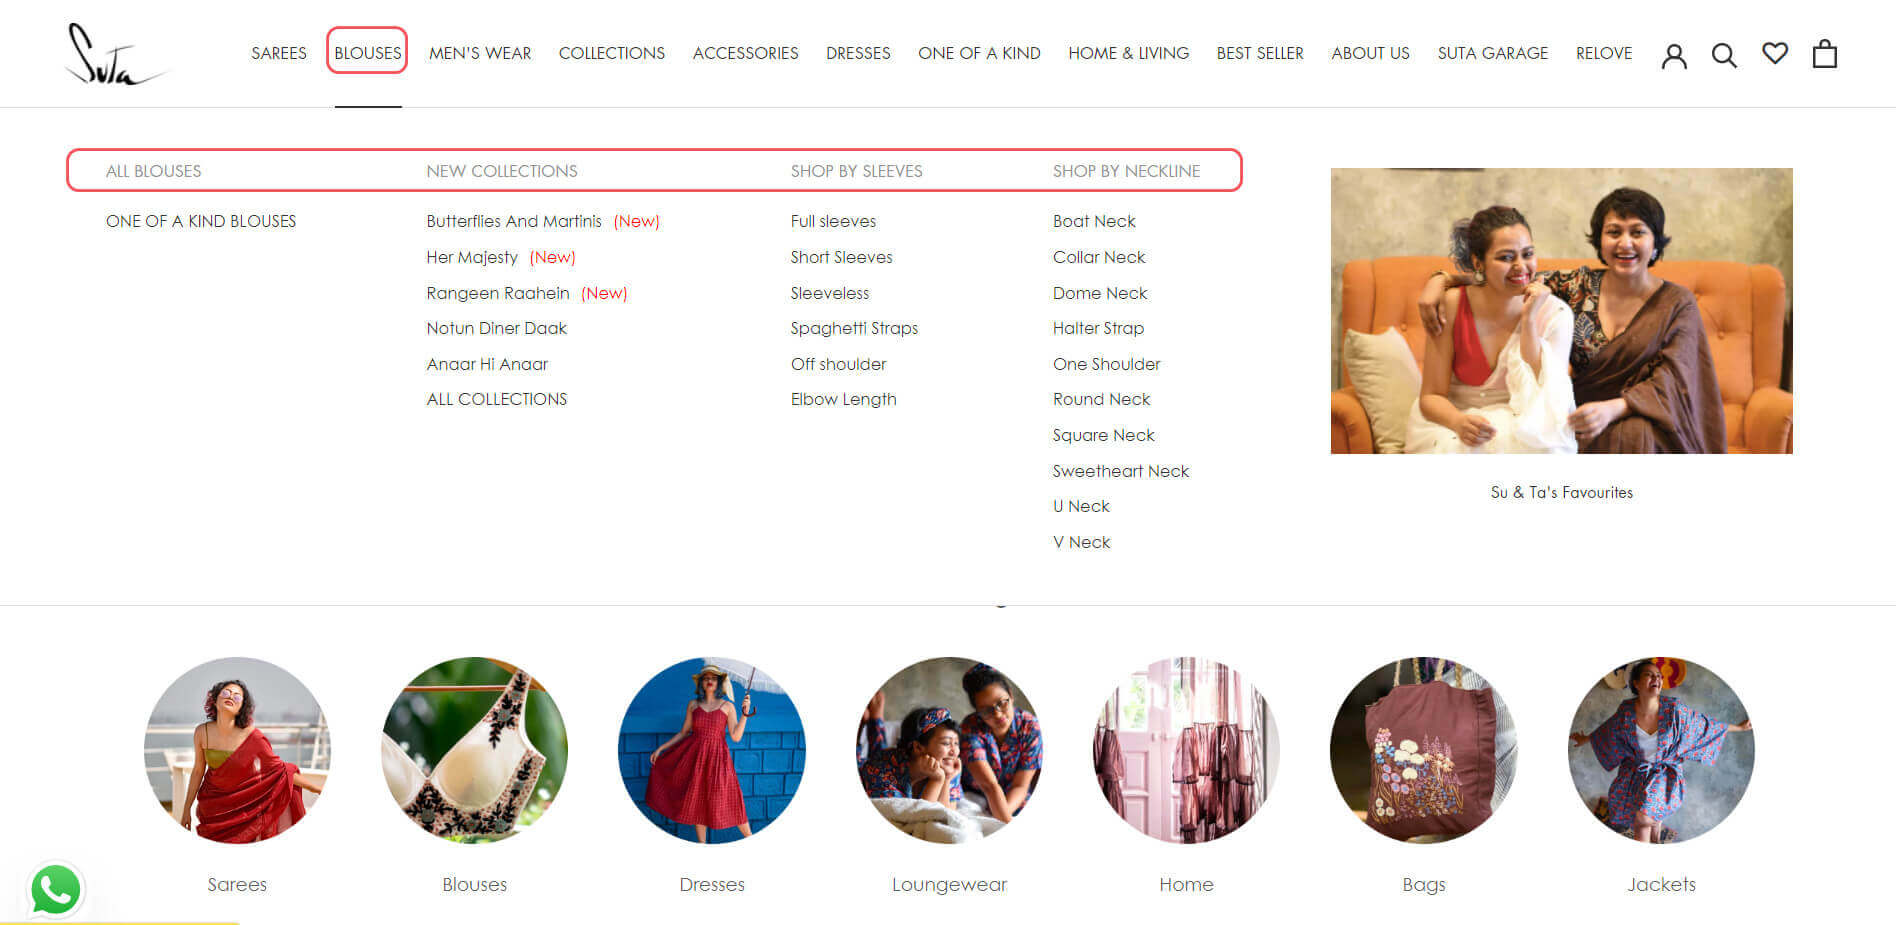
Suta’s Example of Sub-Collections
Distinguish Collections vs Categories vs Sub Collections vs Sub Categories
When you research sub-collections and link lists in Shopify, you will certainly come across “categories” and “sub-categories”.
They turn out to have the same meaning on Shopify. When other writers mention Shopify sub-categories, they are referring to the sub-collections feature.
Why does the store owner need to create sub-collections on Shopify?
-
Better UX/UI
User experience is an essential part of a customer’s shopping journey. Clear Shopify sub-collections make it easier for people to navigate around your store and understand what your shop offers. They can recognize your best sellers and items from different brands thanks to sub-collections.
-
Sale boosting
By using some creativity in creating your Shopify sub-collections, you can increase your cross-sell. For example, you can create sub-collections that include a complete package from separated items such as a dress combined with a bag, sandals, and earrings.
Or, you can also create seasonal packages for gift-giving purposes. Customers will have useful ideas while scrolling through your stores to find the perfect gift combos for their friends and family.
This is called a collection list page. Utilizing sub-collections features well will help customers discover items that they might not realize they need.
-
SEO enhancing
If you organize your Shopify sub-collections carefully, you can even boost your store’s SEO. Sub collections in Shopify use an URL structure to create a hierarchy tree of your store which is called a physical silo. An SEO physical silo gives the search engine a detailed map to crawl and understand your business better.
How to create a Shopify sub-collection?
This is the whole process of how to create Shopify sub-collections. The step-by-step guidance is listed as follows.
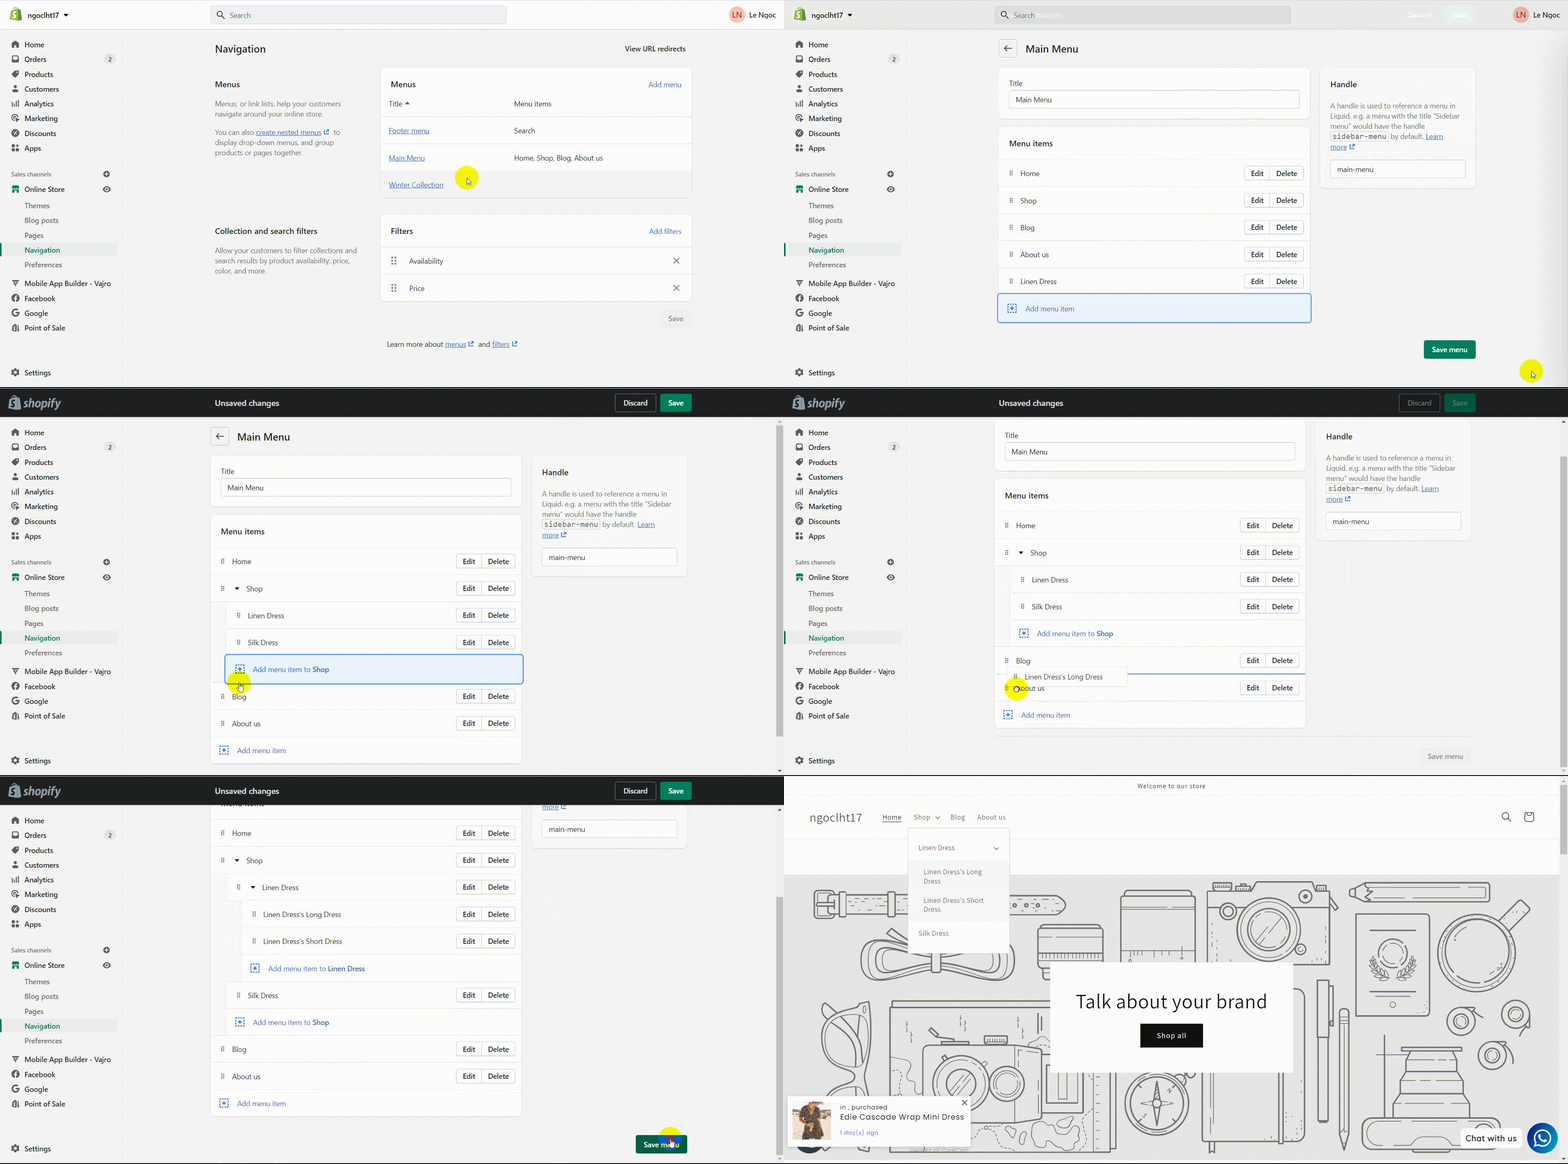
How to create Shopify sub collections
Note: In order to create sub-collections, you need to have your collections in place.
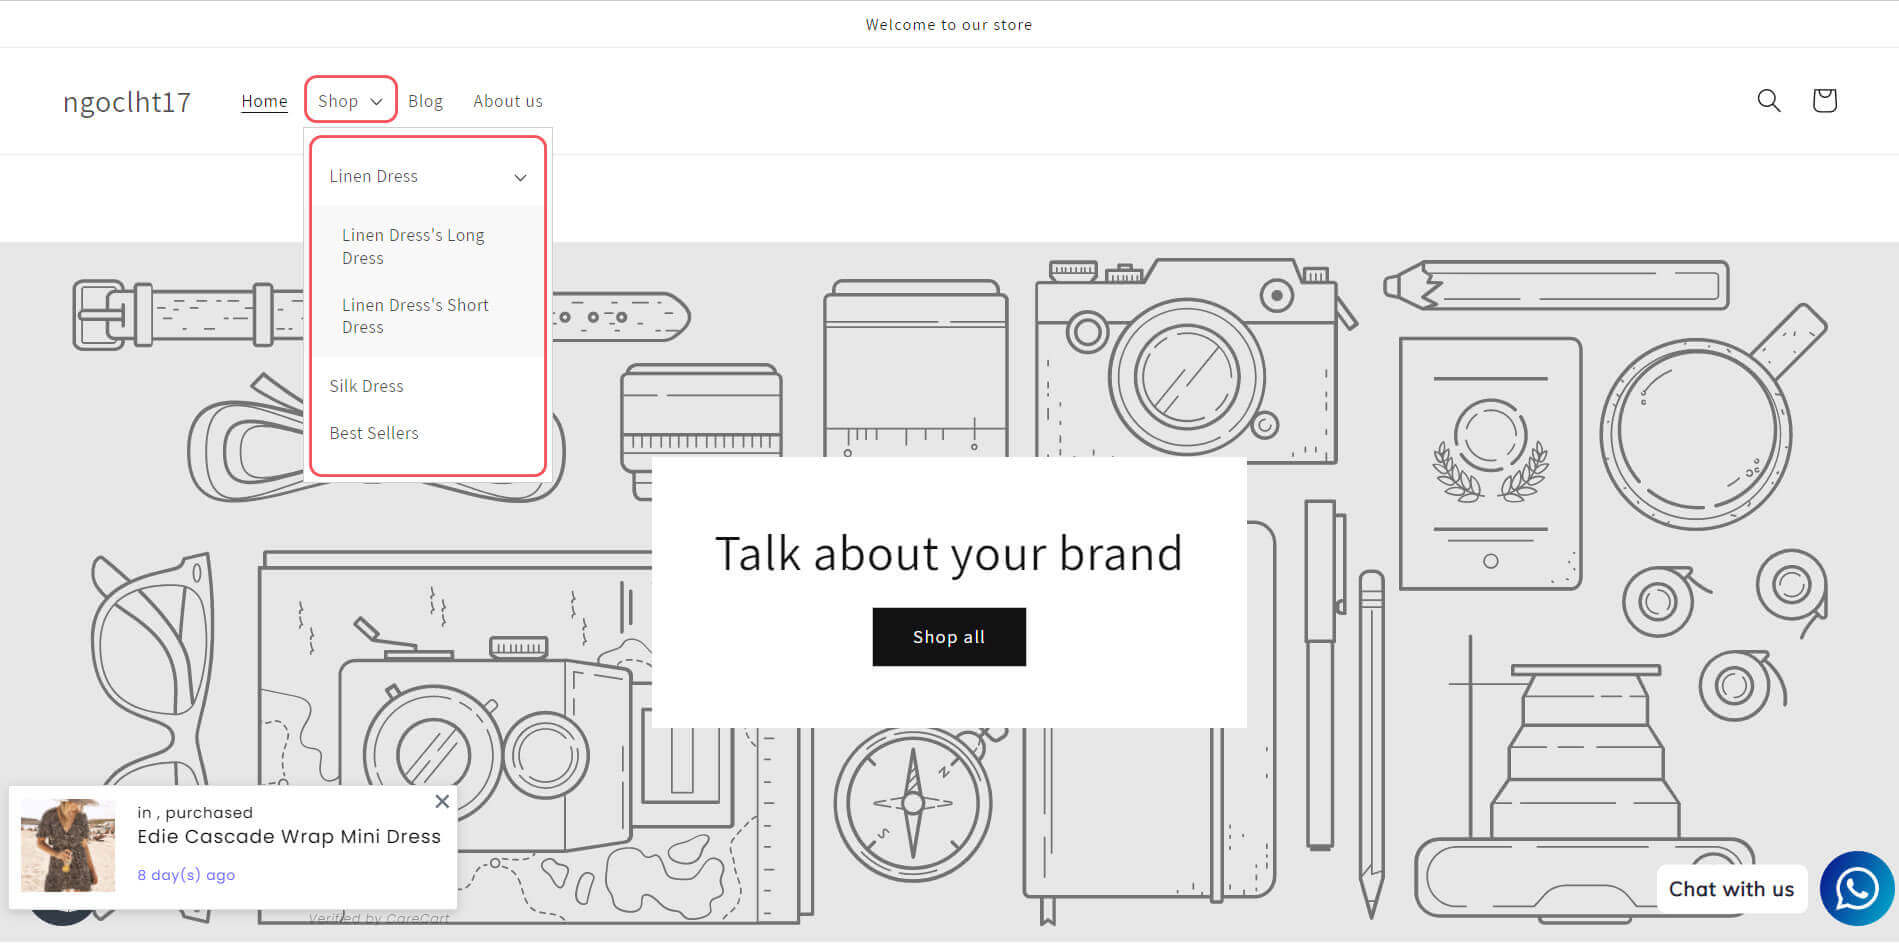
Making a draft for your collection hierarchy is an essential beginning step. For example, I would like to make sub-collections within the “Shop” box for “Silk Dress”, “Linen Dress”, and “Best Sellers”.
Navigate to “Online Store” → “Navigation”
Step 1: Navigate to “Online Store” → “Navigation”.
Because my sub-collections: “Linen Dress”, and “Silk Dress” nest inside the “Shop” box of the top panel. So I would click on “Main Menu” which contains the “Shop” button. You might choose Menu with different titles based on your page’s structure.
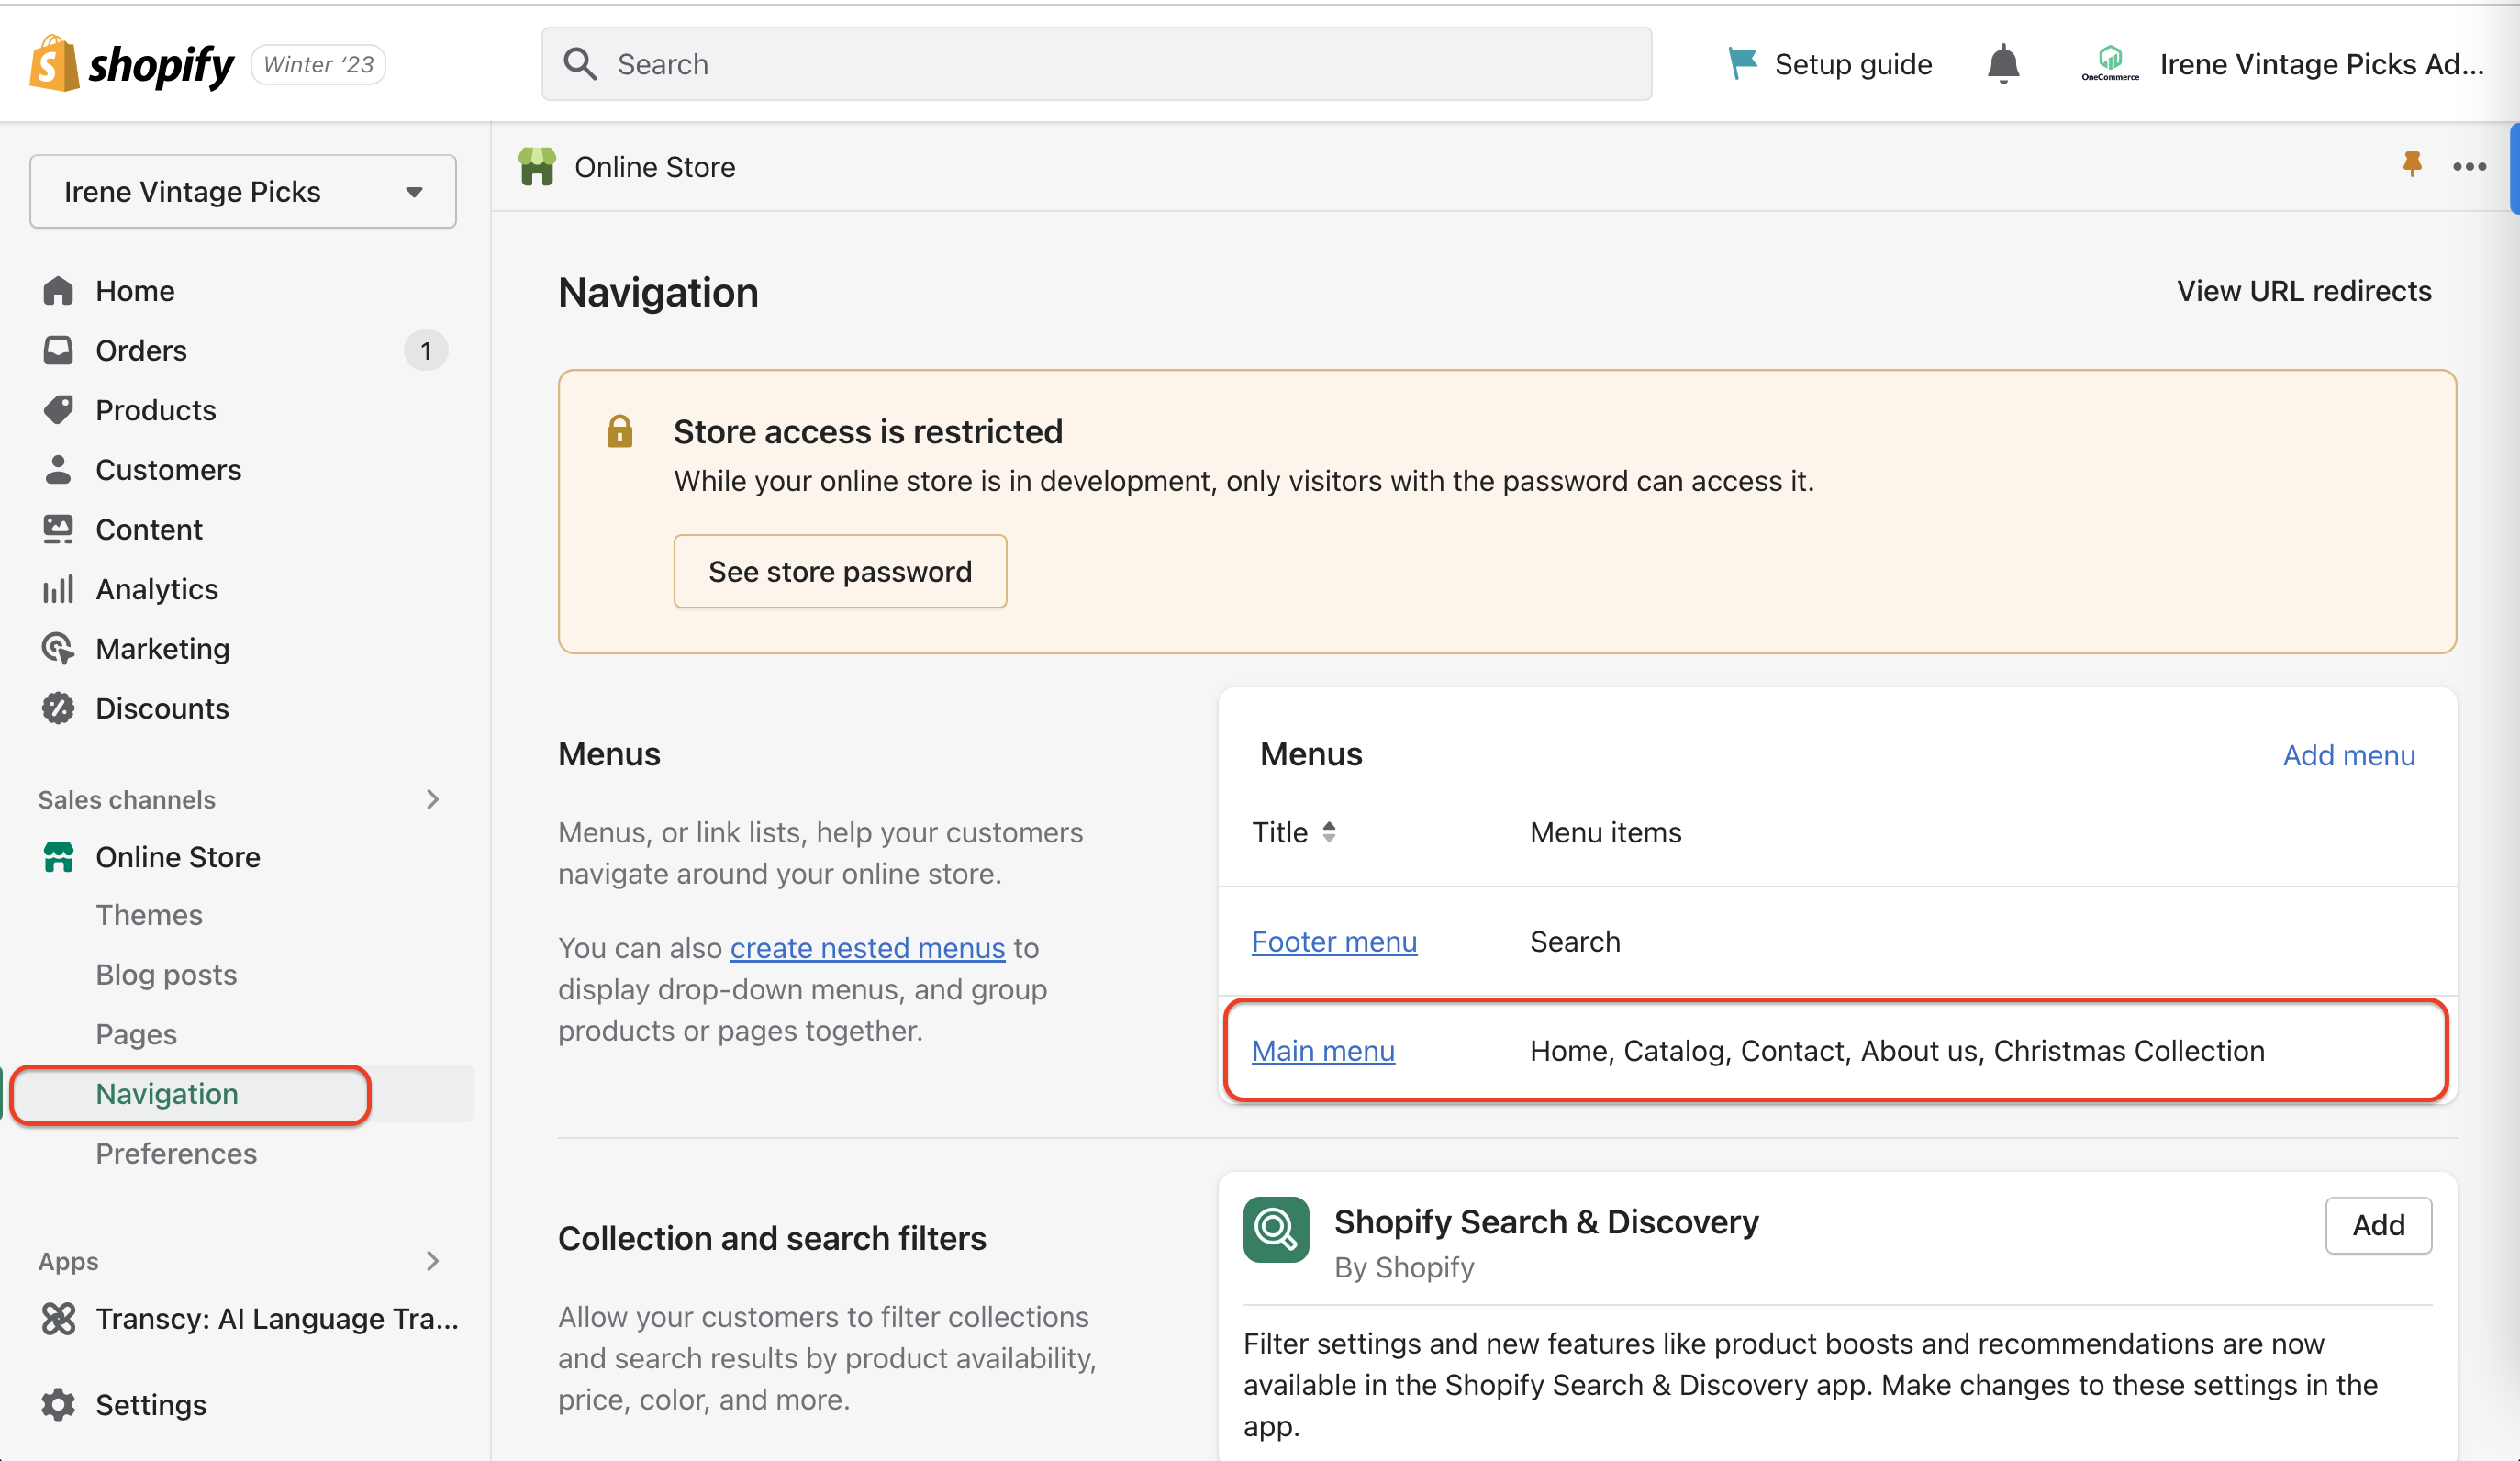
Choose Menu with different titles based on your page’s structure
Step 2: Tap “Add menu items”.
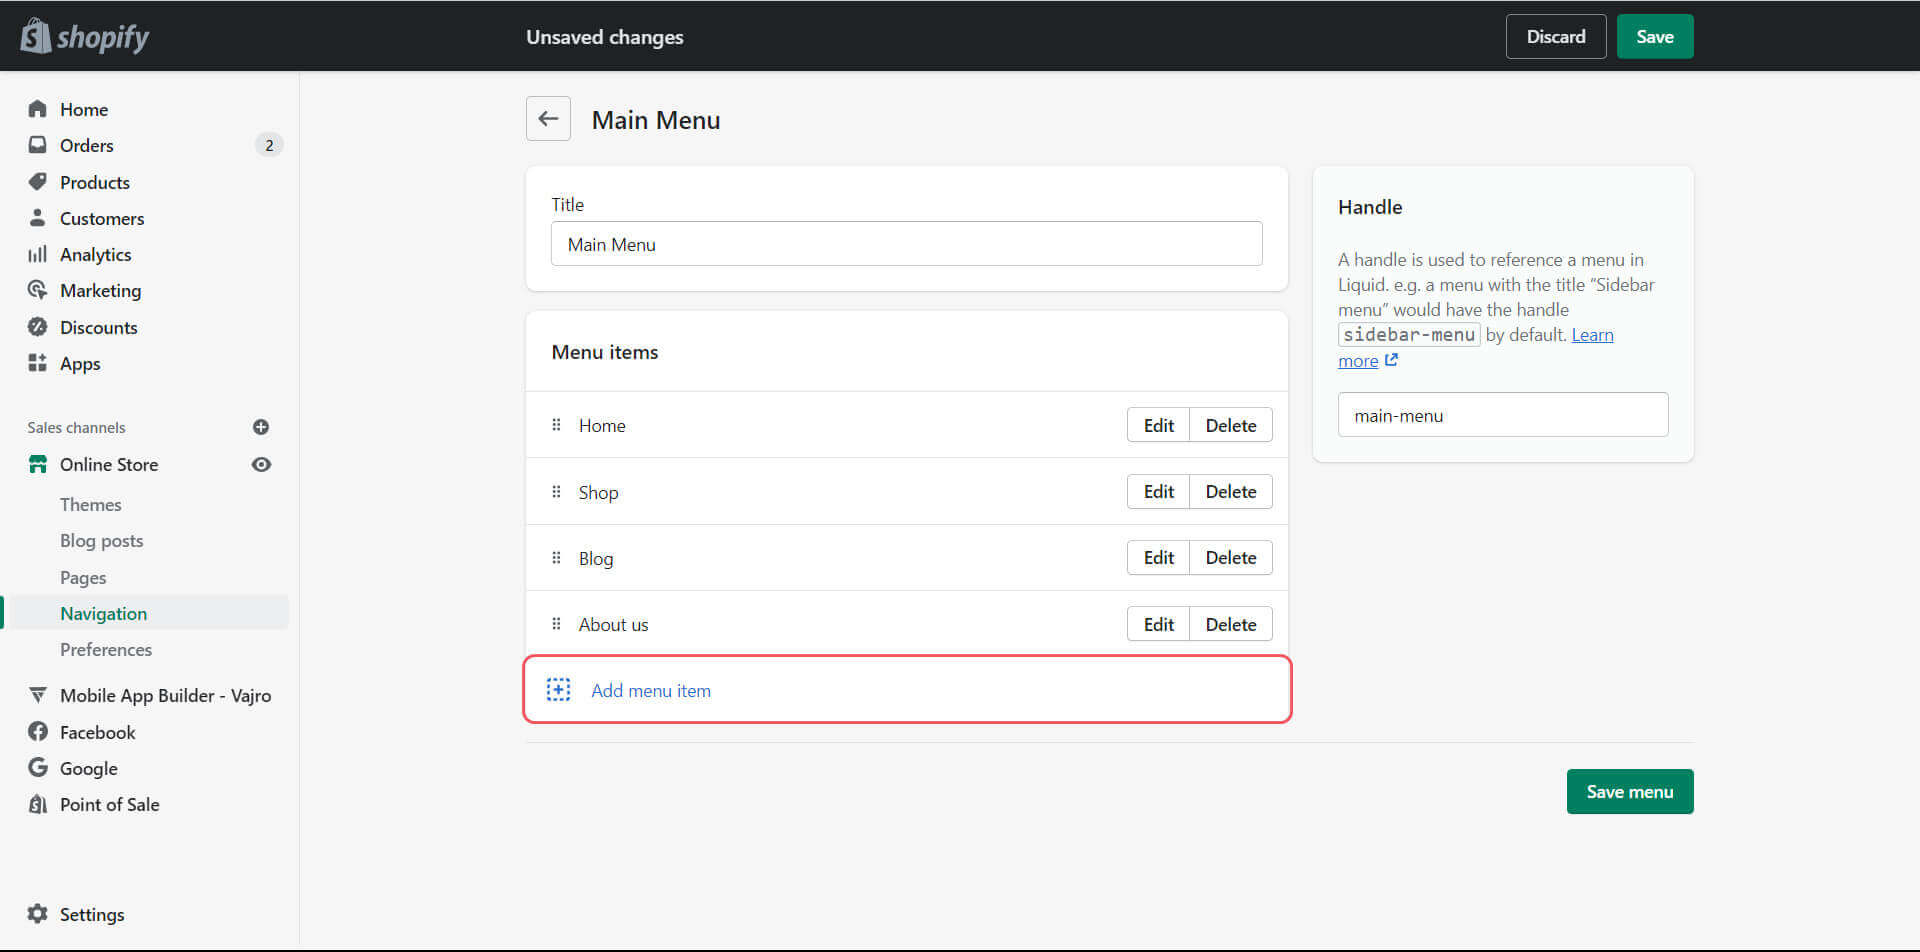
Tap “Add menu items”
Step 3: In the “Link” box, choose “Collections” to choose from your available collections.
I want to create “Silk Dress”, “Linen Dress” and “Best Sellers” sub-collections so I choose them from my available sub-collections.
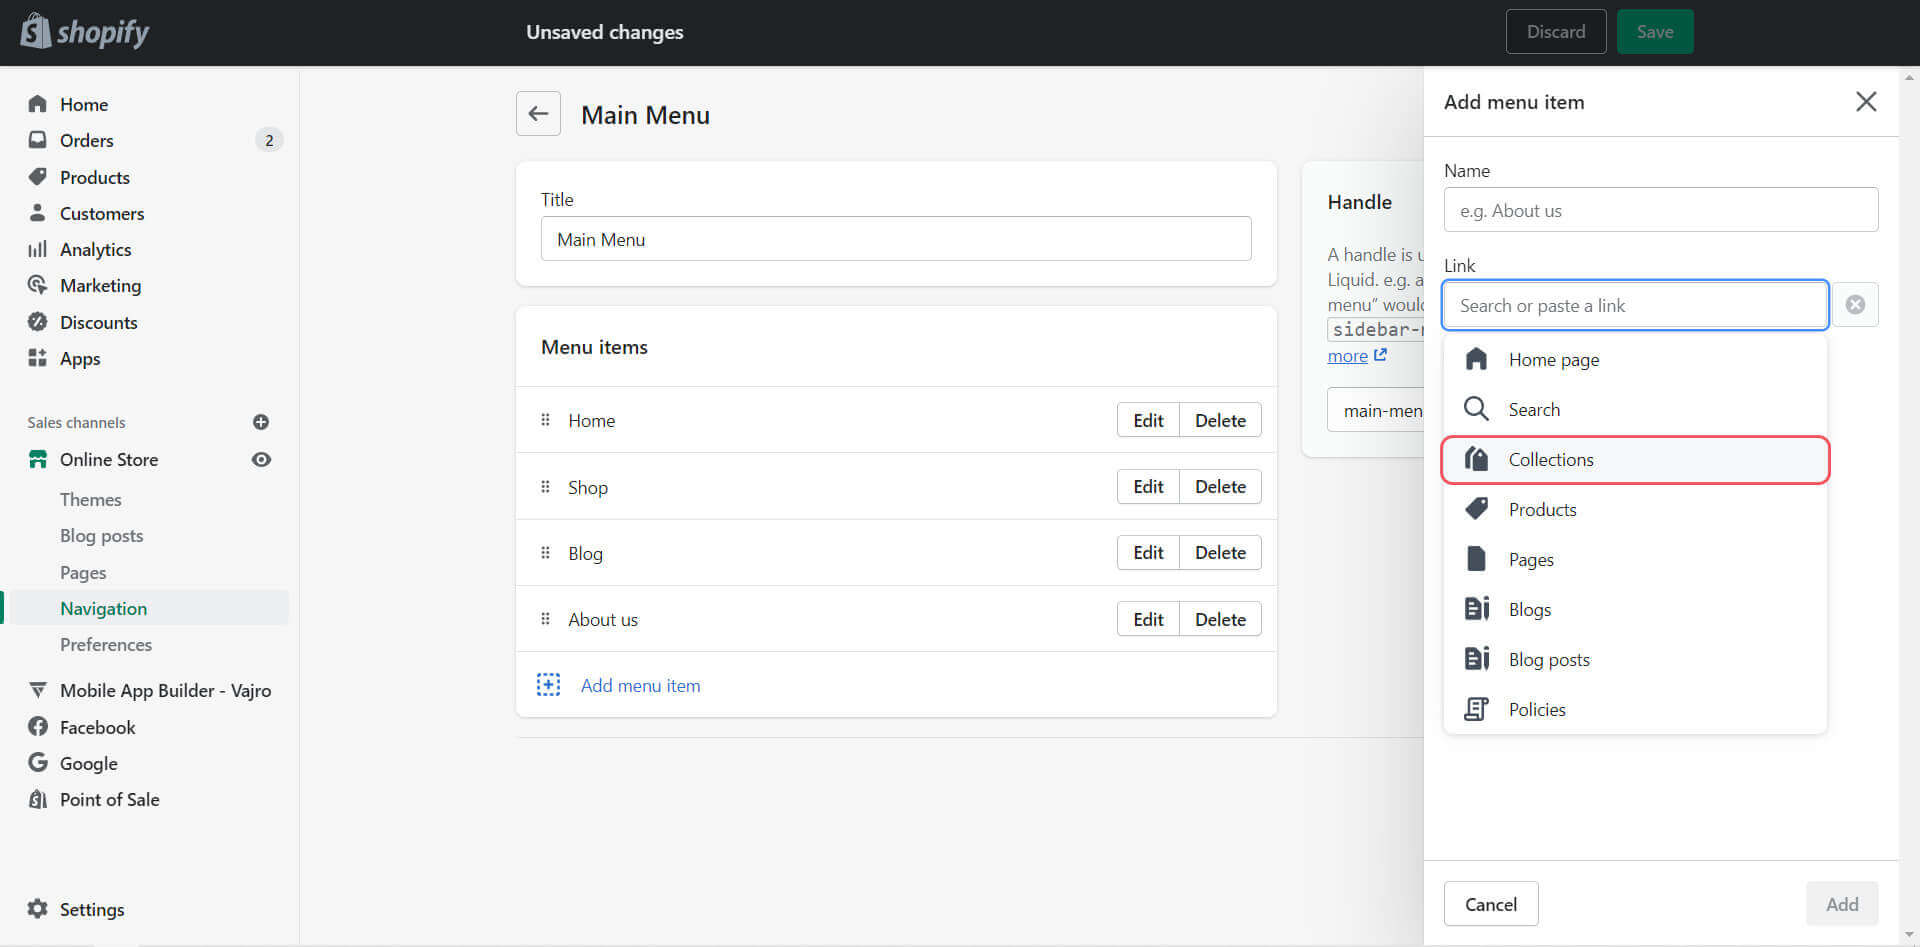
In the “Link” box, choose “Collections” to choose from your available collections
Step 4: Drag your newly-created sub collection into the parent collection.
I will drag “Linen Dress” into the “Shop” collection.
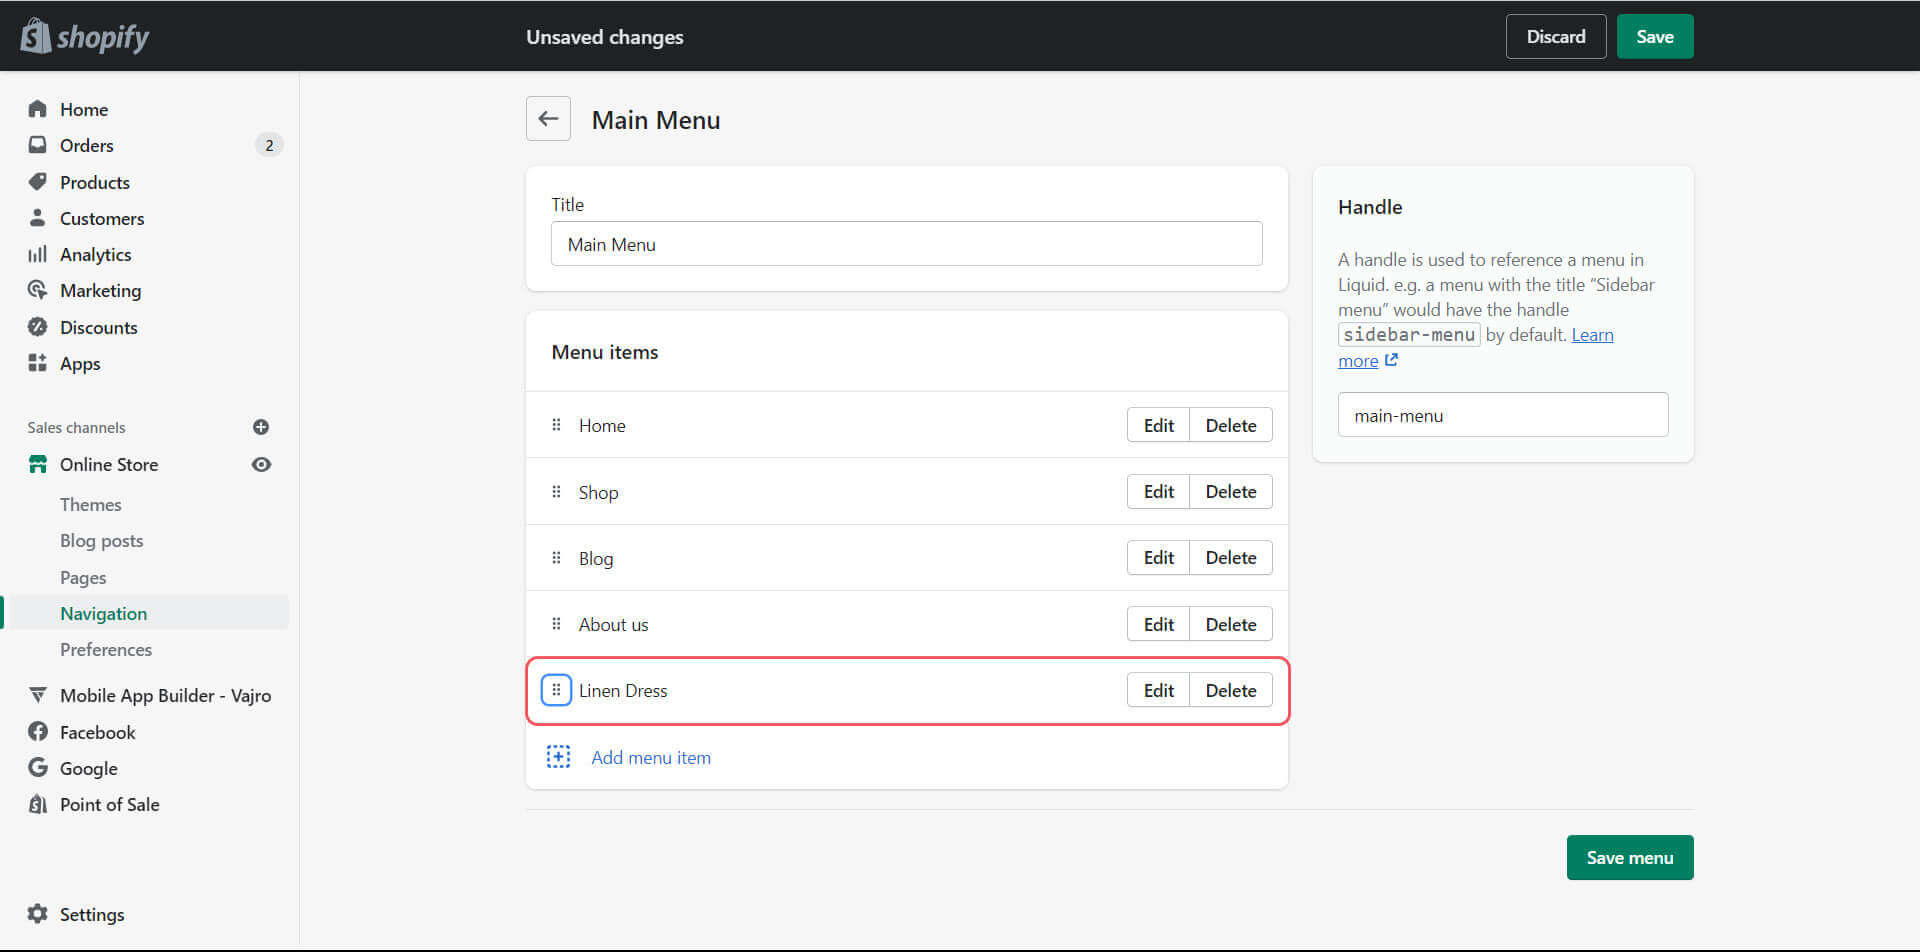
Drag your newly-created sub collection into the parent collection
Step 5: Click “Save menu” to finish the process.
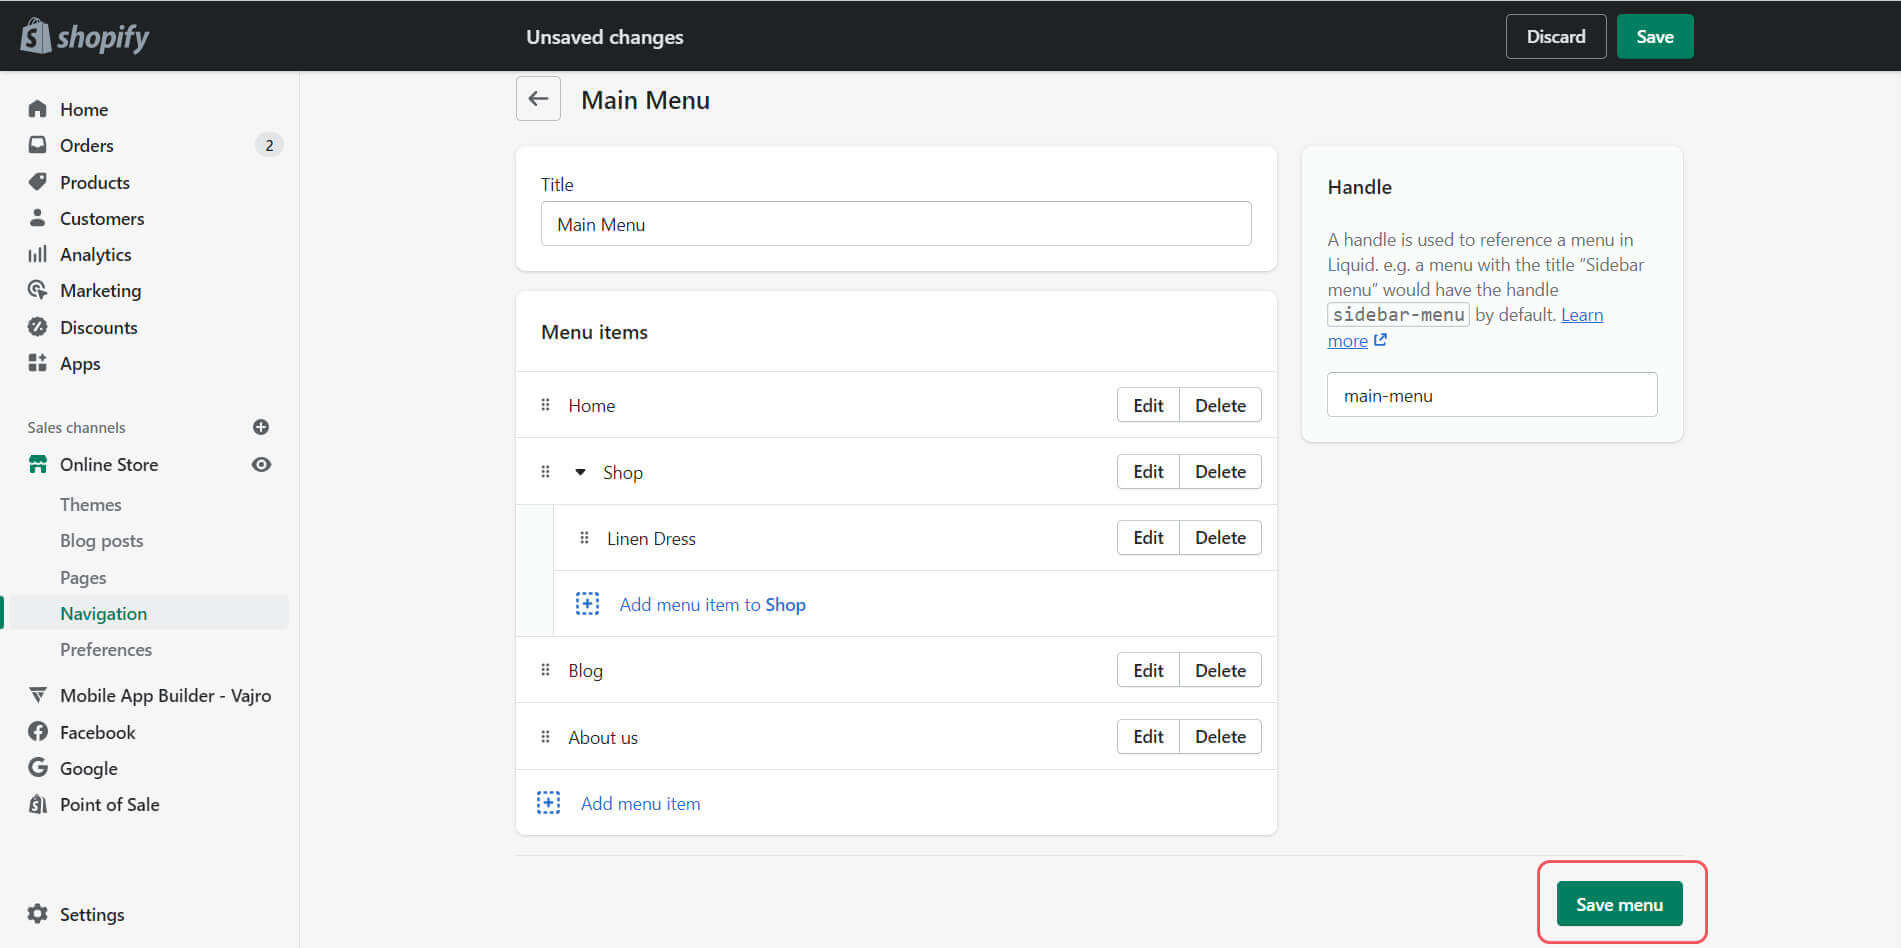
Click “Save menu” to finish the process
My final hierarchy is as follows
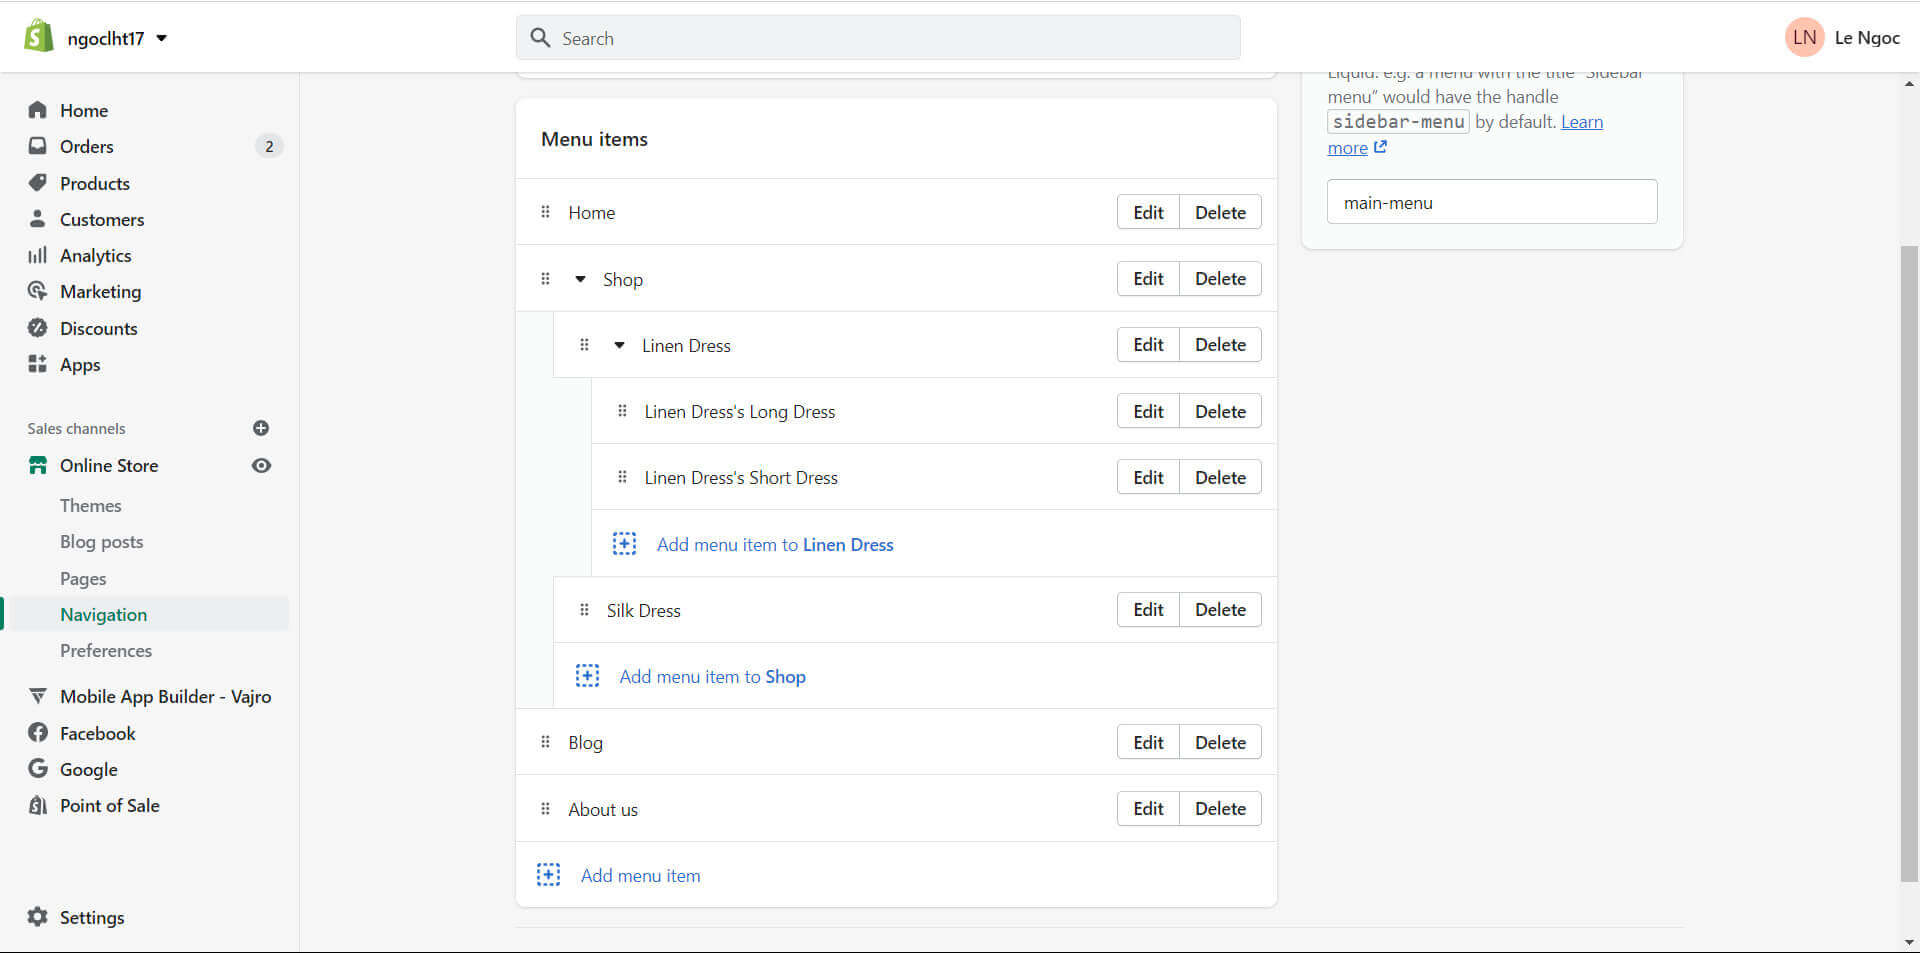
My final hierarchy is as follows
Final thoughts
Creating sub-collections in the Shopify store is an essential step that every business owner should take into account as they assist customers a lot in their shopping journey.
With a few clicks, you can create your own sub-collections without having any technical knowledge as your Shopify Admin panel supply with all the necessities. If you have any questions regarding how to create Shopify sub-collections, please leave your comment below.


