Table of Contents
Instagram is a visual platform, which means that high-quality photos are essential for a successful Instagram strategy. In other words, if you want quality engagement, you will need to post high-quality images.
Influencers have all the best photos on Instagram, and it’s easy to feel left out when your feed doesn’t look as glamorous. What a pity if you do not know how to edit Instagram pictures!
But what most people don’t realize is that you don’t need a professional photographer or a million-dollar camera to get influencer-level photos. With a little bit of know-how, anyone can edit Instagram pictures like an influencer in just a few steps!
No more waiting, let’s learn how to get perfect photos on Instagram in no time!
How to edit Instagram pictures: A step-by-step guide
We all know that a picture can either make or break your post on Instagram. But not everyone knows that you don’t need an expensive camera or spend hours editing to make your photos look good on the app.
With Instagram’s editing tools and filters, even newbies can make their photos look amazing with just a little bit of practice.
So if you’re just getting started in the world of photo manipulation, Instagram is the perfect place to start.
Step 1: Start by choosing a great picture
The first step in how to edit Instagram pictures like an influencer is to start with a great photo. This means finding a photo that is well-lit and has a good composition.
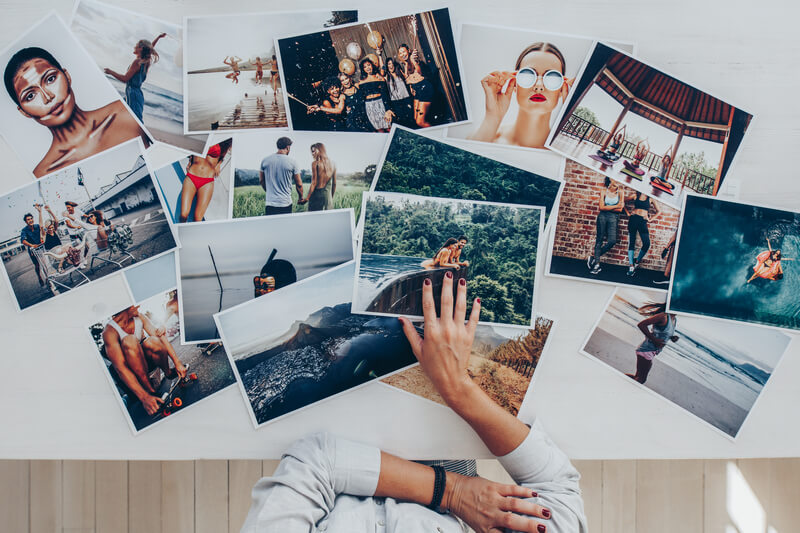
The first step on how to edit Instagram pictures like an influencer is to start with a great photo.
A picture is worth a thousand words, so make sure you’re starting with a quality photo.
Natural light is always the best option, but you can also try the HDR mode on your smartphone camera when shooting in dim light, close-up, or outdoor portraits.
| Another pro tip?
Take a bunch of shots to make sure you’ve got options when it comes time to post. And don’t forget to choose the right size for your photos. |
If your picture is too small, it may appear blurry or grainy, no matter how much you edit it. And you can’t edit your content after posting. For the best results, aim for a photo or video that is at least 1080 pixels wide.
By default, Instagram will crop your content as a square, but you can adjust it to its full width or height if you prefer.
Moreover, If you’re strapped for time or inspiration, try customizing stock photography. There are plenty of free, quality stock photos to choose from.
Step 2: Upload your picture to Instagram
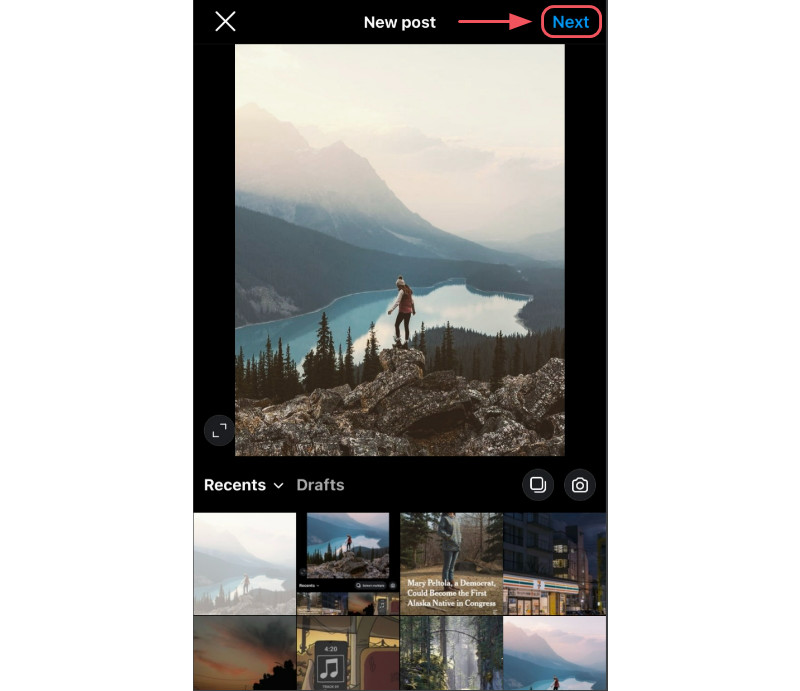
Now that you have a high-quality picture, it’s time to upload it to your Instagram. To do this, open the app and tap on the plus sign at the top right corner of your screen.

Tap on the plus sign at the top right corner of your screen.
This will open up a menu of posting options. From there, select the photo you’d like to edit from your photo album and tap on “Next.”
Step 3: Pick the right filter
It’s time to have some fun! The built-in Instagram photo editor is a powerful tool that lets you make a lot of tweaks to step up your photo-editing game. You’ll find a variety of filters that adjust the lighting, colors, contrast, and sharpness of the image in different ways.
When it comes to choosing excellent filters for your pictures, it all comes down to what you want the final product to look and feel like. It’s important to consider the atmosphere you’re trying to create because different filters will produce different results.

Different filters will produce different results.
For example, Clarendon is the most significant filter giving your photos a cooler look that pumps up the contrast in a natural way (according to The 10 Best Instagram Filters for 2022), while Gingham adds a touch of a vintage look.
Moon is perfect for creating a dreamy, ethereal feel by turning your pics into black and white, while Lark gives your photos a boost of extra personality.
There are endless possibilities, so experiment until you find the perfect filter for your needs!
| Another pro tip?
You can change the level of any filter by double tapping it and then adjusting the scale from 0 (no effect) to 100 (the full effect). |

Another pro tip on how to edit Instagram pictures.
But nowadays, most famous Instagram influencers prefer to bypass the filter step altogether and customize their visual balance instead.
Step 4: Adjust the lux
If you want to take your Instagram photos to the next level, then you need to get to know the lux function. It’s super easy to use, but maybe you’ve never found it. Well, let us introduce you to the world of better photos.
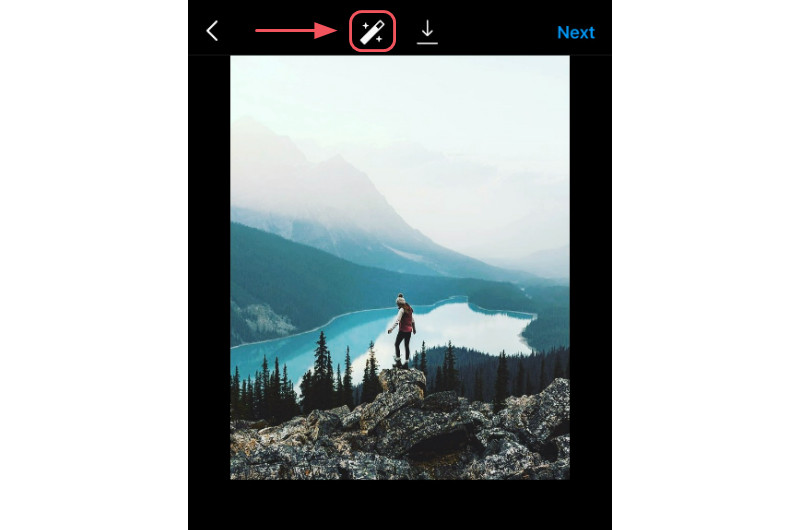
The lux filter is a great way to edit Instagram pictures.
The lux filter is a great way to edit Instagram pictures. It automatically adjusts the saturation and contrast, making your photos more vibrant and highlighting the details that make a great photo.
To use the lux filter, you can simply tap the magic wand symbol on the filter selection screen and then adjust the slider to add more or less lux to your image. We usually slide it up and down until I settle on what looks best. Then, tap on “Done” when you’re finished, and it’ll take you back to the filters page.
Step 5: Customize your pictures with the Instagram simple editing tool
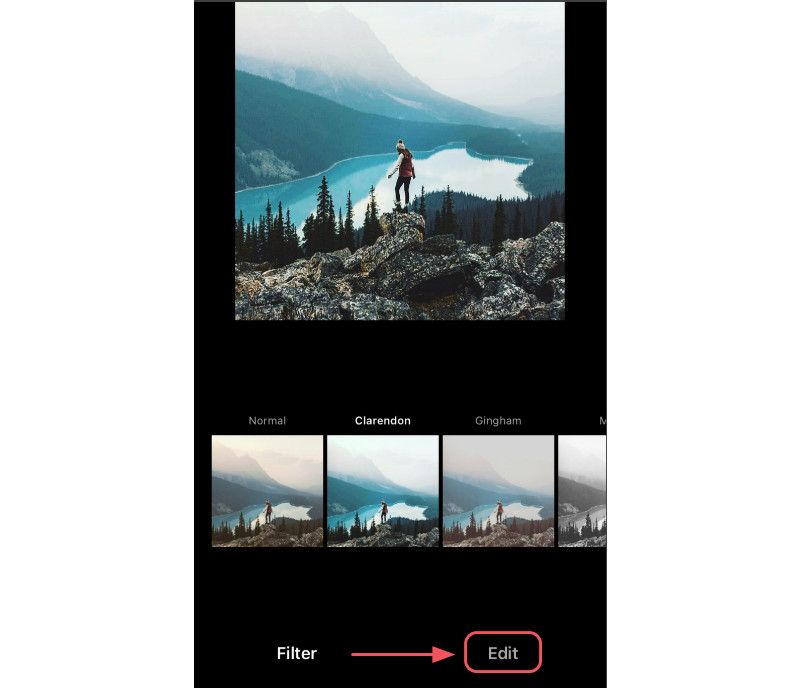
Tab on “Edit“
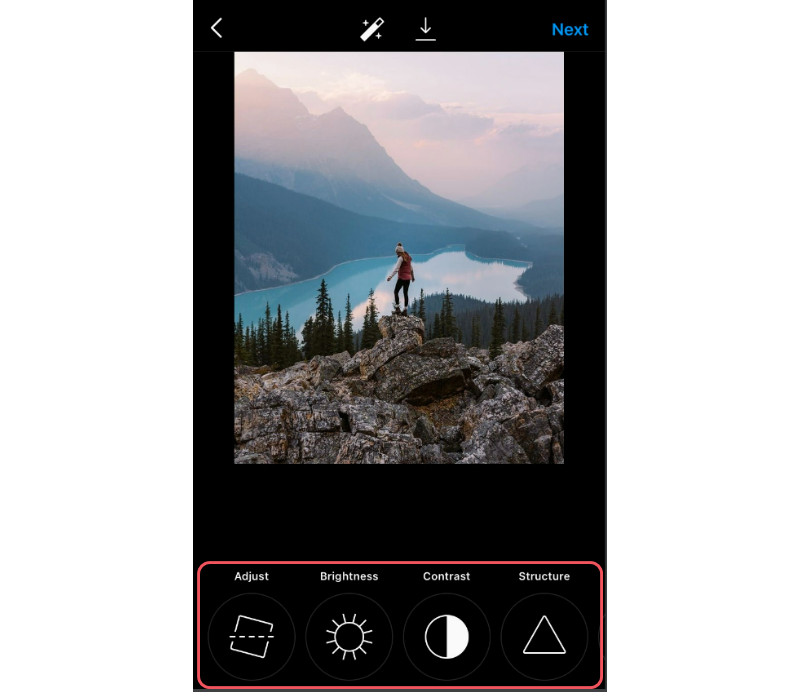
At the right bottom of your screen, you’ll see an “Edit” tab. Tapping that to open up a menu of editing options, including
- Adjust: this allows you to straighten out your image or play with the horizontal and vertical perspective a bit.
- Brightness: this slider allows you to edit Instagram pictures to lighten or darken as you see fit.
- Contrast: A slider will let you make the distinction between dark and bright parts of your image, making it more or less intense.
- Structure: This will help bring out more of the details in your pictures.
- Warmth: Adjust the tones of your photo by sliding to the right for orange tones or to the left for blue tones.
- Saturation: This refers to the intensity of colors in your photo, and can really make a difference in how your final picture looks
- Color: change the existing colors by highlighting or shadowing them.
- Fade: As you might guess, fade makes your pictures look faded. It’s excellent for manually adding a vintage look and feel to your photos.
- Highlights: This will control how light or dark your photo appears. Make whites whiter and brights brighter by adjusting this setting up or moving it down to tone down.
- Shadows: can help create a dramatic feeling, or make previously hidden details more visible. To do this, you can use the shadow tool to darken the shadows in your image or reduce the depth of the dark areas.
- Vignette: allows you to darken the edges of the photo, making the image at the center look brighter by contrast.
- Sharpen: makes the details a little crisper.
Step 6: Adjust individual pictures in a multi-image post
If you’re sharing multiple photos in a single post, you can edit Instagram pictures separately. To do this, tap on the Venn diagram symbol in the bottom-left corner or double-tapping on every photo.
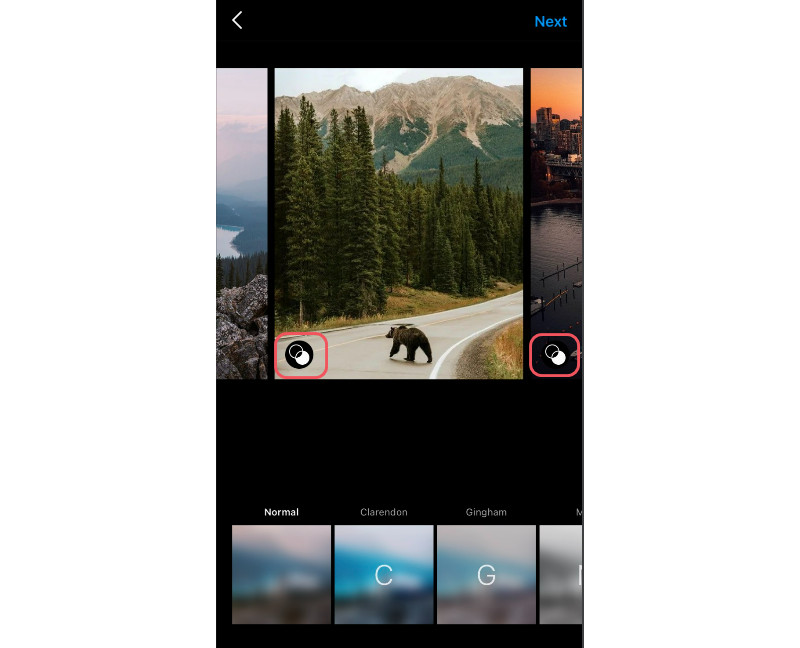
If you’re sharing multiple photos in a single post, you can edit Instagram pictures separately.
This will bring up individual editing options for each photo. If you don’t do this, Instagram will apply your adjustments to every photo similarly.
Step 7: Post your photo (or save it for later)
Now that you’ve edited your photo, it’s time to share it with the world (or save it as a draft if you’re feeling shy). To share your masterpiece, simply post your photo and write a caption.
If you want to tag any people or locations, go ahead and do that too. Then, just tap on “Share”, and your photo will be on its way.
Tips for editing pictures on Instagram that go beyond the basics
If you want your Instagram photos to stand out, you’ll need to spend some time editing them before you even open the app.
Here are a few ways to make those pics pop:
- Straighten up and focus: Use the straighten and crop tool to level your camera or get rid of any stray pieces of litter that may have crept into the shot.
- Tidy up the details: You will want to do this before you start a color correction. Whether that means removing crumbs from a food shot or erasing a zit from a model’s face, getting rid of distractions will make your photos look more polished.
- Mix and match different editing tools: this is one of the best ways to edit Instagram pictures. There’s no rule saying you need to use just one editing tool.
If you love the smoothing effects of one program and the cool filters in another, you can use both to get your photo perfect before uploading it to Instagram. This way, you can mix and match until you get exactly the look you want.
Congratulations! Now you know how to edit Instagram pictures like a Pro!
Conclusion
If a picture is worth a thousand words, then Instagram is the ultimate visual platform. While you can also post text and hashtags, the best way to make your posts stand out is to use quality images. The use of filters is a great way to further enhance your images.
How to edit Instagram pictures like an influencer is something that can be achieved with a few simple steps.
There are loads of different Instagram photo editing tools available to help you make your posts stand out. The key is to find a few that work well for you and use them regularly to enhance your photos.
With a little practice, you can develop an impressive Instagram feed full of stunning photos.
