Table of Contents
In today’s fast-paced digital age, businesses need to adapt quickly to stay ahead of the competition. During the process, you would often encounter Shopify—a comprehensive e-commerce platform that allows entrepreneurs to create and manage their online stores with ease.
You are interested in using Shopify for your online business, however, how to use Shopify to its full potential can be challenging, especially for those new to the platform.
That’s why we’re here to guide you through the process of unlocking the full potential of Shopify! Whether you’re a seasoned entrepreneur or just starting your online journey, this guide will provide you with the tools and knowledge you need to succeed in the world of e-commerce.
So, let’s dive in and discover the power of Shopify together!
Shopify Learn: Basic Key Facts
Shopify is an eCommerce platform that was founded in 2006 and has since become one of the leading eCommerce platforms in the world. It has empowered over 1 million businesses in more than 175 countries, and it has processed over $200 billion in sales since its inception.
Shopify is a popular choice for businesses of all sizes, from small startups to large enterprises.
Do you first want to know more about Shopify? Let’s learn what is Shopify and how it works!
Here are some important facts before learning how to use Shopify:

Shopify is a cloud-based platform
It means users can access it from anywhere with an internet connection. This makes it easy for businesses to set up an online store and sell their products to customers all around the world.
Shopify has the versatility of built-in features
From website builder, shopping cart, and payment processing to inventory management, and marketing tools,… Shopify provides all! Moreover, these features are highly customizable, and Shopify also supports a wide range of third-party apps and plugins to extend its functionality even further.
There is a variety of pricing plans for Shopify
From basic to advanced, Shopify targets to meet the needs of all different businesses. Because of this, it’s simple for anyone to pick a package that works for their needs and budget.
Shopify team has 24/7 support
Shopify provides excellent customer support through its 24/7 live chat, phone, and email support channels. This implies that companies may get assistance with anything when they are getting used to how to use Shopify.
And many more!
The platform offers a high level of security, is PCI compliant, and is user-friendly, in addition to a plethora of other advantages that have won the favor of over one million businesses.
| ?You might also want to know about: |
How To Use Shopify: 7 Step-By-Step Shopify Tutorial For Beginners
1. Sign up for Shopify’s Free Trial
The first step to using Shopify for beginners is to sign up for its free trial. This is a great way to get started and experience the platform before you commit. We have explained in our article about the Shopify free trial to provide you with a better understanding of Shopify’s pricing plans.
| ?Worry about payment? Don’t be! Shopify provides an exclusive free trial for up to 3 months with just $1 per month, allowing you to explore the platform without any financial obligation. |
To sign up, simply head over this link and enter your email address. Shopify will then ask you a few questions to optimize your experience, so make sure to answer them to the best of your ability.

Shopify free trial
They will then ask about setting a secure password, and the name of your store. It’s okay if you don’t have a store name in mind yet – you can always change it later.
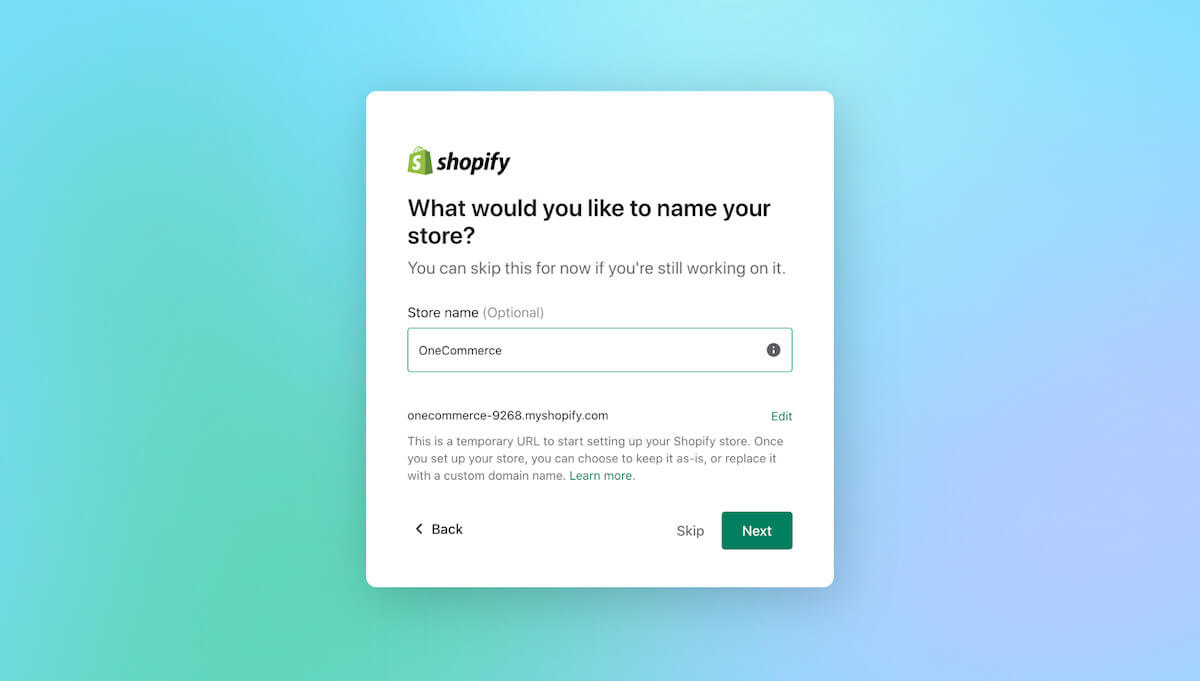
Shopify register process
After completing these steps, you will have a brand new online store and mission control center for your business. However, don’t forget to verify your email address to keep your account secure.
Now that you have set up your Shopify account, let’s move on to the next step and start building your online store!
Now that you’ve set up your Shopify account, it’s time to get acquainted with the dashboard to know how to use Shopify. The dashboard is the control center for your online store, and it’s where you’ll manage everything related to your business.
When you first log in to your Shopify account, you’ll be greeted with a 4-point checklist designed to help you get started. This checklist includes essential tasks such as adding products, customizing your theme, and setting up payment methods.
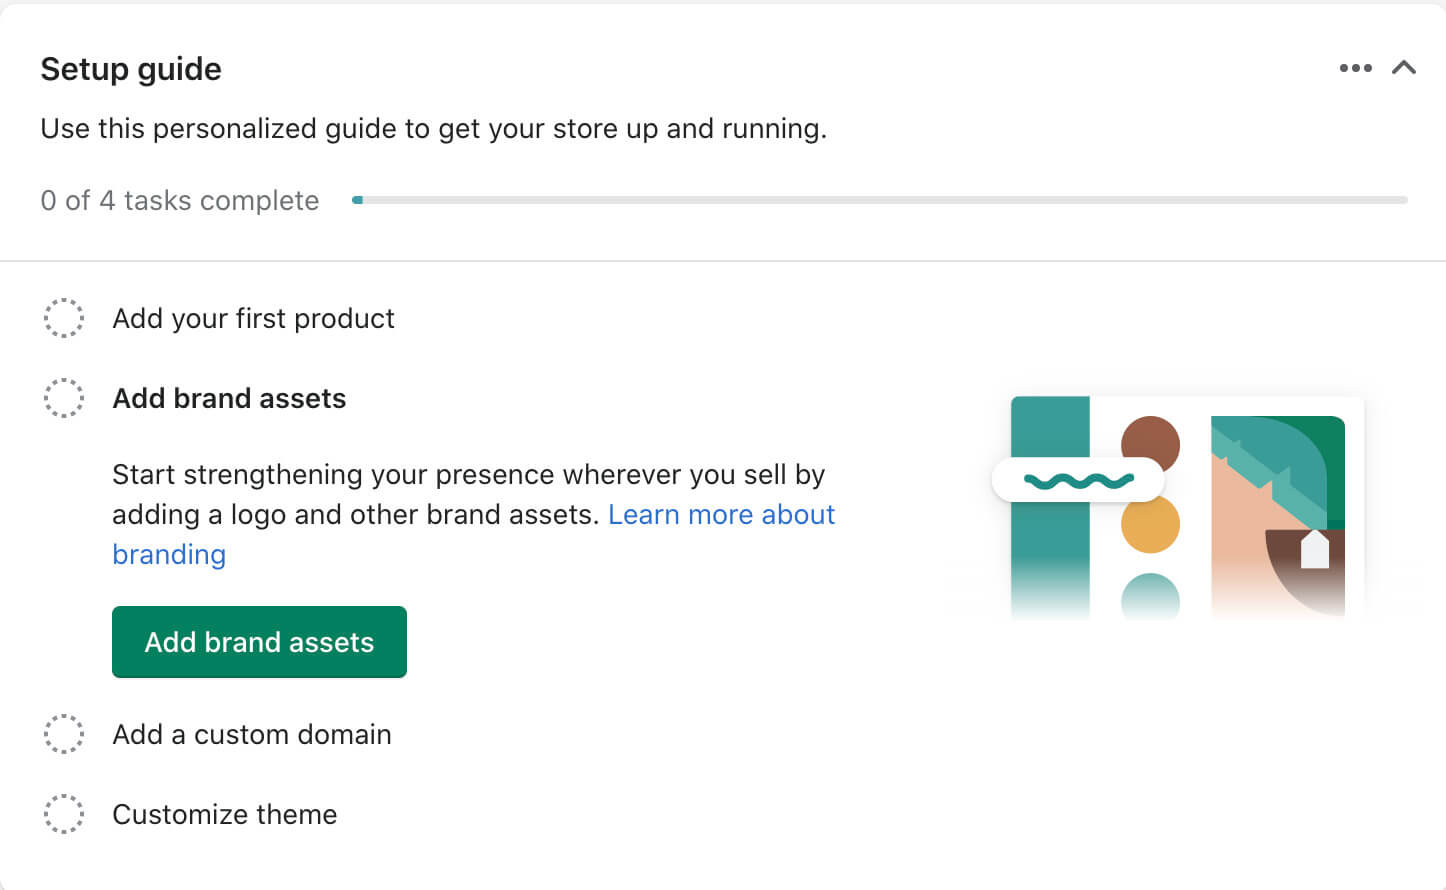
Shopify 4-step setup
Then, take a moment to explore the left sidebar of the dashboard. This sidebar has everything you need to manage your business. When you click on one of these options, Shopify will reveal a drop-down menu with more options. This makes navigating and finding the specific feature you’re looking for easy.
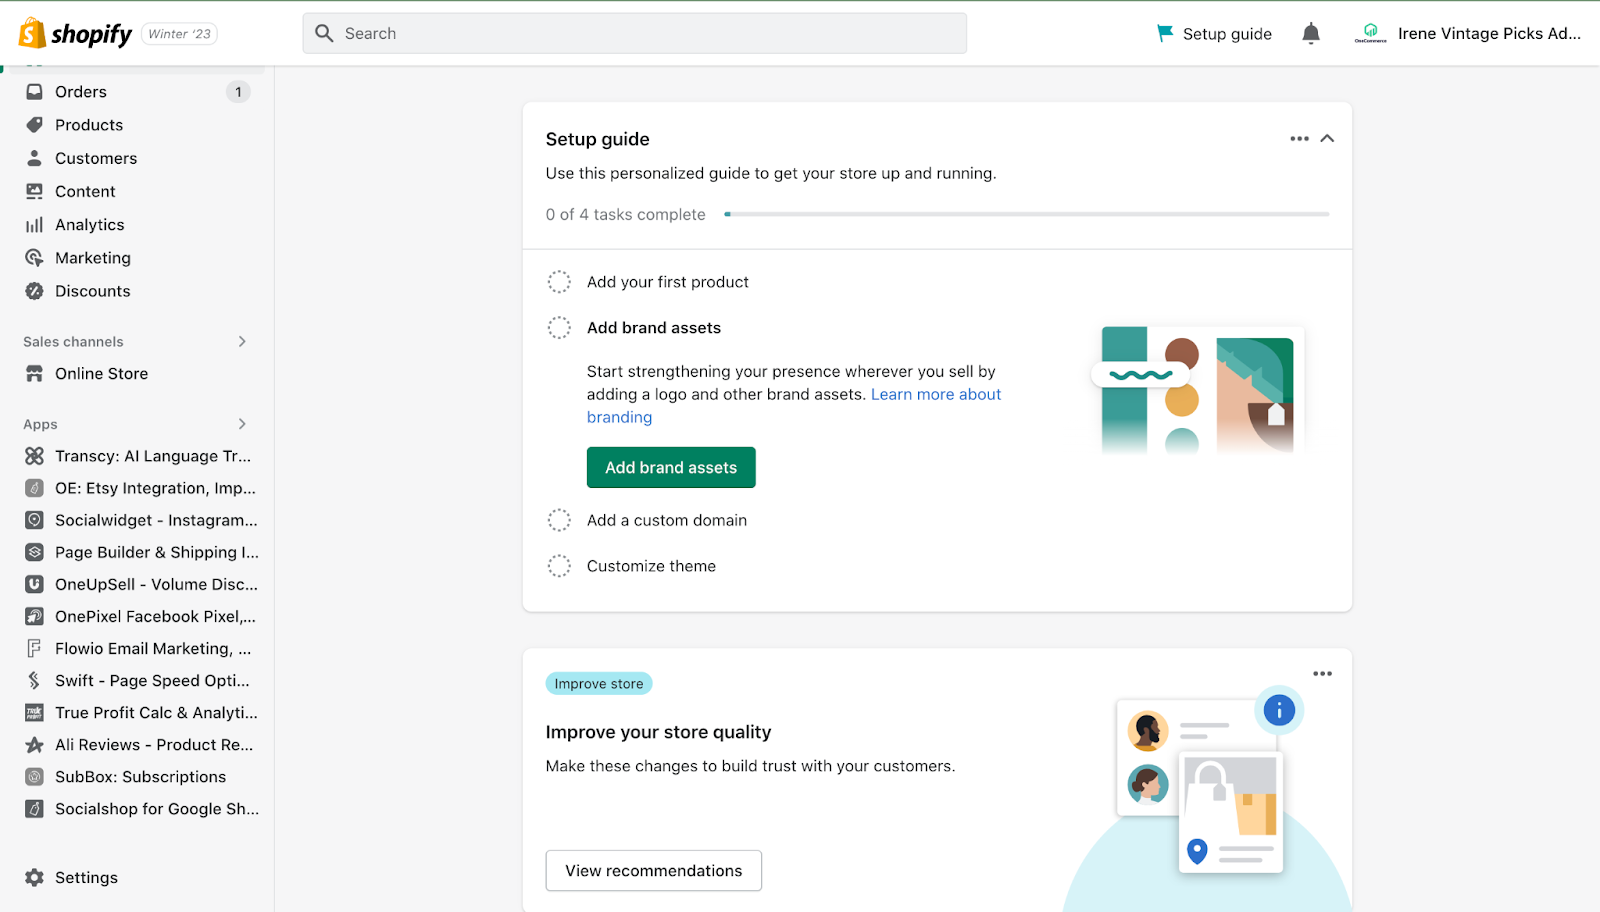
Main dashboard of Shopify
At the bottom of the left sidebar, you’ll see “Settings”. This is where you can update many of the core functions of your account, such as your store name, payment details, and notifications. It’s important to review and update these settings to ensure that your store is running smoothly and efficiently when learning how to use Shopify.
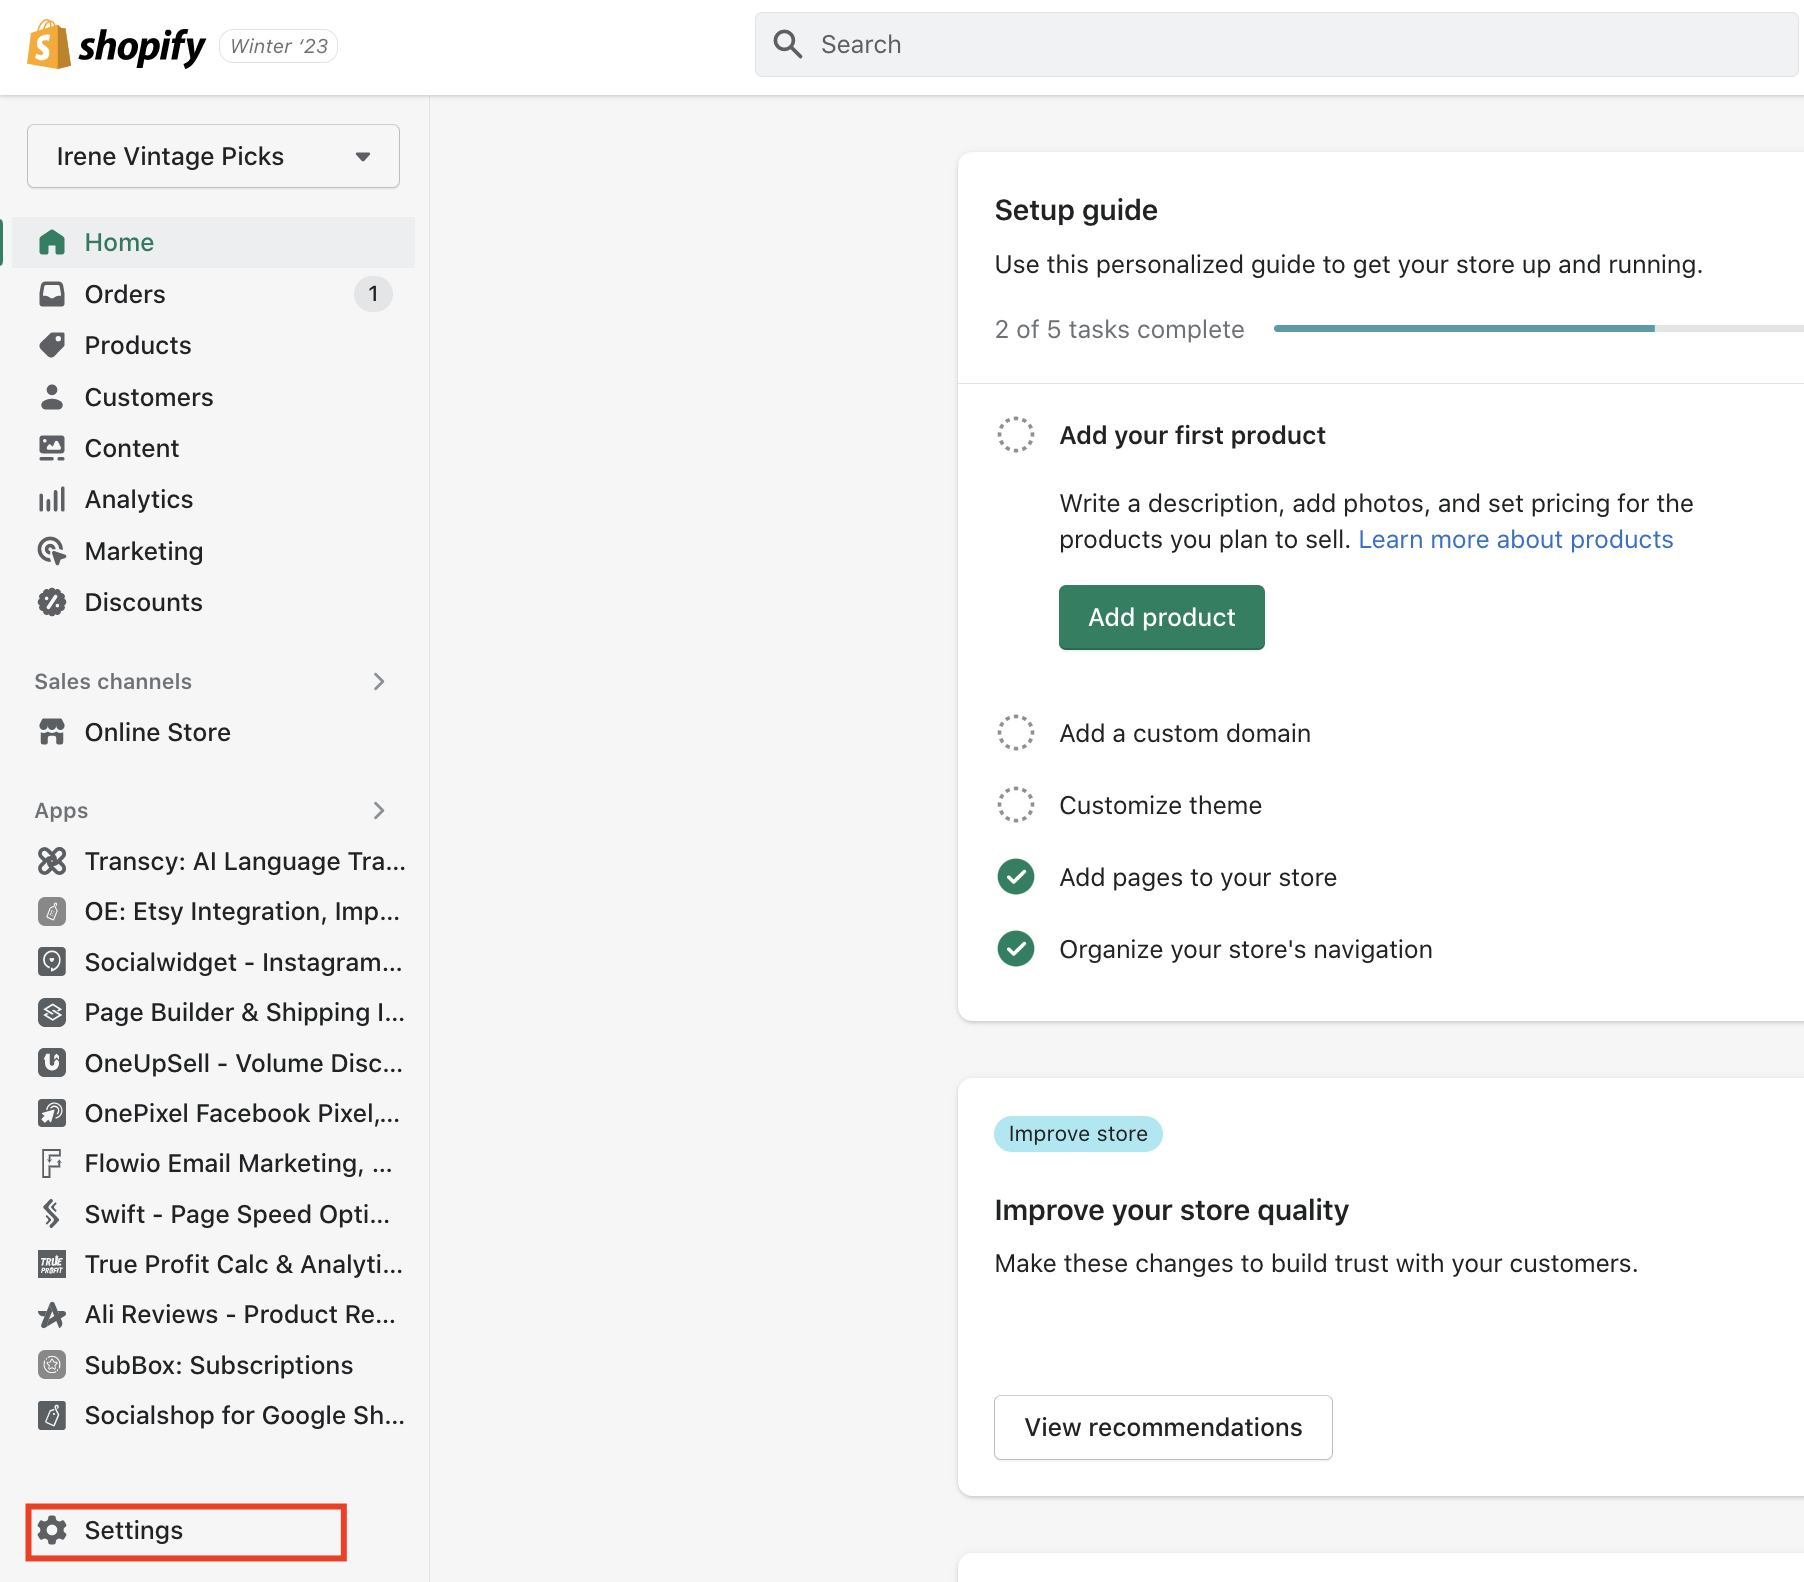
Shopify setting button
3. Customize Your Website’s Theme
Now that you’ve familiarized yourself with the dashboard, it’s time to customize your website’s theme. The appearance of your website is essential for creating a positive user experience and attracting potential customers, so it’s important to choose a theme that best reflects your brand and products.
To get started, click “Online Store” in the sidebar and then click “Themes”.
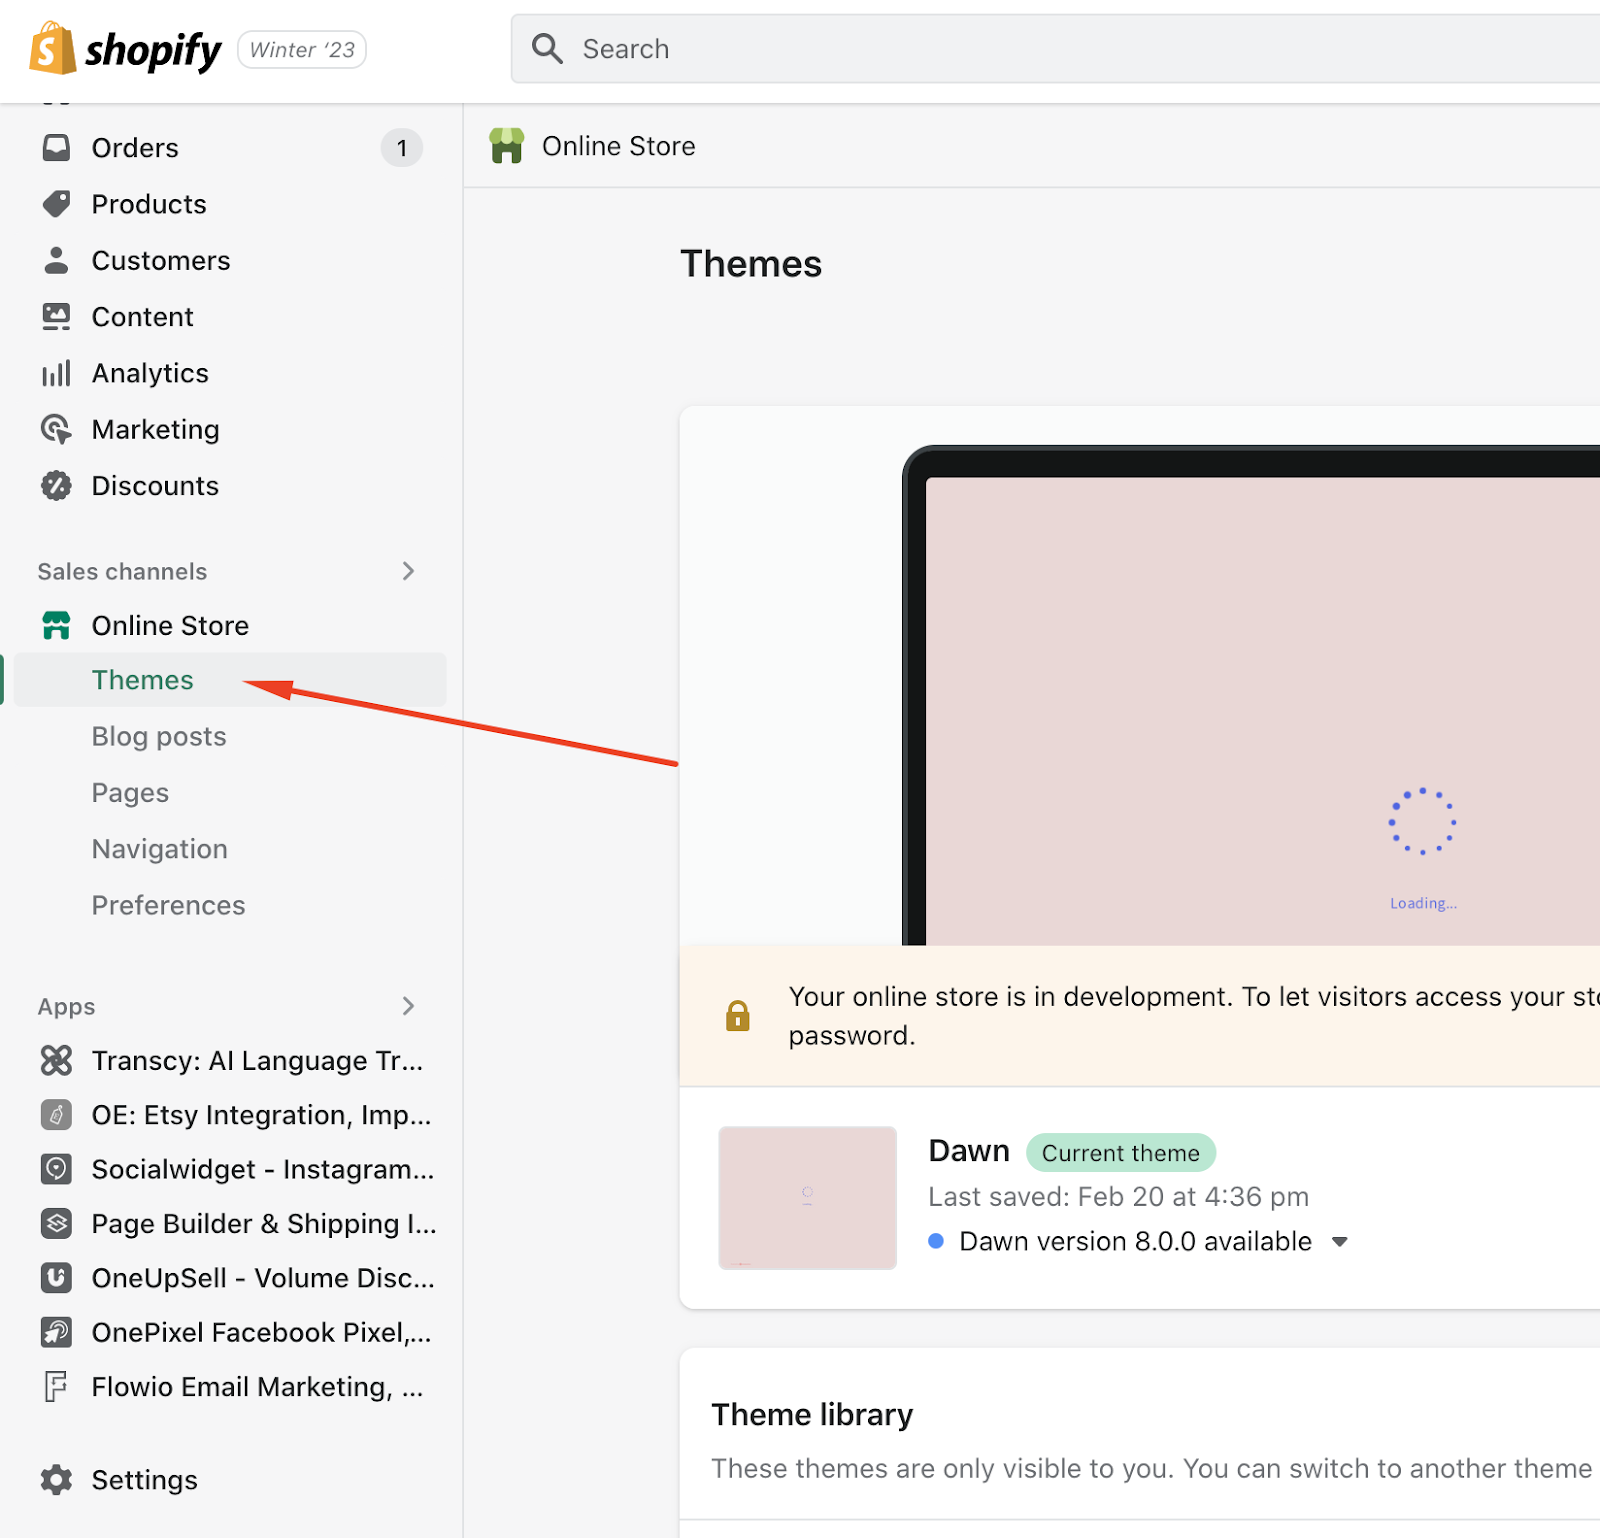
Theme customization section
From here, you can start customizing the pre-installed “Debut” theme or decide on a new theme from the free theme library, browse the Shopify Theme Store, or upload themes purchased from a third-party marketplace.
Remember, you can always change your theme later, so don’t worry too much about making a perfect choice right away when getting started on how to use Shopify. Additionally, if you want something more specific, you can hire a Shopify Expert to help you customize your website.
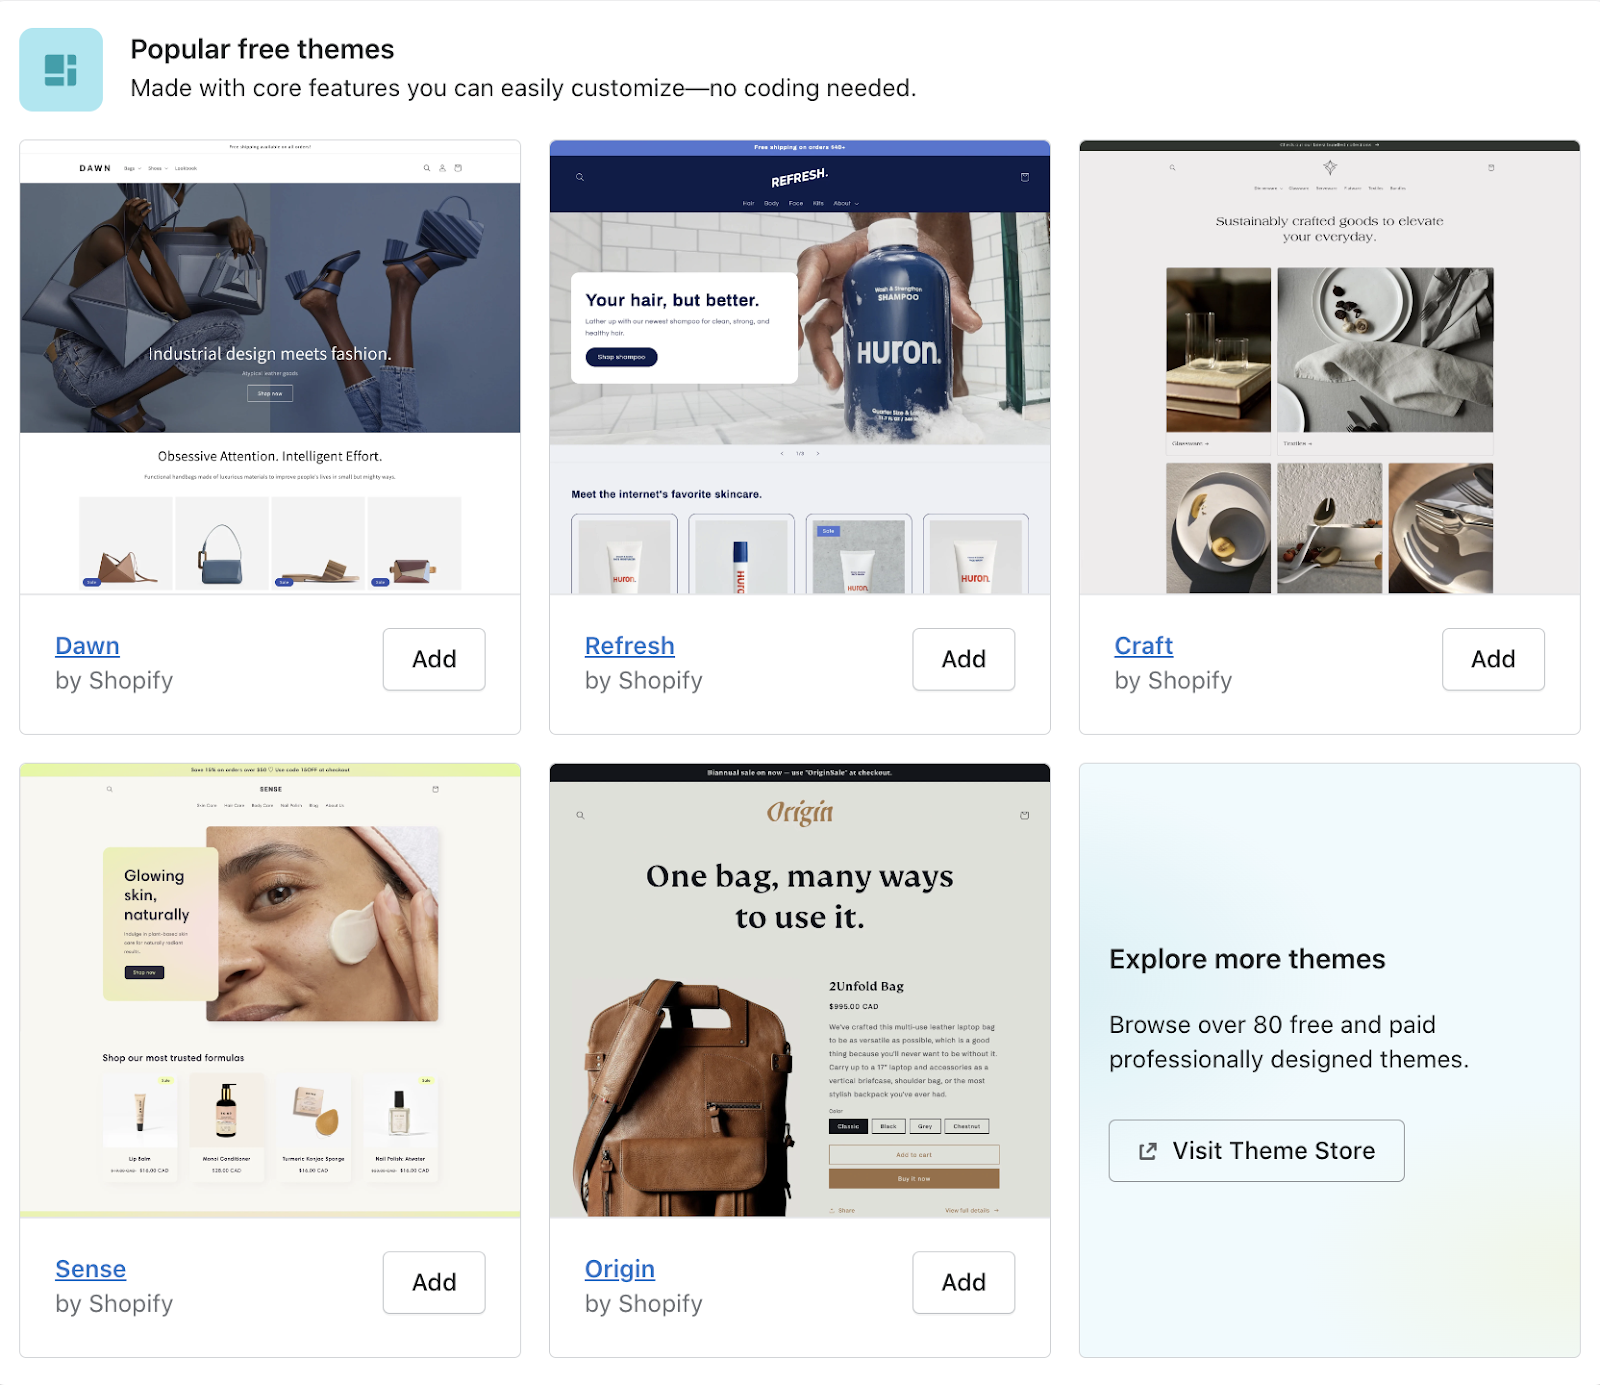
“Popular free themes” section
Once you’ve installed your chosen theme, click “Customize” and Shopify will take you to the page editor. Here, you can use the menu on the left to alter the layout with drag-and-drop modules and use the drop-down menu at the top of the page to customize different website pages.
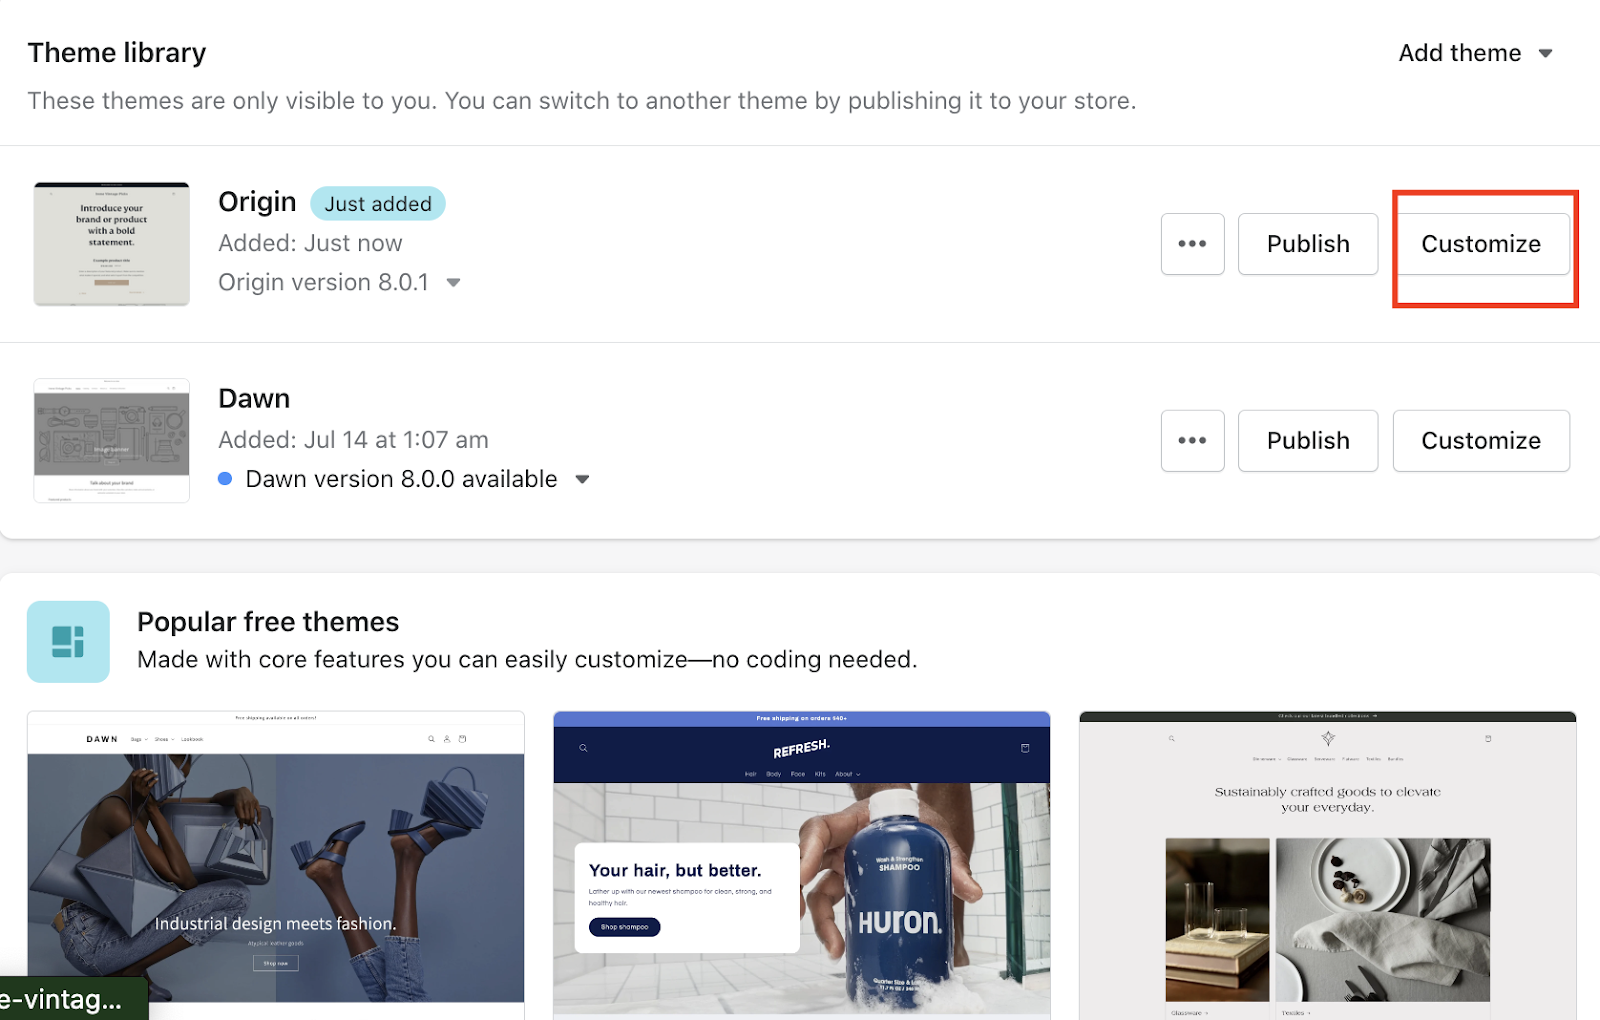
Customize the added theme
To further customize your store’s appearance, you can access the theme’s settings at the bottom of the left sidebar. Here, you can customize your store’s colors, fonts, and more to match your brand and create a cohesive look across all pages of your website.
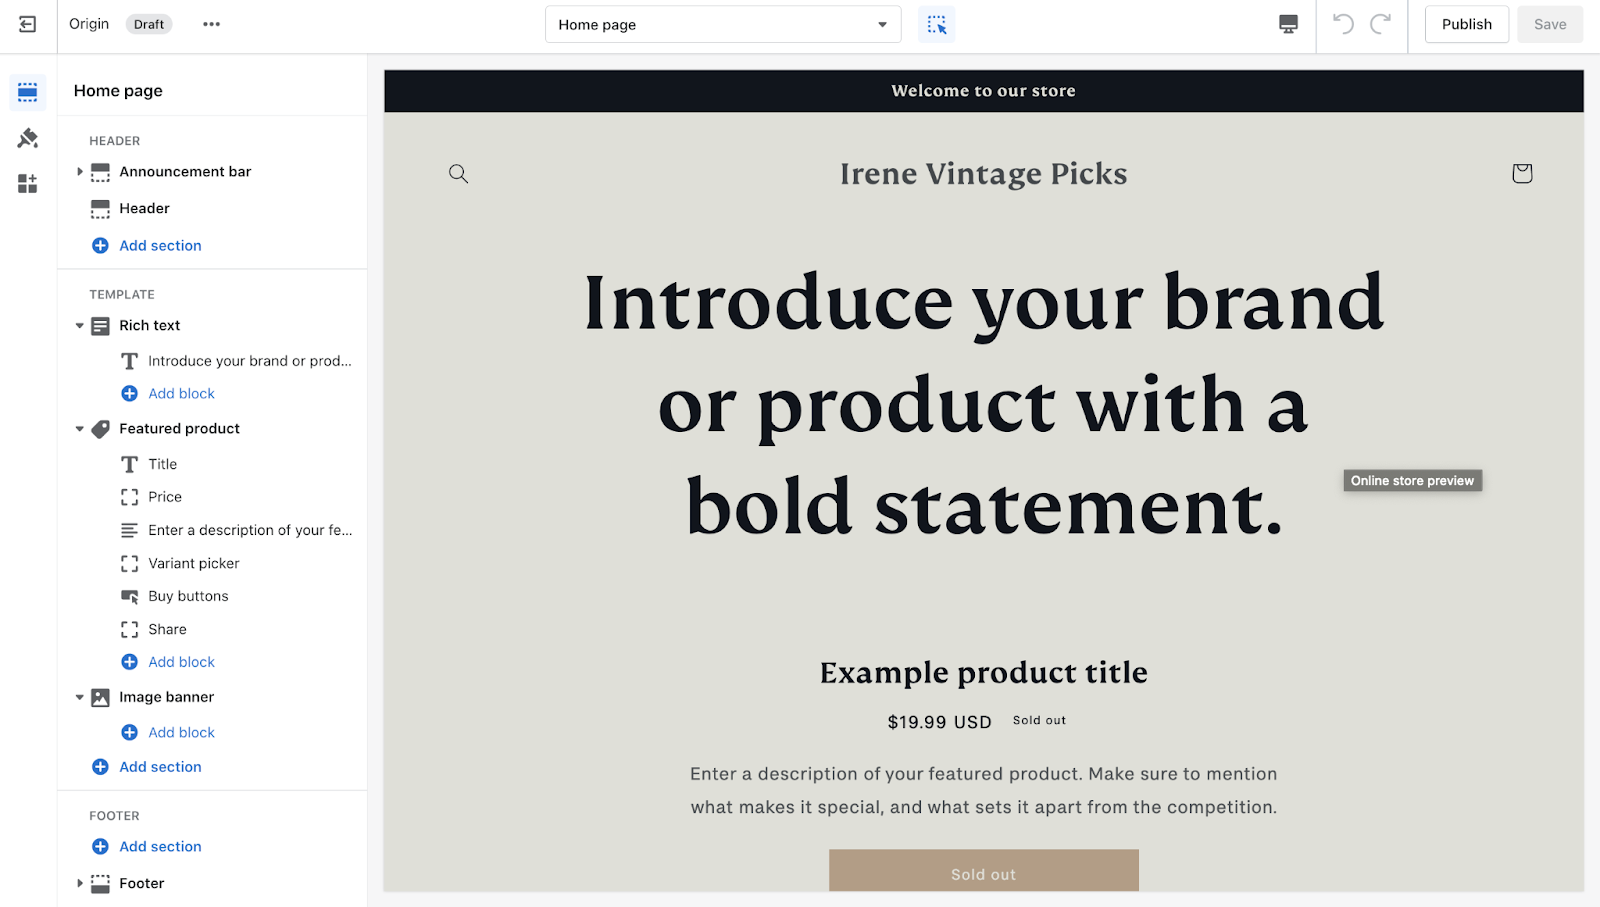
Shopify theme personalization
| ? Remember, the appearance of your website plays a significant role in attracting and retaining customers, so take your time to ensure that your chosen theme accurately reflects your brand and products. |
4. Add Products
After customizing your website’s theme, it’s time to think about how you’ll sell your products. With Shopify, you have the flexibility to sell through a variety of sales channels, including your website, social media platforms, e-commerce marketplaces, and even in person. Before you start adding products, it’s a good idea to set up your preferred sales channels.
4.1 Set up sales channels
To do this, click the “Setting” icon in the sidebar of the dashboard (at the bottom), and then select the sales channel you want to add.
Each sales channel has a different setup process, but Shopify ensures that you have all the necessary tools to set up and manage each one successfully, even when you are just beginning to know how to use Shopify.
For instance, you can add social media platforms like Facebook, Instagram, or Pinterest, which will enable you to sell products directly from your social media profiles.
You can also add e-commerce marketplaces like Amazon, eBay, and Etsy, which can help you reach a large customer base and increase your sales.
Moreover, if you have a physical store, you can use Shopify’s point-of-sale system (POS) to sell your products in person. The POS system is designed to work seamlessly with your online store, ensuring that all sales channels are synchronized, and inventory levels are up-to-date.
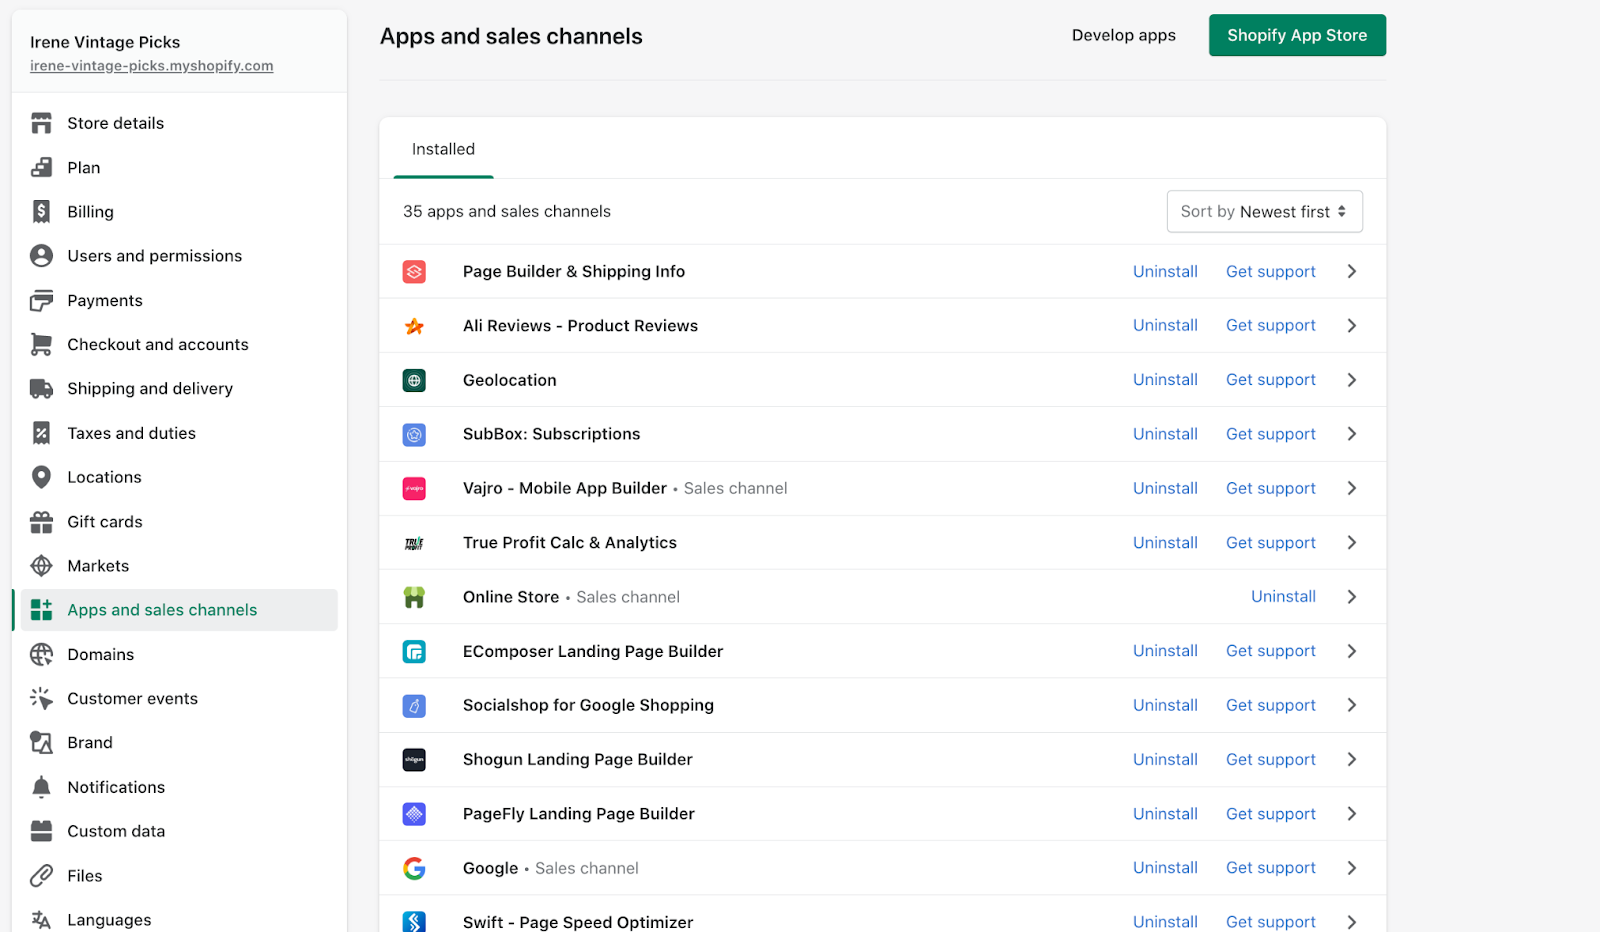
Sales channel section
4.2 Add Products
After customizing the appearance of your website and setting up your preferred sales channels, it’s time to add some products to your Shopify store. To do this, click on “Products” in the sidebar and then select “Add product”.
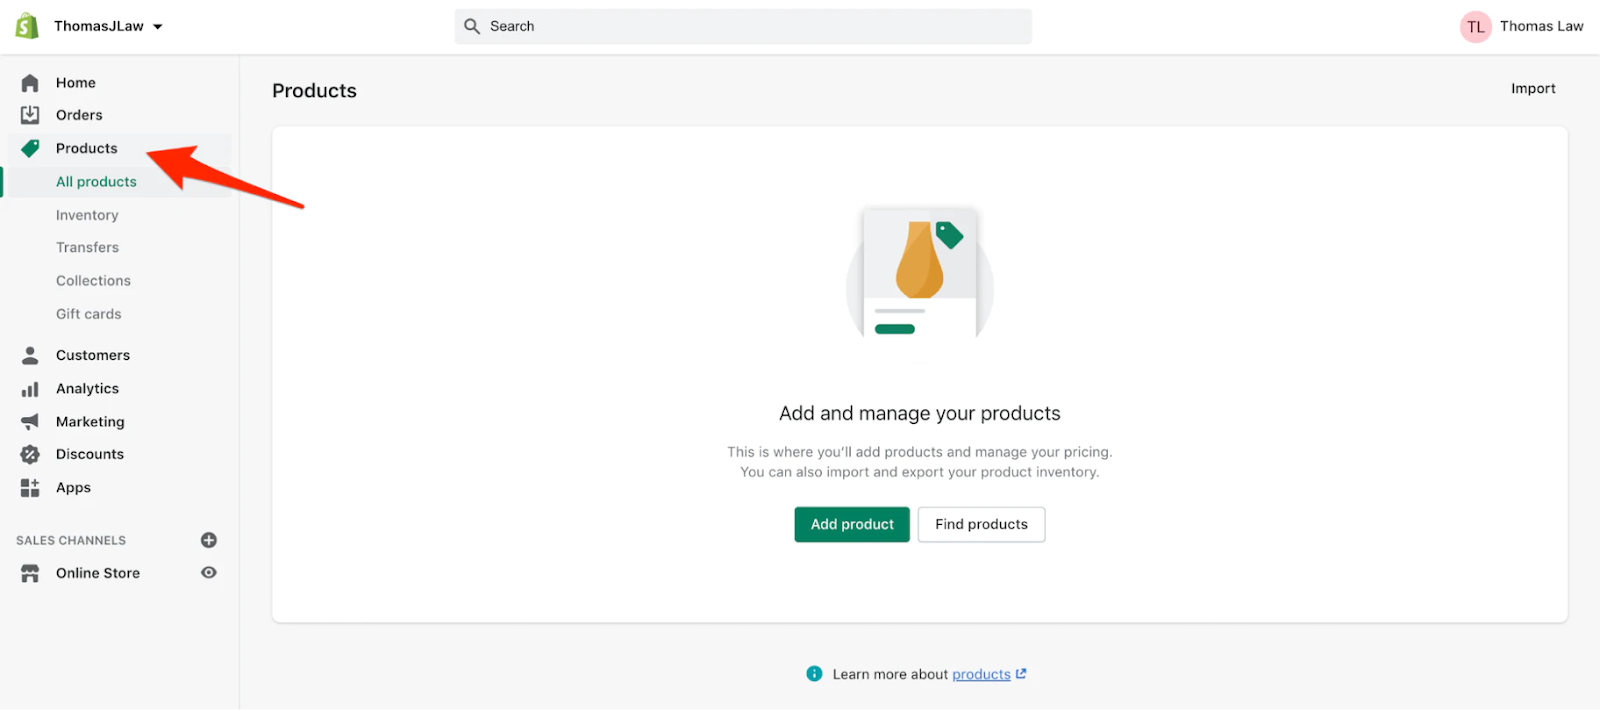
Product add’s section
If you don’t have any products of your own, you can use a drop-shipping integration like DSers to find and sell products from other suppliers.
| ?Important note: For digital products like e-books or software, you can uncheck the “This is a physical product” option to disable shipping settings. |
When adding a product, it’s important to fill out all the necessary details, including the product name, description, pricing, and images. You can also configure inventory and shipping settings, and select the sales channels you want the product to be available on.
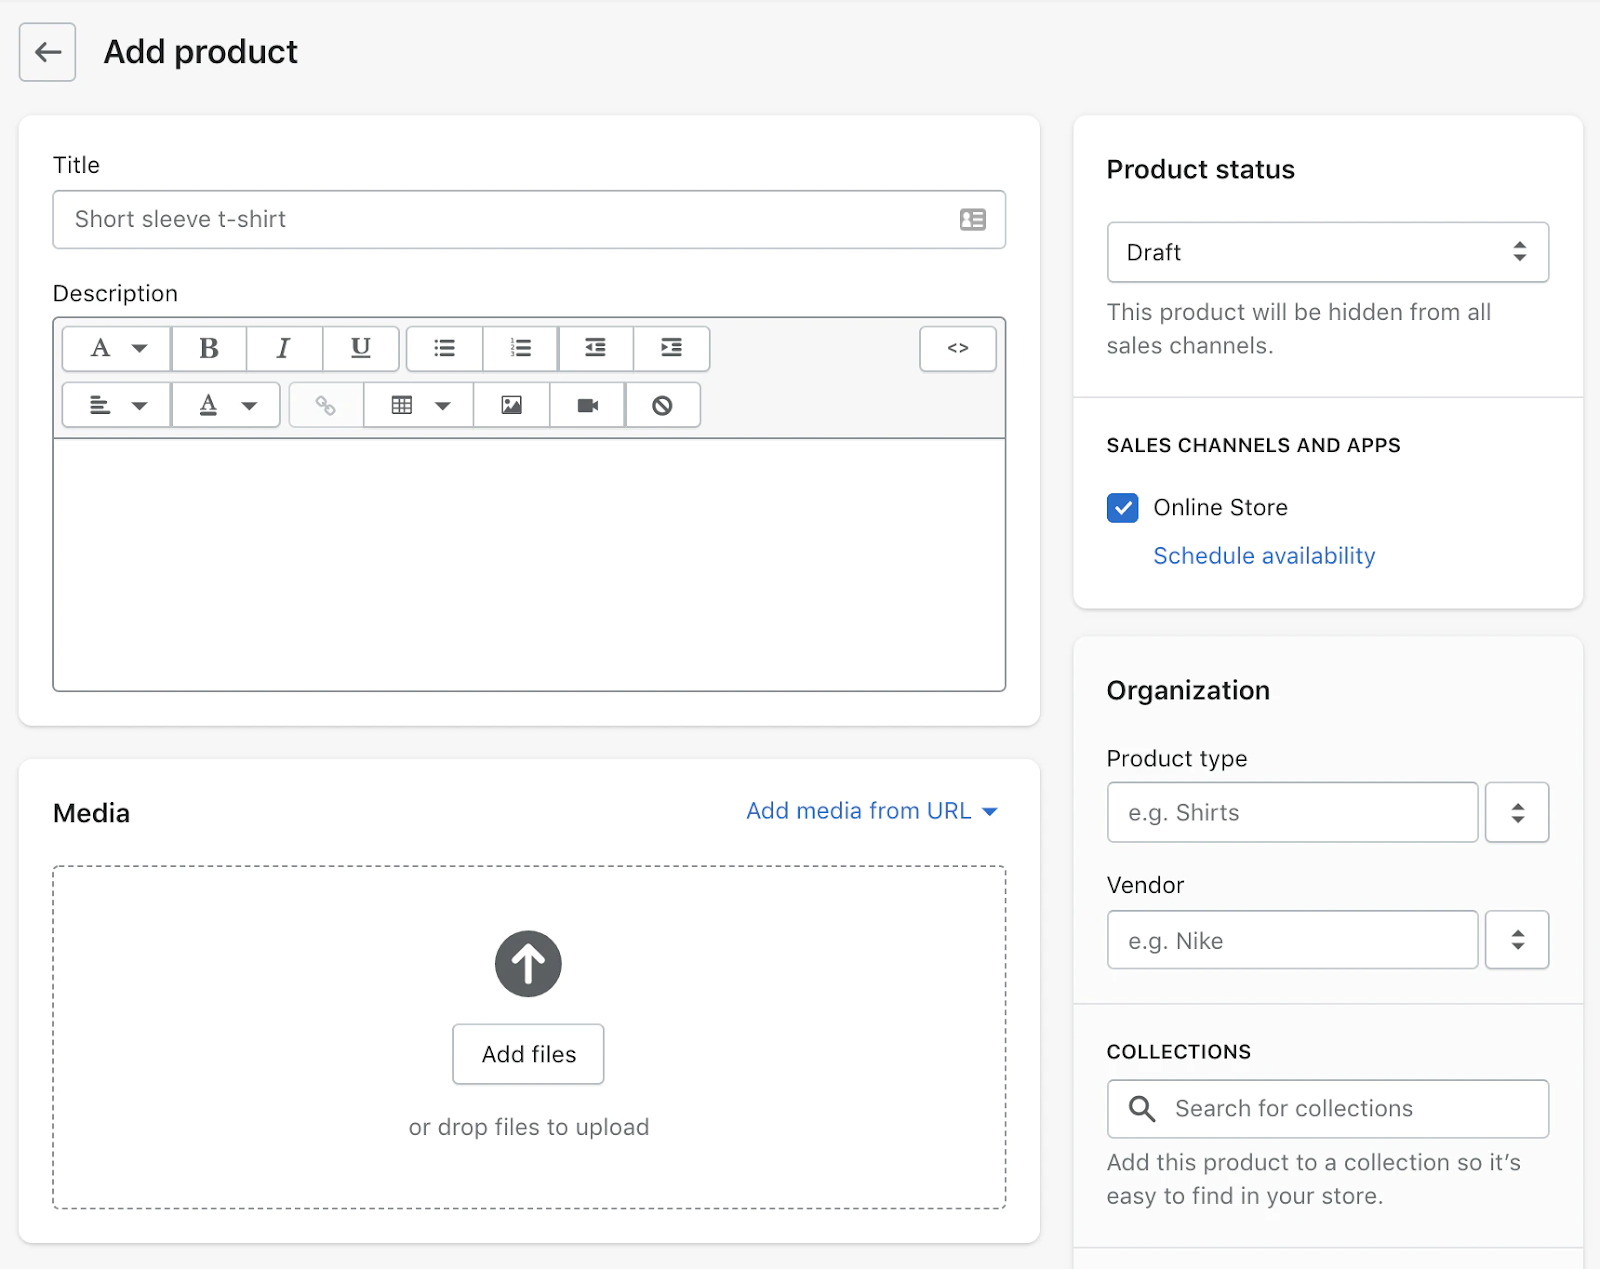
Product information input table
Additionally, you can group similar products together using collections, which can be helpful for organizing and promoting products on your website. Once you’ve entered all the relevant information for your product, don’t forget to click “Save product” to add it to your Shopify store.
5. Set Up Payments
Products are all uploaded, now, let’s move to some very last important steps of how to use Shopify, and one of them is setting up to be able to make money. Once you’re set up with Shopify Payments, you can also enable other payment methods such as Amazon Pay or PayPal.
To do this, click on Setting > “Payments” in the sidebar and scroll down to “Add payment methods”. Here, you can select the payment methods you want to offer your customers.
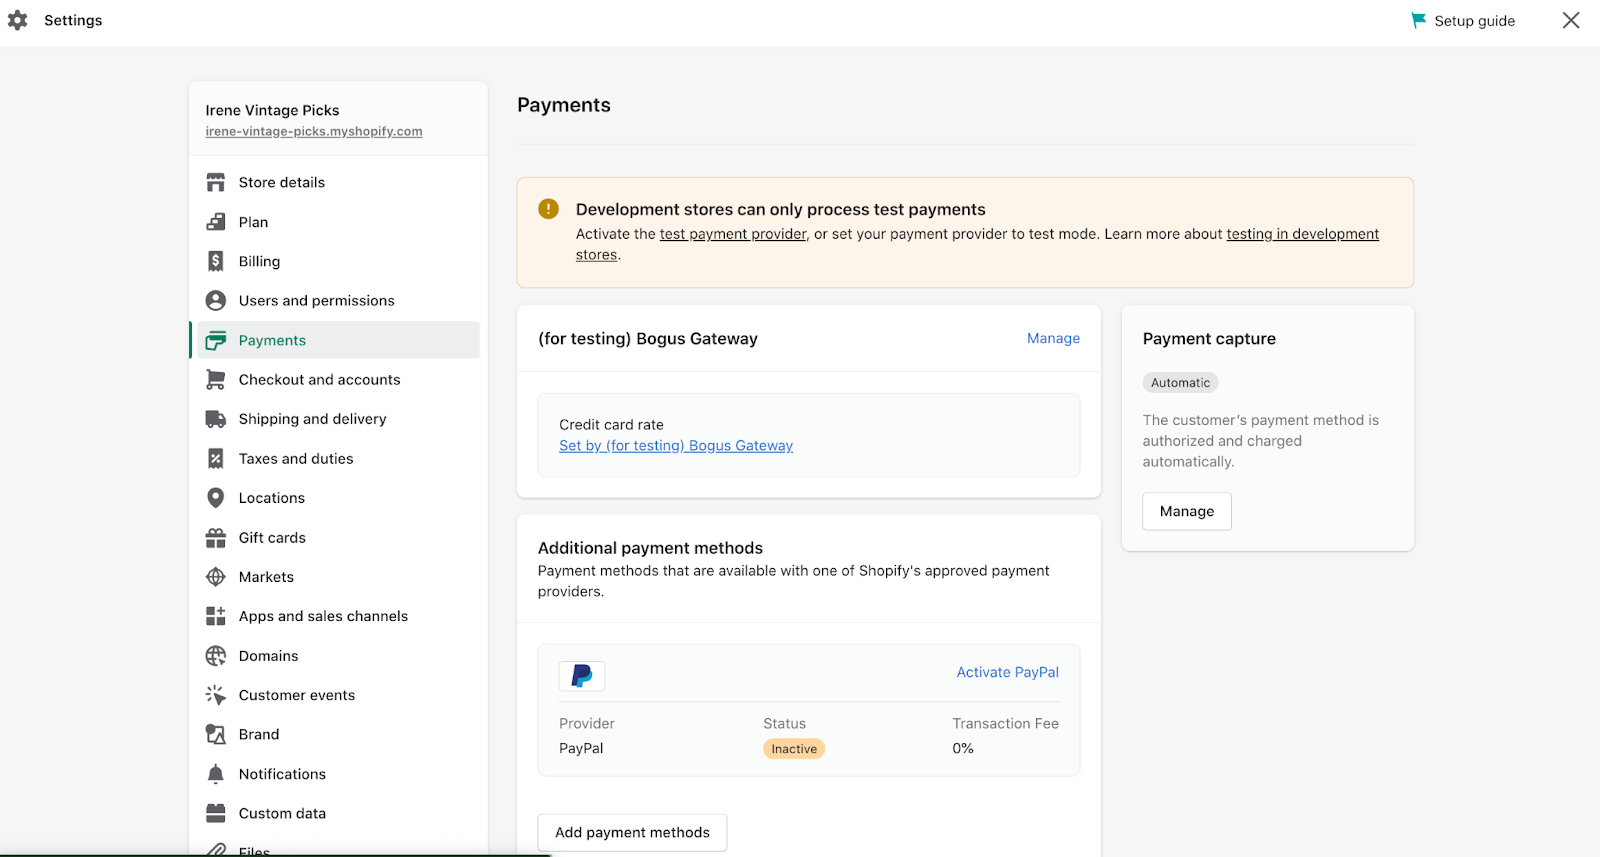
Add payment on Shopify
Additionally, you can also customize your payment settings to include options like automatic capture of payments, refunds, and chargebacks.
Keep in mind that depending on the payment method you choose, there may be additional fees or transaction charges. It’s important to review the terms and conditions of each payment method before enabling them in your store.
Moreover, with some small modifications, you can also let your customer see prices in their currencies as well.
Finally, make sure to test your payment settings to ensure that everything is working correctly. To do that, try to place a test order and process the payment to make sure that funds are being deposited into your account.
6. Add a Domain
Having a custom domain gives your website a professional look and helps customers remember your website. You can always change Shopify domain later if you wish to.
To set up a domain, follow these steps:
- Click “Online Store” in the sidebar and select “Domains”.
- From there, you have three options: connect an existing domain, transfer an existing domain, or buy a new domain.
- If you already have a domain, you can connect it to Shopify by selecting “Connect existing domain”. Shopify will guide you through the process.
- If you prefer to transfer your domain to Shopify, select “Transfer domain”. Shopify will guide you through the steps needed to transfer your domain.
- If you don’t have a domain, select “Buy a new domain” and search for available domain names. Once you find one you like, click “Buy” and follow the instructions to complete the purchase.
- After purchasing or connecting a domain, make sure to set it as your primary domain in the “Domains” section of your Shopify dashboard.
7. Make Your Store Public
After you have configured your settings, it’s time to make your site live! First, make sure that you have chosen a pricing plan that suits your business needs. Then, remove any storefront passwords to make your site public.
To do this, click “Online Store” in the sidebar, then click “Themes” and select “Actions” > “Password”. Here, you can remove any passwords and click “Save”.
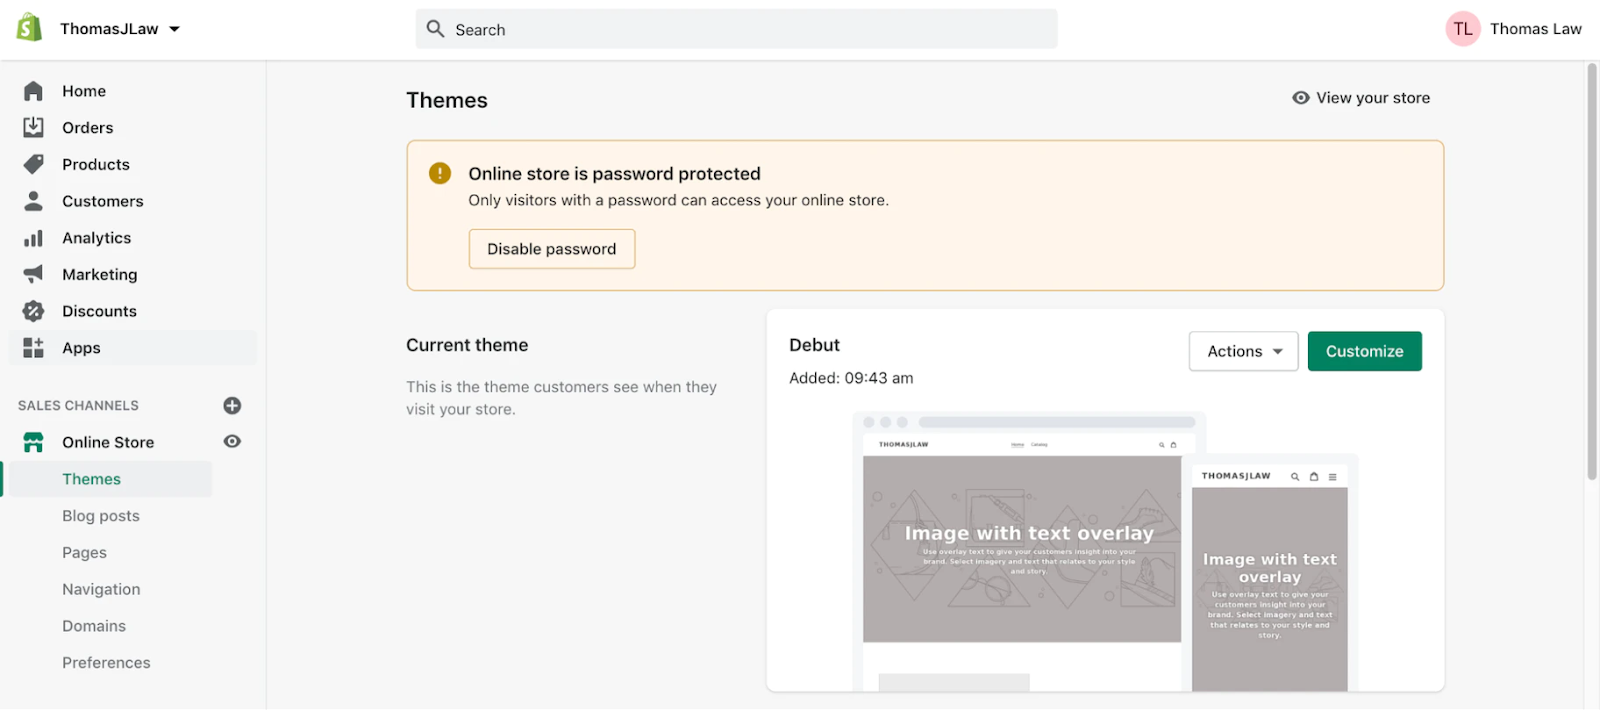
Set up/ Remove Password
Next, navigate to “Settings” and click “Billing”. Make sure that you have entered a valid payment method to ensure that your Shopify account stays active.
Finally, click “Online Store” > “Preferences” and check the box that says “Enable password protection”. This will help keep your site secure and prevent unauthorized access.
Once you’ve completed these steps, your Shopify store is now live and ready for customers to visit and shop, and you have completed the last steps of how to use the Shopify tutorial!

Shopify mainpage website
Conclusion
In this Shopify tutorial for beginners, we covered all the essential steps needed for how to use Shopify to set up a successful online store. By following these steps, you can start your own Shopify store and take advantage of all the essential features, including 24/7 support, unlimited products, and more.
With Shopify, you can easily build and grow your business online. So what are you waiting for? Sign up for your free trial and get started today!
