Table of Contents
The Facebook timeline can be said that acts as a diary of life. With a timeline, users can view or update news, photos, and outstanding events from past times to the present. So how to use these features that are available on the Facebook timeline?
In this article, we’ll walk you through: what is the Facebook timeline as well as how to use it effectively to write a great story about yourself.
Let’s find out.
What is the Facebook timeline?
Facebook timeline is a social media tool that was first introduced in September 2011 and was made available to all users in February 2012.
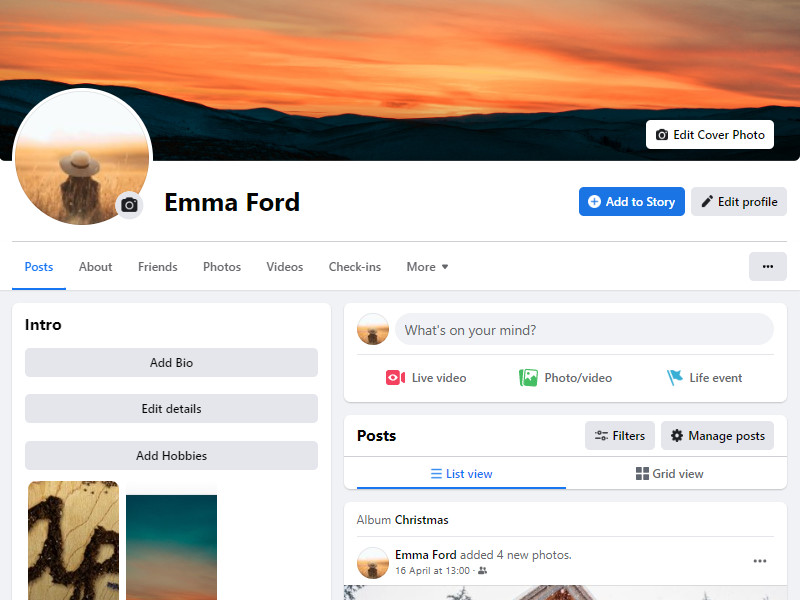
Facebook Timeline is a great social media feature
The Facebook timeline contains reverse-chronological data of a user’s Facebook history, organized by year, with crucial life milestones like birthdays, weddings, and other major events.
Instead of archiving, the timeline reorganizes all saved user information for display. Viewing obsolete events, photographs, and comments was more difficult or impossible in past Facebook incarnations.
How to use the Facebook timeline?
Follow these simple steps to get the most out of your Facebook timeline:
Step 1: Set the cover image for the main interface
First, let’s get acquainted with the cover photo – the largest photo, at the top of the main interface.
This is the photo that is probably the least changed. Often it will be a souvenir photo, a slogan, a life motto or a saying that users feel passionate about.
However, if you want to change it, you can go to the upper left corner of the cover photo, click on the camera icon – “update cover photo”.
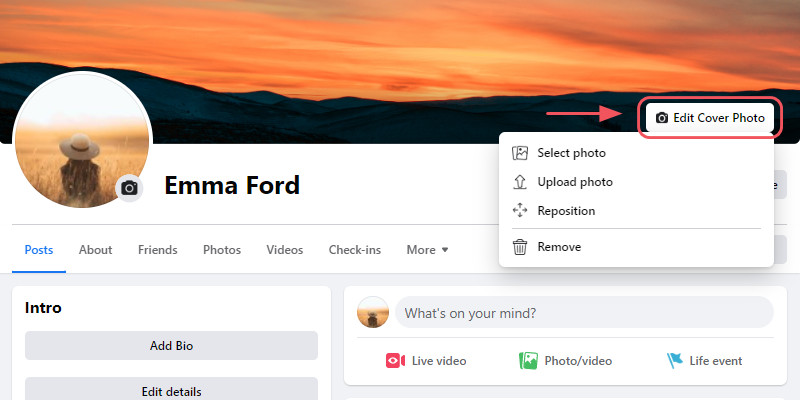
The cover photo that is probably the least changed
You can choose to upload a photo (if you want to get an image that is available on your computer) or “choose from my photo” (if you want to get an image that is available on the Facebook timeline).
Step 2: Add an avatar to people can recognize you
Also right on the cover photo, in the lower-left corner is a smaller image, called an avatar.
Set up an avatar for the Facebook timeline to help others recognize you
Avatar can be the image that the user wants to represent their personality. It is also the image that other people can find you.
To change this image, you can move your mouse over the image and click on the updated profile picture icon.
Displays a photo album table with many options for users to replace the avatar image, such as taking an instant photo with a webcam, or selecting in the folders your pictures, photos with your face…
Step 3: Edit your profile
In the next step in using the Facebook timeline, you need to update your information.
To update the information, you need to select the “Edit profile” button located below the cover image.
When you can add new personal information such as work and education, places lived or contact and information…In addition, users can provide other personal information to connect with their friends.
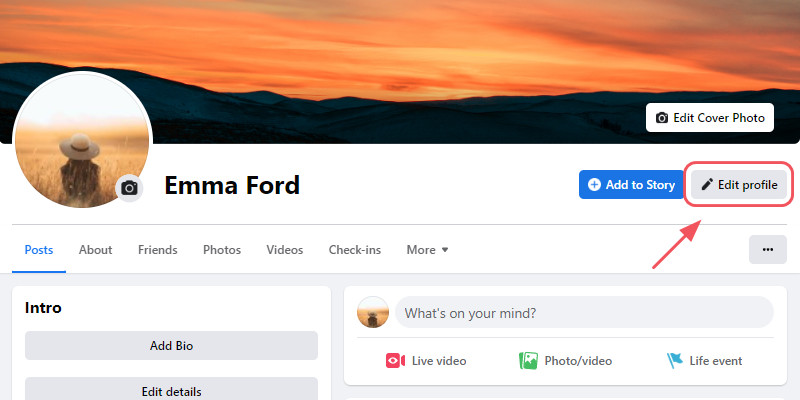
Users can change, edit old personal information or add new information
Step 4: Get used to the status frame
Right below the cover photo is the status frame. By using this box, your articles, confidants or photos/videos will be seen by your friends.
With smaller but equally important options at the bottom of the status bar such as “feeling”, “tag people”, “check-in”…Users will have more options to make their posts more vivid.
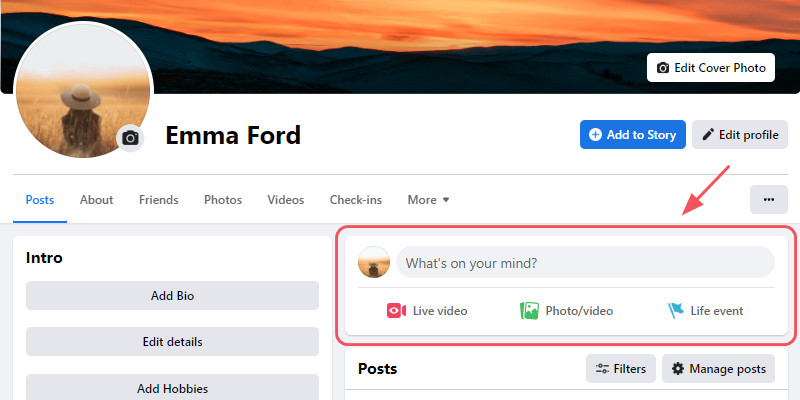
You can share articles, thoughts, images via the status frame
Advanced setting on Facebook timeline
There are a lot of advanced settings users will see once they use Timeline. Here are some important advanced settings:
Edits privacy settings
When you update your status, you’ll see a drop-down menu showing exactly who you’d like to share your post with.
You can choose what appears on your Facebook timeline by yourself, giving you more control over what people see when they visit your page.
This feature just affects what appears on your timeline; tagged posts will continue to appear in search, the news feed, and other areas of Facebook.
- Choose “Settings” from the “More” menu in the bottom right corner.
- Then choose “Account Settings” from the drop-down menu.
- From the menu, select “Timeline and Tagging”.
- Choose the field that says “Review posts friends tag you in before they show on your timeline?” in the first subsection, “Who can add things to my timeline?”
- Ensure that this is set to “On.”
You’ll be able to approve posts you want on your Facebook Timeline by accessing your Activity Log once this functionality is enabled.
On Facebook, you can tap the drop-down arrow in the upper right corner to view Activity Log.
Alternatively, on the mobile app you can go to “More” > “Settings” > “Activity Log”.
Public, friends, only me, or custom are the four options. When this setting is changed, it will remain in effect until the user changes it again in the following post.
Add “Life Events” to your timeline
Right above your security managers is a new option – “Life Event”. Not only helps to share status or photos with friends, but users can also add to their Facebook timeline by highlighting past events, such as previous jobs, friends and family, relocation, travel, etc.
After selecting a category to update, you will see a form to fill in the details: location, who you were there with, date, old story, photos and privacy settings for who can see this event.
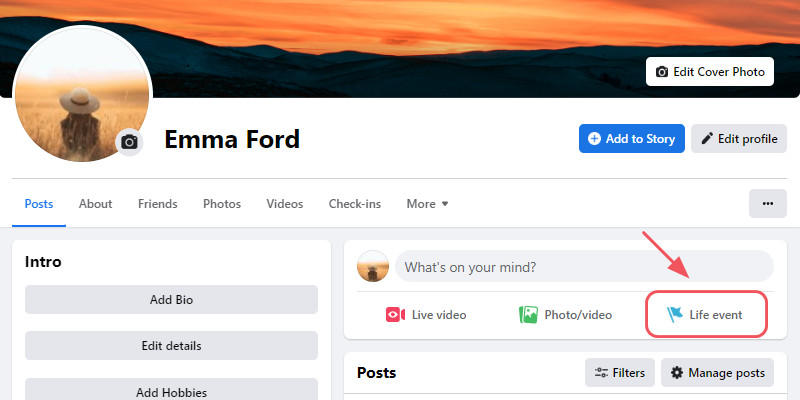
You can add life events to the Facebook timeline
Pin highlight events on the timeline
As part of the timeline interface, users were able to specify which posts deserve to stand out and which are less important.
For example, if you want to bookmark a new photo album of a recent trip. Move your mouse pointer to the right corner of the post and select “Pin post”. It will pin this post to the top of your Facebook timeline.
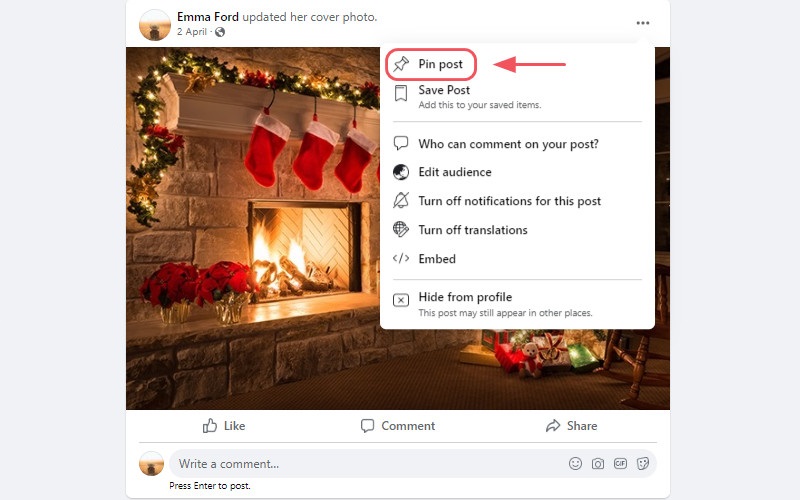
Users were able to specify which posts deserve to stand out
Similarly, if you want to hide a post on your timeline but not delete it completely. Move your mouse pointer to the right corner of the post and select “Hide from people”.
Final thought
Facebook timeline is a great social media feature that is not only a place for you to share your pictures, posts and experiences but it also makes it easy to connect with your friends.
In this blog post, we provided a comprehensive guide on how to use the Facebook timeline. We hope that after reading this article, you gain deeper knowledge about how to use the Facebook timeline.
If you have any questions, you can always let us know via the comment below. We are glad to help!


