Table of Contents
On-demand printing has become more common as it’s the easiest and fastest way to sell your custom products to customers.
You just need a laptop and now you can turn your ideas into practice by using eCommerce platforms and print-on-demand services without having any inventory or shipping transport.
To do this, first, you need to build print on demand websites to display your products and attract customers.
Here is a step-by-step guide to help you set up the best print on demand websites.
Let’s start building your own print on demand websites!
There’re hundreds of eCommerce platforms and print-on-demand companies that are trustworthy and provide you with top-notch services. You can search for each site’s traits and integrations for your best solution in 7 Tips to Get the Best Print On Demand Shirt Printing.
Establishing print on demand websites is really necessary for your eCommerce business, and you need to have at least one to get the ball rolling. That’s because the print on demand websites are the places where you design your products, run your online stores, and boost sales.
Hereafter, we’ll pick out Shopify, the most popular and user-friendly eCommerce platform to give you a demo of how to create basic print on demand websites.
Step 1: Create a Shopify account
You can search Shopify on Google, which will lead to the Shopify homepage.
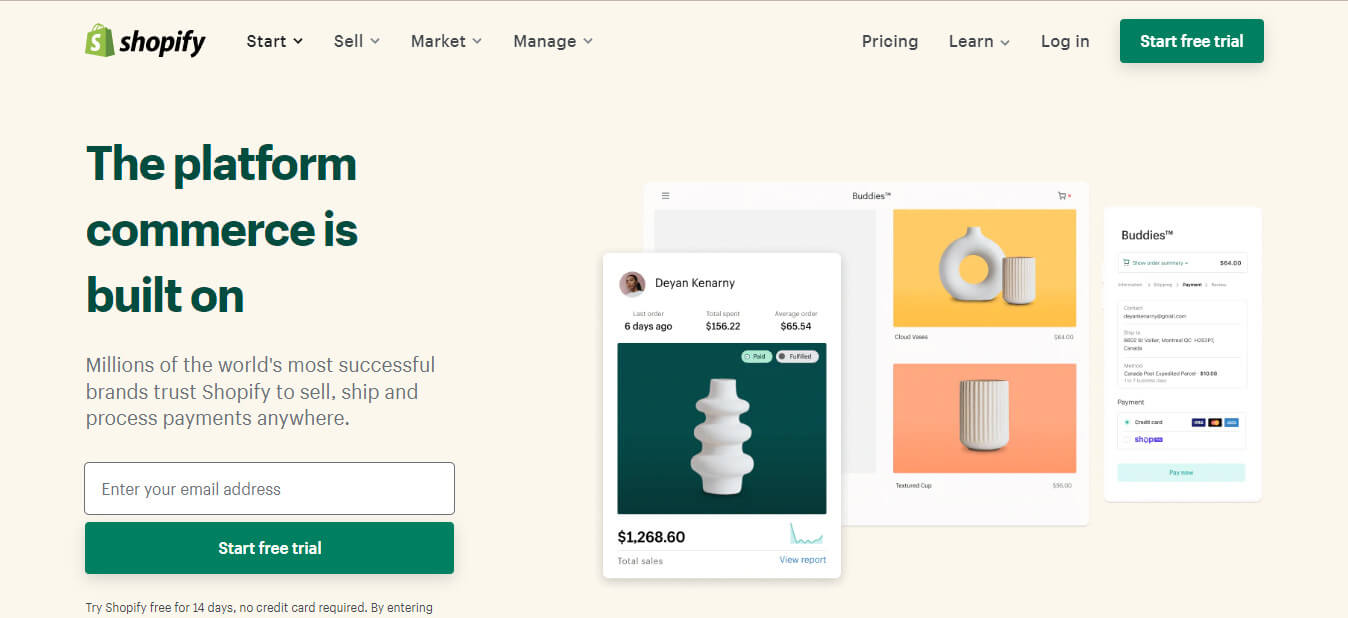
You’ll head to the Shopify homepage.
Now, you can fill in your email address and then press the Start free trial button to use Shopify at no cost for 14 days.
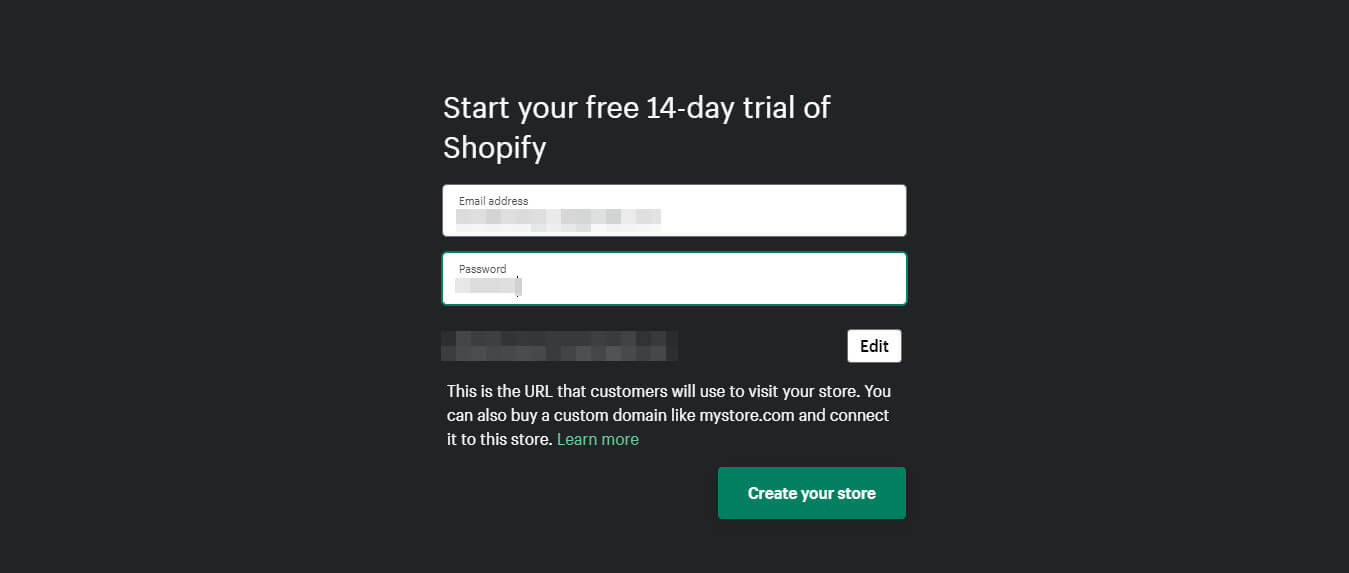
You can use Shopify for free for 14 days.
Next, Shopify may ask you some questions about yourself and your business status, such as:
- Your purpose and experience with Shopify
- Where you would like to sell your products
- Your current revenue
- The industry you’re operating
- Your default business address so you can get paid
After filling out this information, you can click Enter my store, and now you get a Shopify account ready.
Step 2: Create an account with a print-on-demand provider
There’re multiple POD suppliers to choose from, ranging from Printify, Printful, Gelato, and more. Each has different printing methods and dropshipping services that you should take into consideration. We also outlined some of them in the 5 Best Print On Demand Companies to Sell Custom Products.
In this case, if you intend to sell custom T-shirts on print-on-demand websites; you can choose Printful as your POD provider as it has a favorable margin for sellers to earn profits and high-quality printing.
Moreover, Printful offers you a wide range of white-label products to create your custom designs without any limitations.
Therefore, what you should do next is create a Printful account which is very quick and free of charge.
Create a Printful account
First, you need to log in to the Printful website.
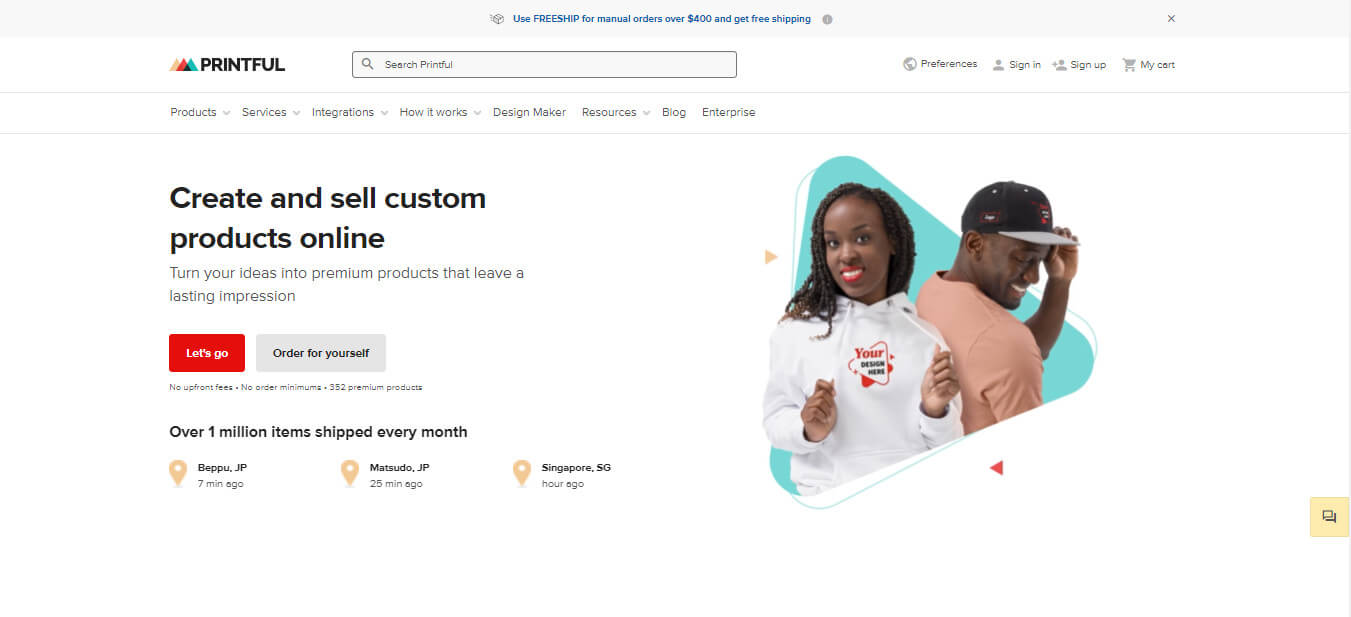
you need to log in to the Printful website.
Then, it’s similar to the process of Shopify account registration, just type in your email address and Printful will create one for you at once.
If you find and read How to Have the Best Experience on the Printful Website, you’ll get a more detailed tutorial and a deeper understanding of Printful – a print-on-demand and dropshipping company.
Step 3: Connect your Shopify store to the Printful website
Now, you go back to the Shopify dashboard that you’ve just generated and click Apps.
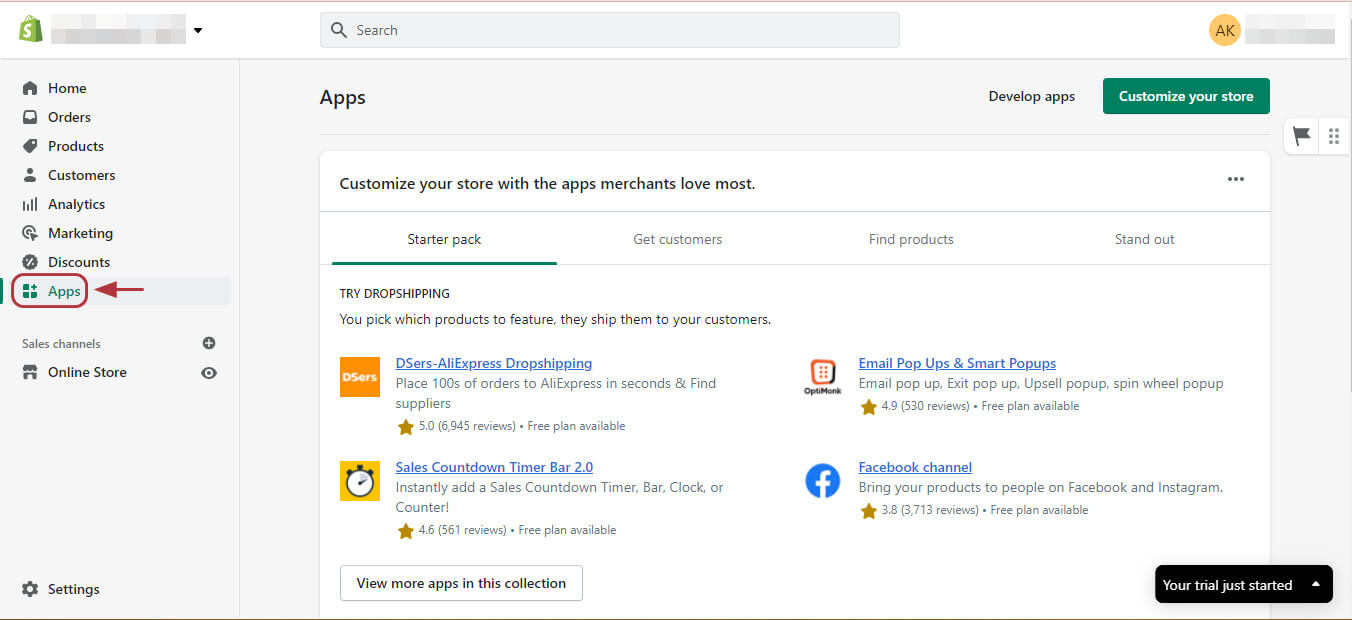
You go back to the Shopify dashboard and click Apps.
When you find Printful: Print On Demand on the search engine, you should choose Add App and then Install App to successfully add it to your print on demand websites.
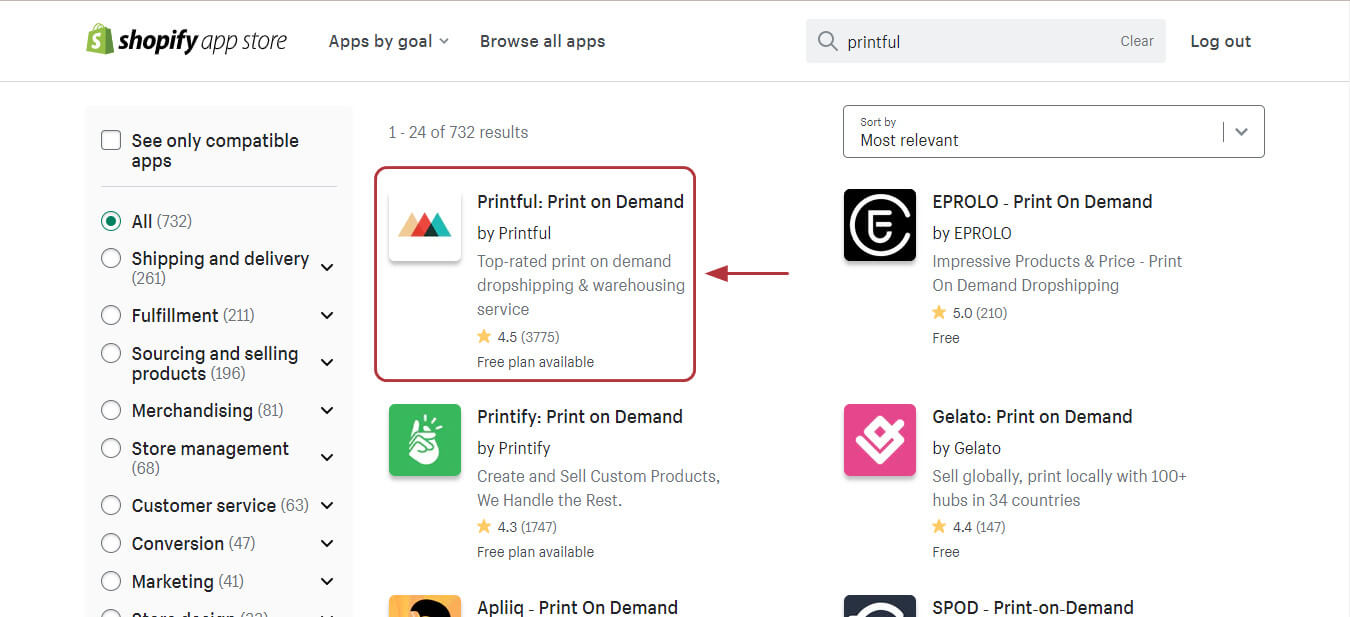
You can add Printful to the print on demand websites.
Eventually, you’ll need to confirm the connection by accepting the connection of your online stores to the currently used email address.
Now, you’ve got the Shopify and Printful accounts integrated.
Step 4: Add your first products
You’ll go back to the Printful dashboard and click on the stores where you want to put your custom products. Click Add Product to start picking products for sale.
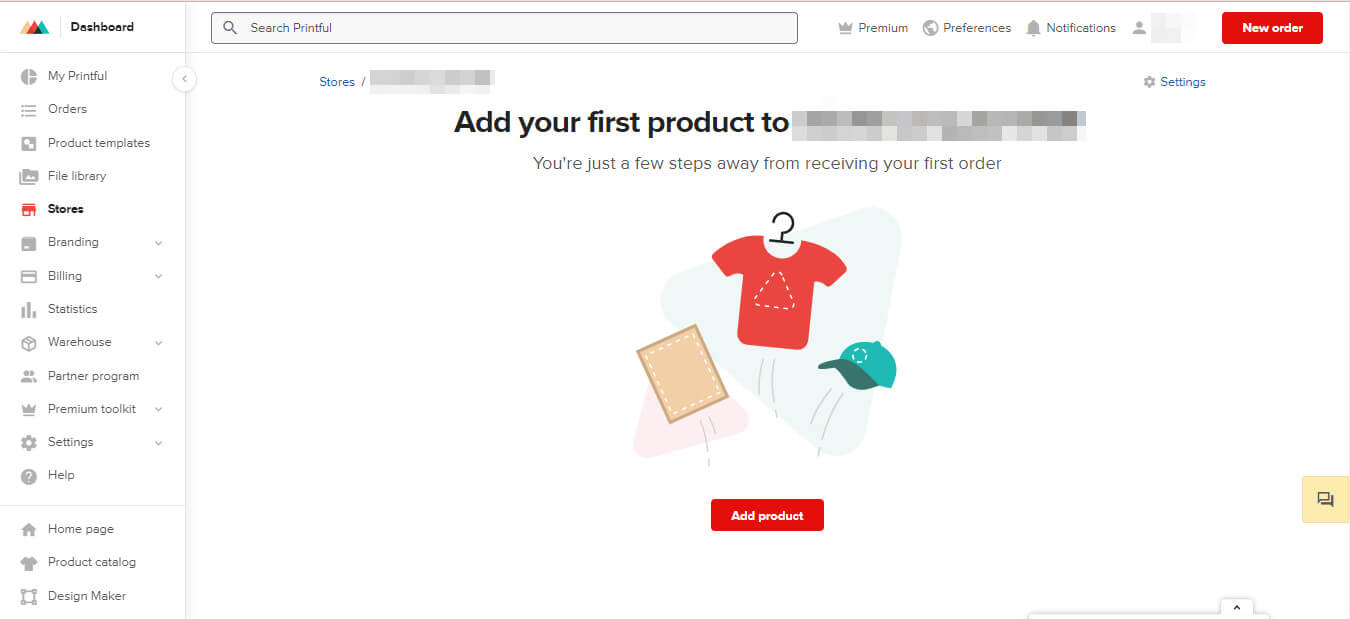
Click Add Product to start picking products for sales.
Add your favorite products
Printful offers you several lines of products, so just search for the one that suits your business requirements. However, you should also look at the number of reviews and rated stars to make a smart choice.
For example, we sell print-on-demand clothing and we’ll choose a unisex staple T-shirt to make designs on.
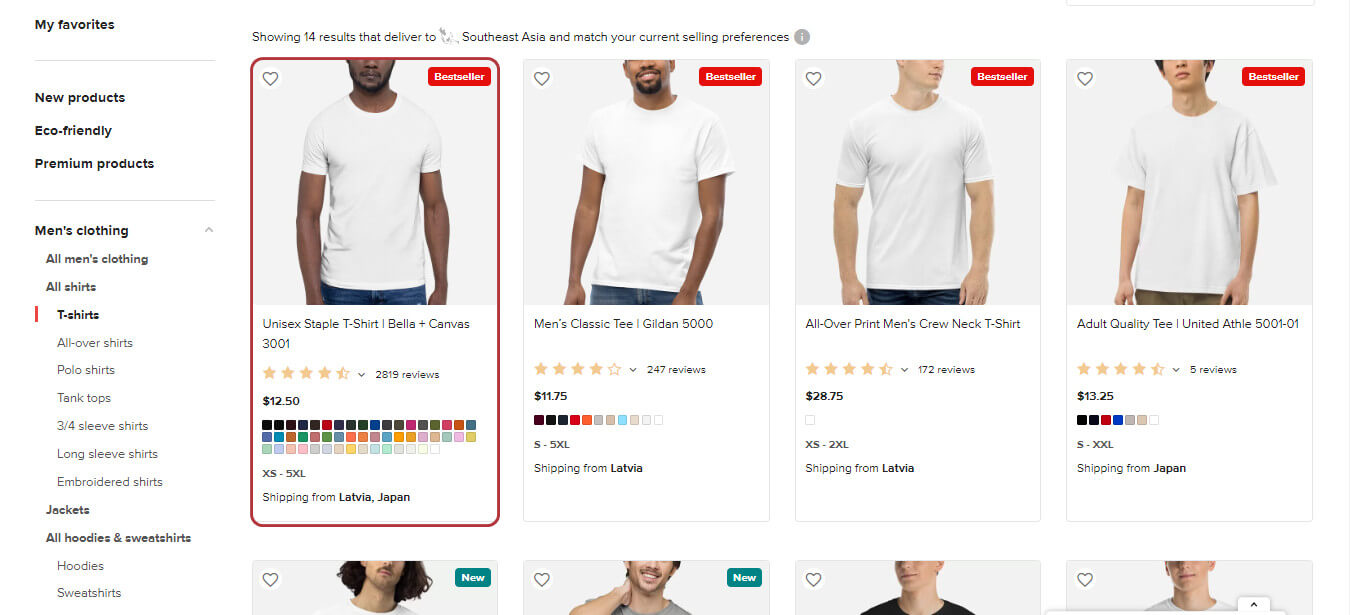
We’ll choose a unisex staple T-shirt to make designs.
Here you can see tons of colors, sizes, and two printing techniques (DTG printing and embroidery). You can pick any amount of them to add to the print-on-demand websites if you want.

Here you can see tons of colors, sizes, and two printing techniques.
Add your favorite designs
Additionally, Printful’s customization tools allow you to choose the placement of your designs like left chest, center chest, outside label, and inside label. However, you’d notice that each printing method may have different areas for custom designs.
In terms of creating designs, there’re lots of options for you. You can upload your ready-made designs from the computer, or start creating one by using many design tools that we highly recommend like Canva, Freepik, and Placeit as they have everything you need to create a creative design for your print-on-demand websites.
Just remember to pick the images with a resolution as high as you can as it’ll affect the quality of the printing products.
Edit the design of the product
When you’ve already inserted your preferred design, you can edit its dimensions, positions, and even directions if you want.
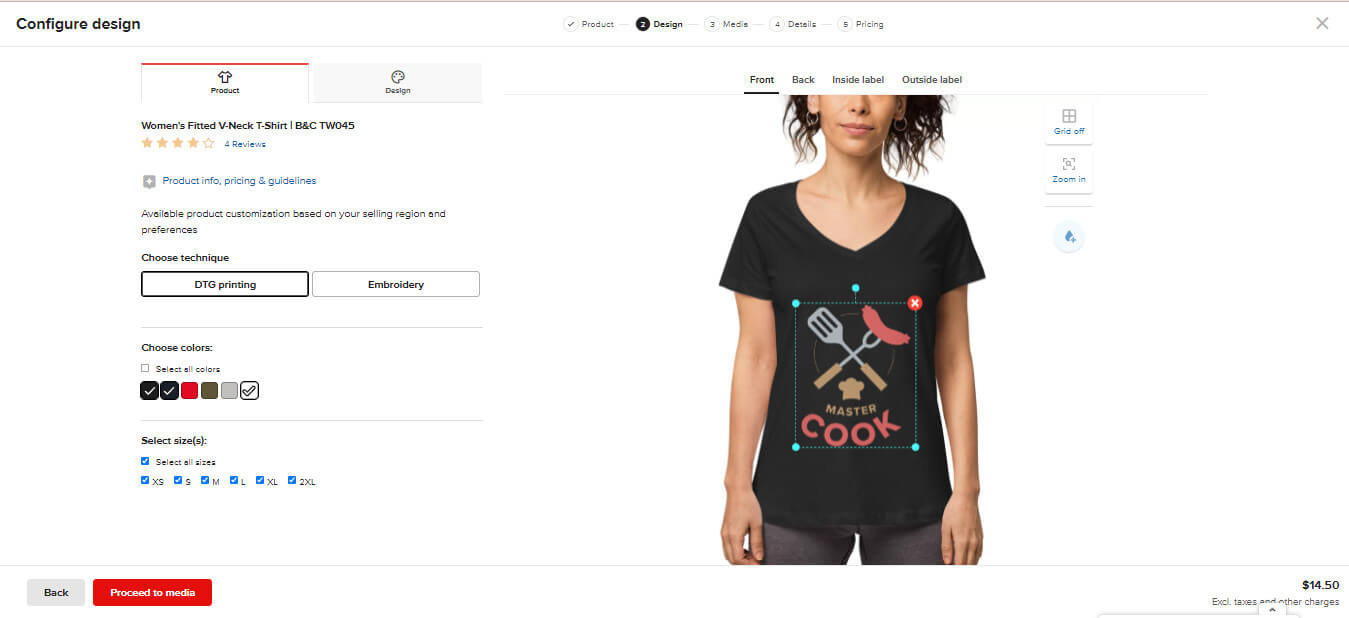
You can edit images’ dimensions, positions, and even directions.
Then, press Proceed to media to complete the designed product.
Choose an attractive mockup
Finally, you’re going to choose the mockup that will be displayed on your print on demand websites. That’s also what the customers would see when they first click on your products.
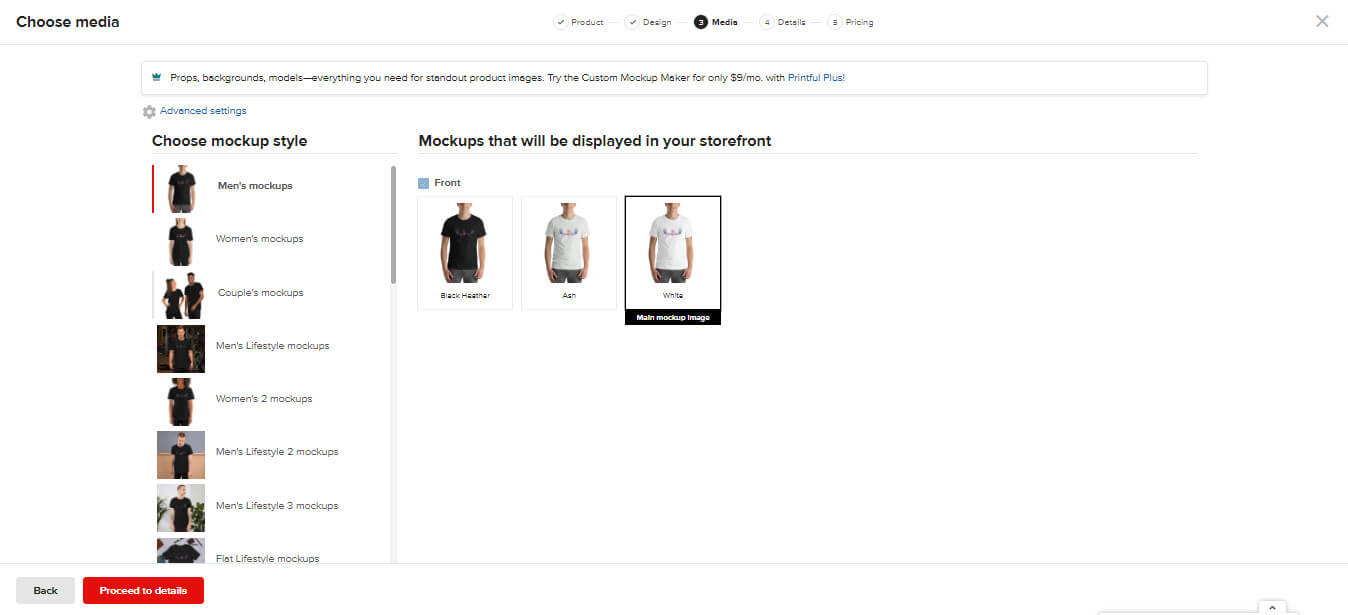
Choose the mockup that will be displayed on your print on demand websites.
Edit products’ details
This is where you can edit the products’ introduction which will be presented on your print on demand websites when customers look at your mockups.
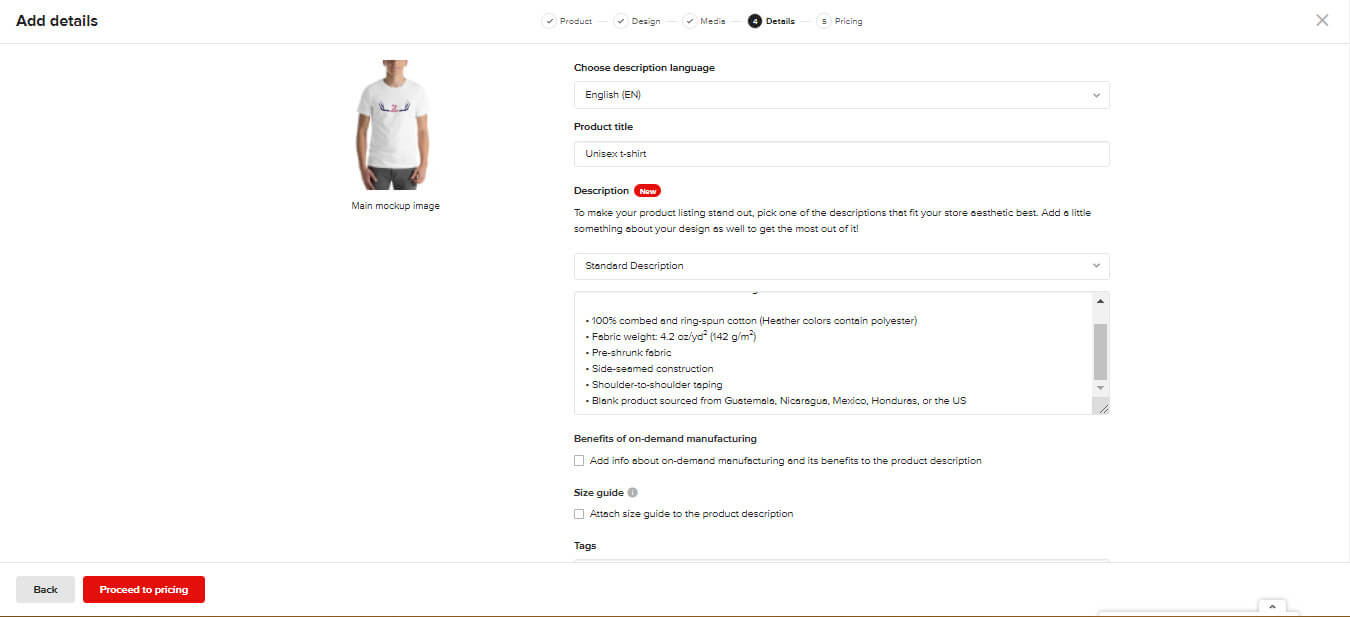
This is where you can edit the products’ introduction.
They may include the description language, product title, and description (like standard, quirky, playful, and on-trend which is based on your business styles). On-demand manufacturing, tag, size guide (like the measurement system), and product collections it belongs to are also covered as well.
When you finish filling out all products’ basic information, it means you’ve fulfilled the product design process. Now you’ll proceed to the next part – pricing.
Step 5: Set up your product price
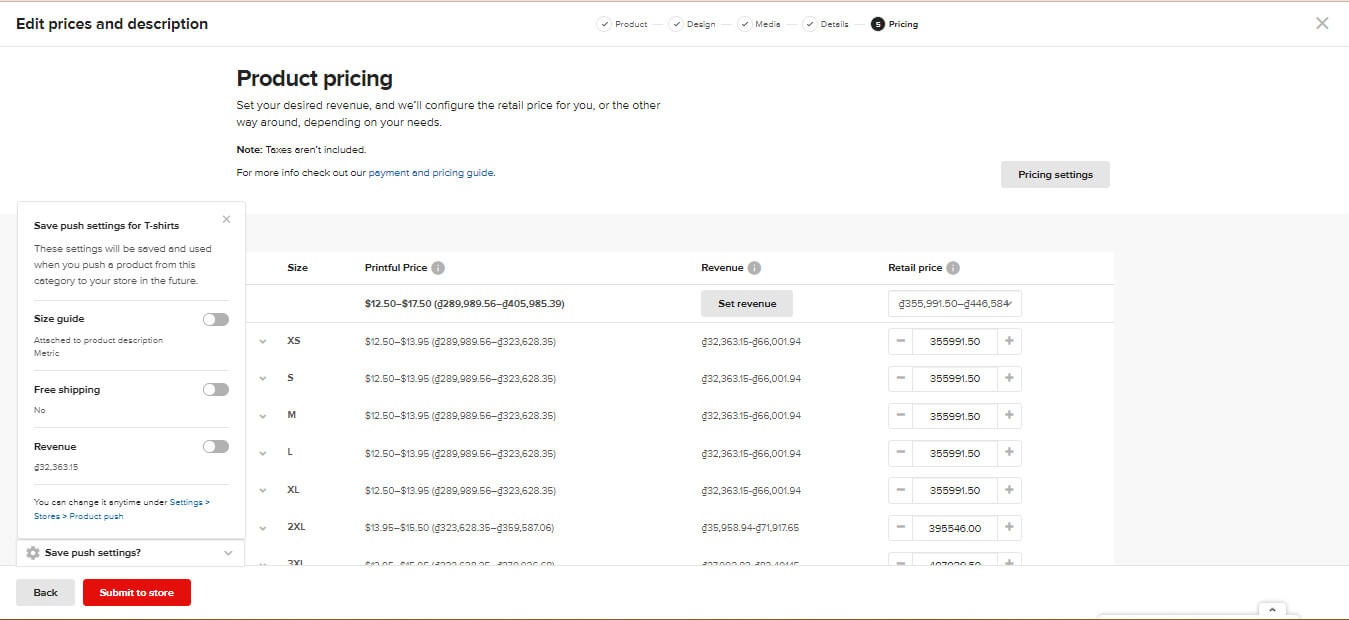
You can set revenue in Pricing.
Here you can see the Printful price. That’s basically the cost of making a product and depends on the product size, color, printing technique, print placement, and fulfillment location.
Besides, Printful automatically calculates the retail price which is the money your customers will pay for your products. Hence, you can easily figure out how much profit you’ll gain.
However, you can fix the profit rate to be higher or lower according to your needs and it’s allowed for each product you have on your print on demand websites.
After setting competitive pricing, click Submit to store. Now, you’ve already had the product added.
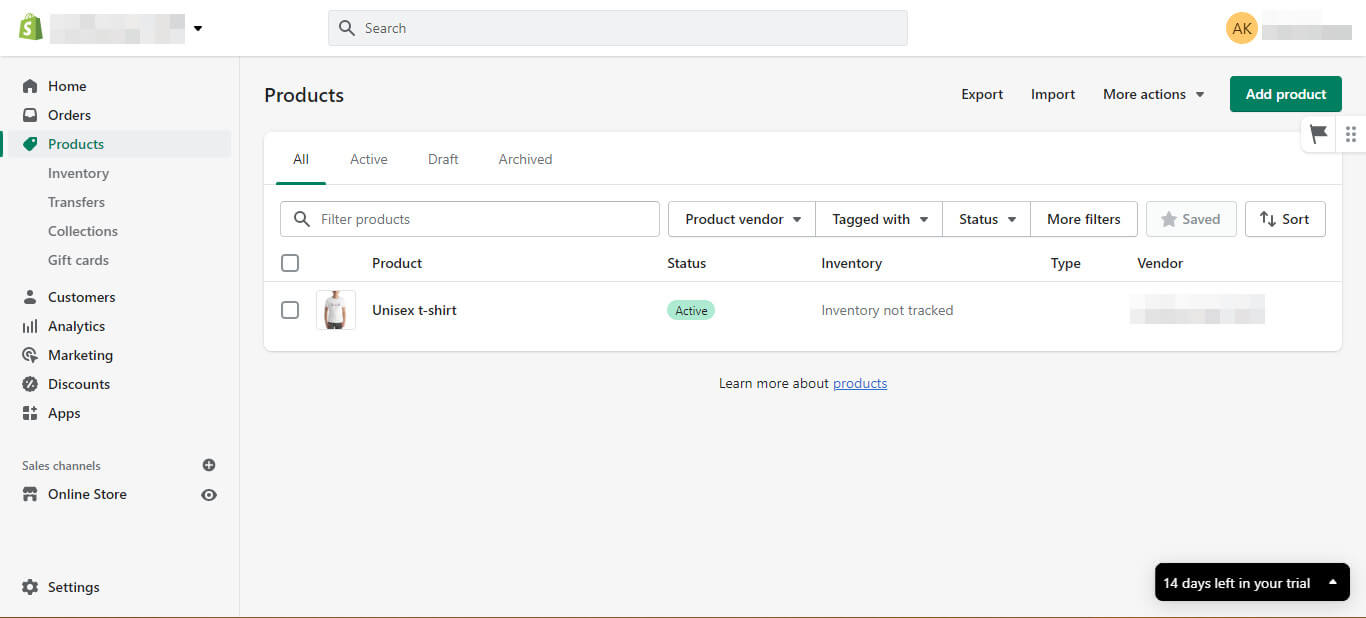
You’ve already had the product added.
Step 6: Design your print-on-demand websites
You’ll cover this step via the Shopify platform. This is what your print-on-demand websites look like on Shopify at first.
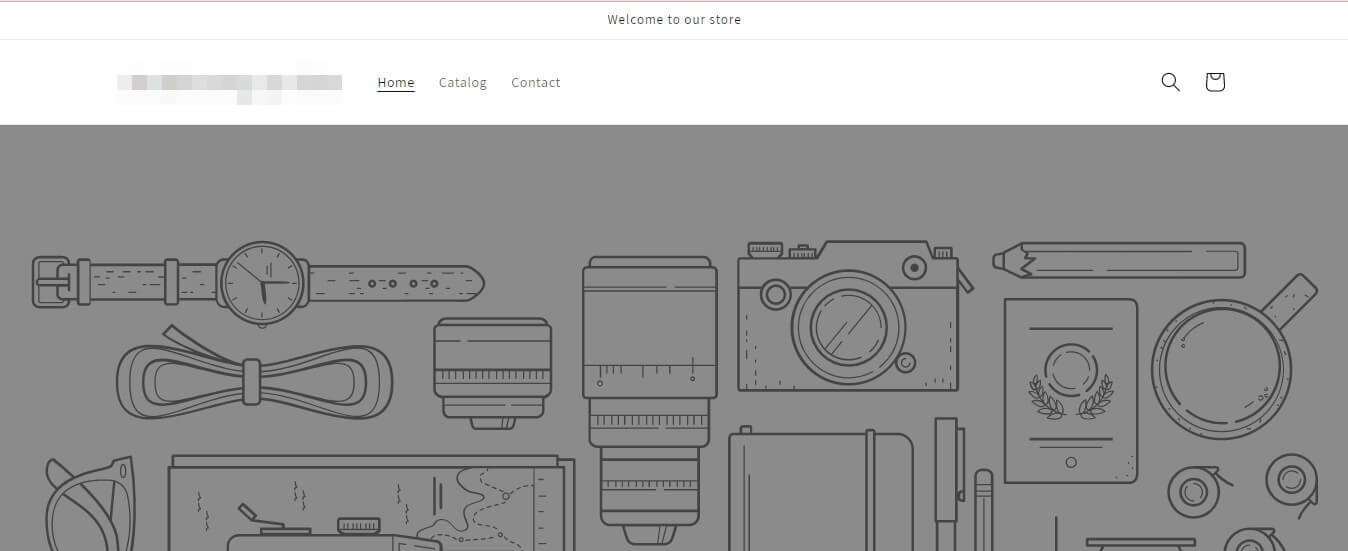
This is what your print on demand websites look like on Shopify at first.
It’s quite simple and basic, so we should make it more eye-catching.
Themes
Setting themes on your print-on-demand websites is important as customers will immediately see them when they enter your stores.
To do this, you can explore free themes on Shopify or shop some in the themes store. You’ll see many themes’ previews and topics so you can choose one that suits your taste.
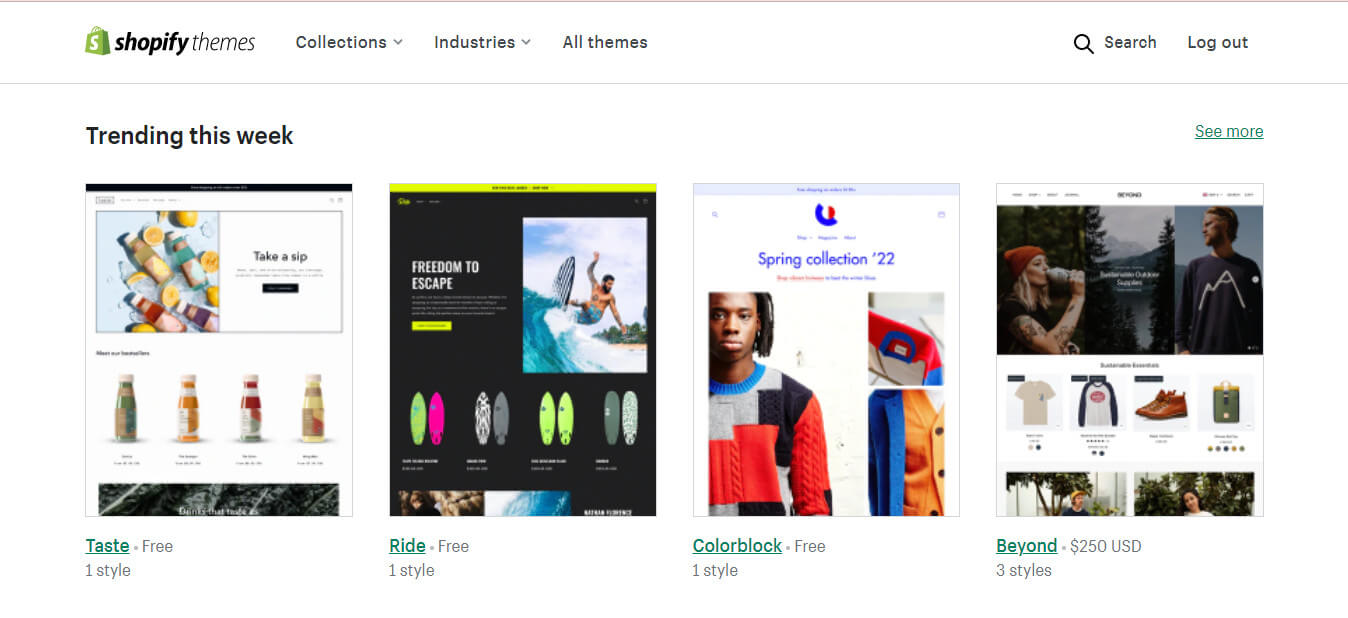
You can explore the Shopify theme store.
Or else, you can design your stores manually by clicking on Customize here.
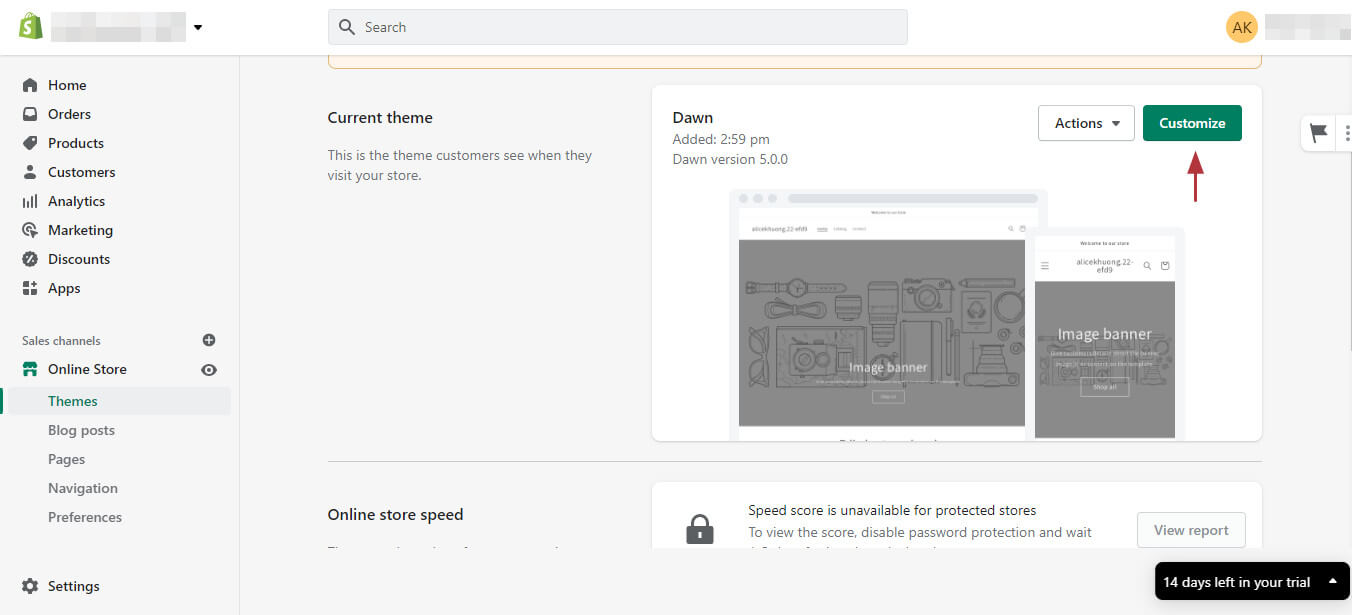
You can design your stores manually by clicking on Customize here.
Now you can edit each of the sections to decorate your homepage in the way you love from text, pictures, header, and footer.
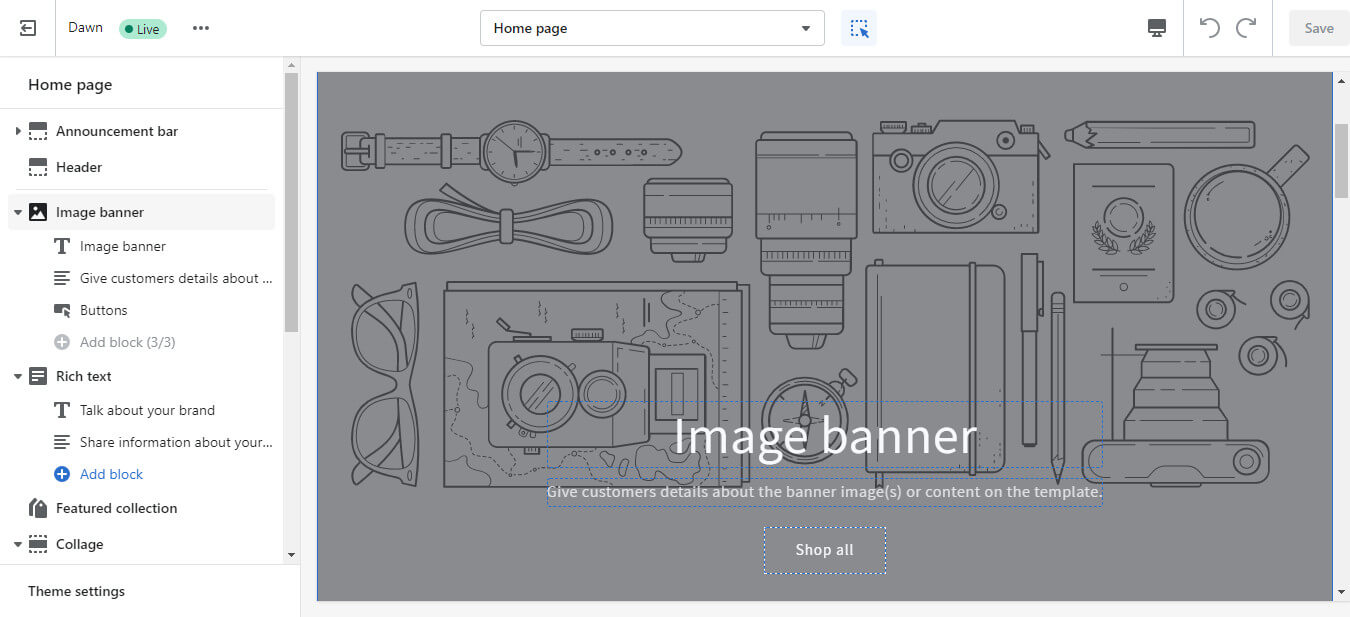
You can edit each of the sections to decorate your homepage.
Collections
You’ll create product collections in the Products section. It helps your customers quickly find out the items they want on your print on demand websites based on the topics, seasons, and more.
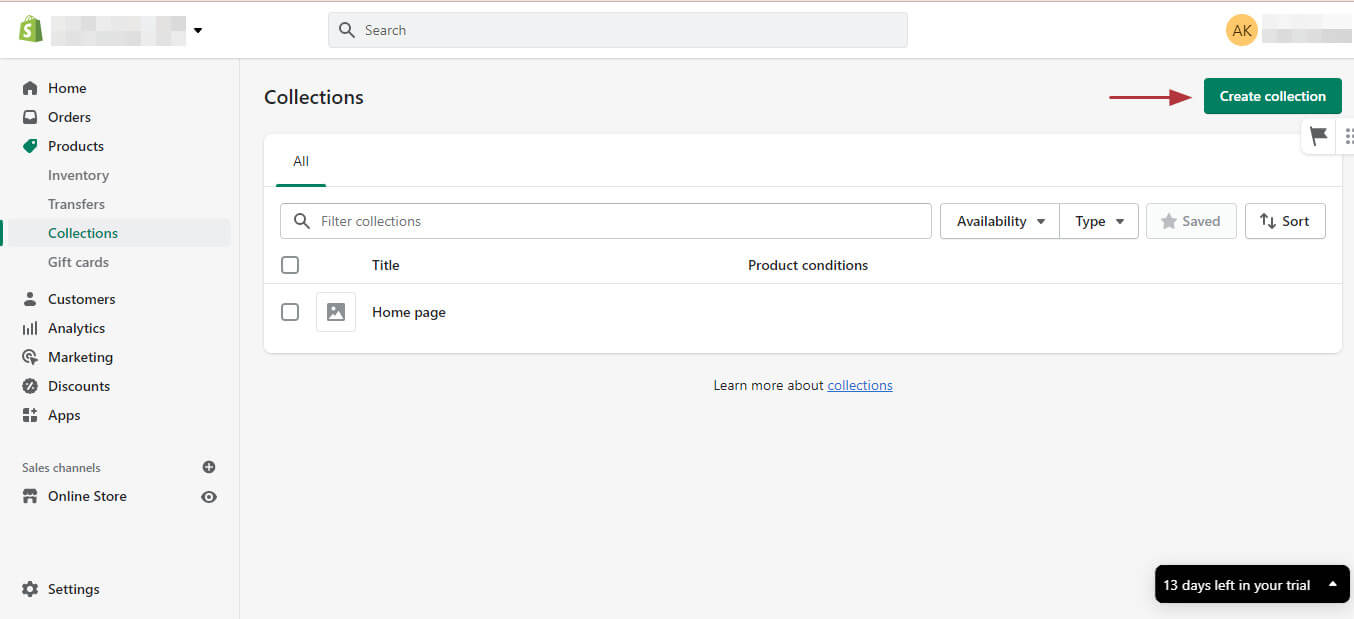
Create product collections.
You can title your collection name, for example, T-shirts, hats, summer collections, or others. Then, insert a collection description and an illustrative image to give it a better look.
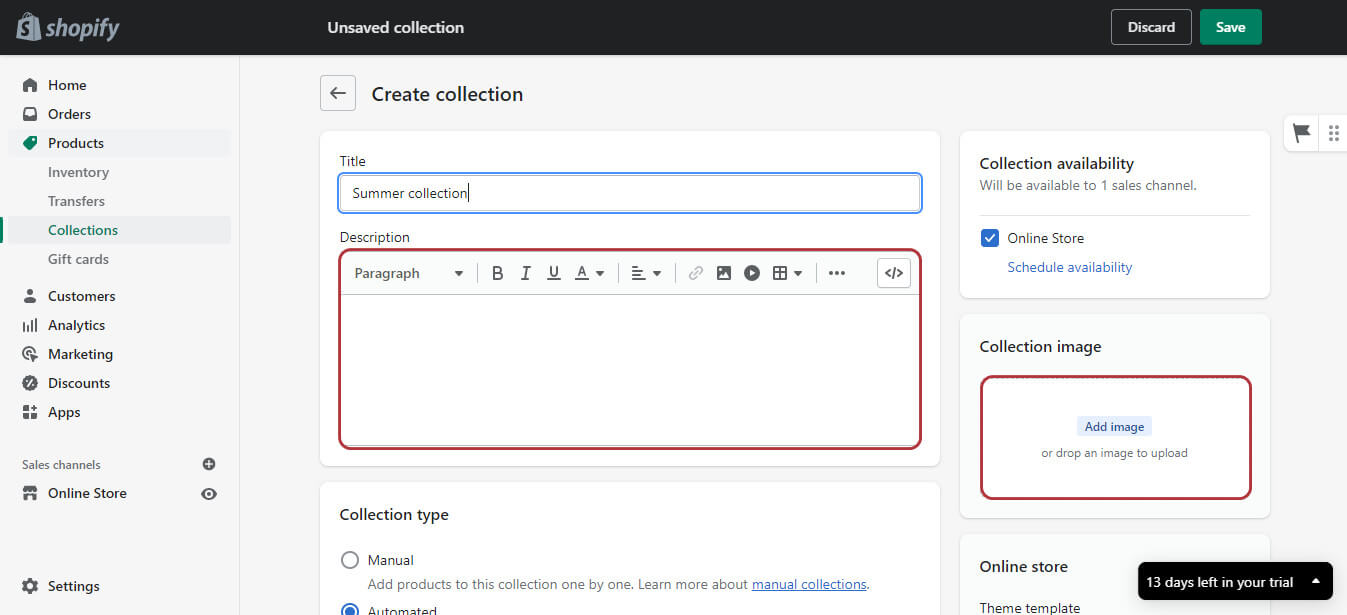
Insert a collection description and an illustrative image.
The good news is you can use your mockup image which can be downloaded for use on Printful.
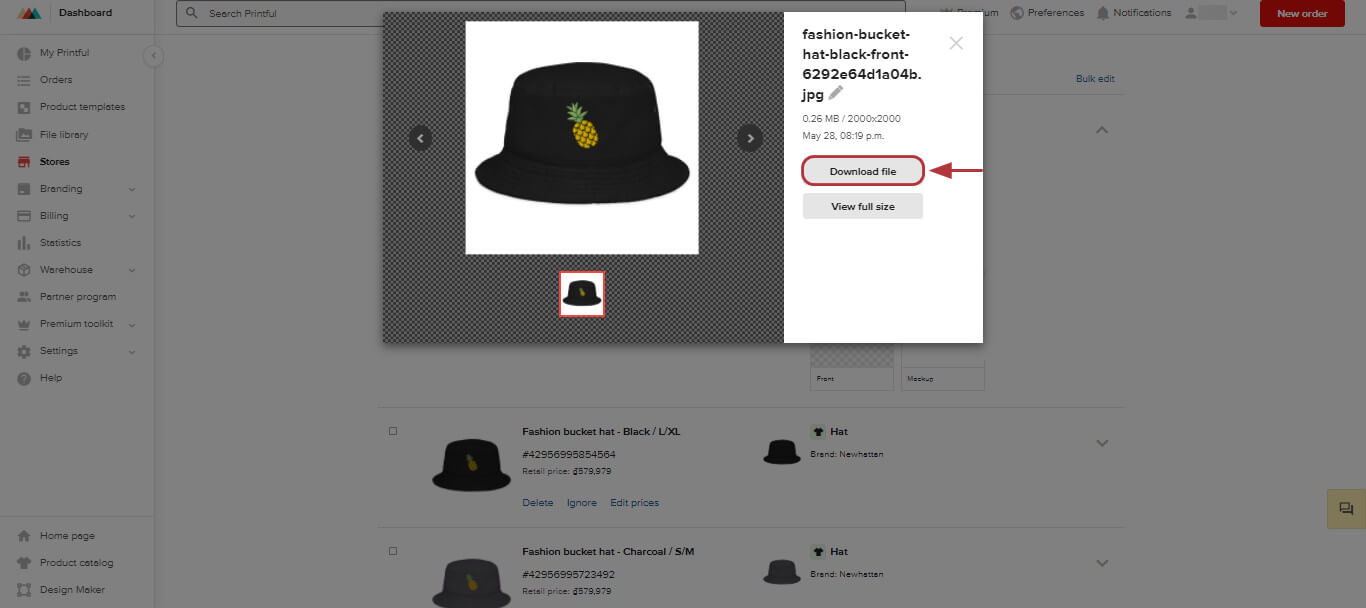
Use your mockup image.
Remember to Save your first collection.
Now, you can add your ready-made products to this collection or more in the future.
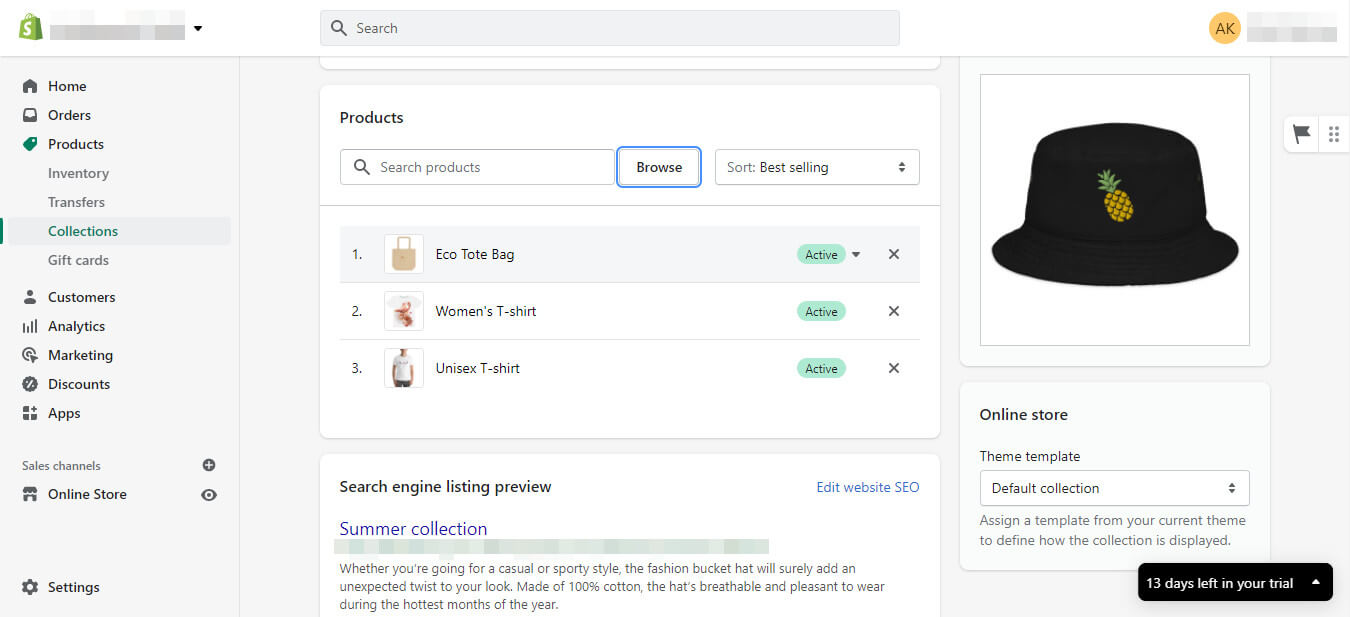
Add ready-made products.
Once you’ve got amazing product collections, you can make them prominent on your print on demand websites by adding the collection you want to the online store’s navigation.
First, you’ll need to update the menu. Find the Navigation and click on the Main menu.
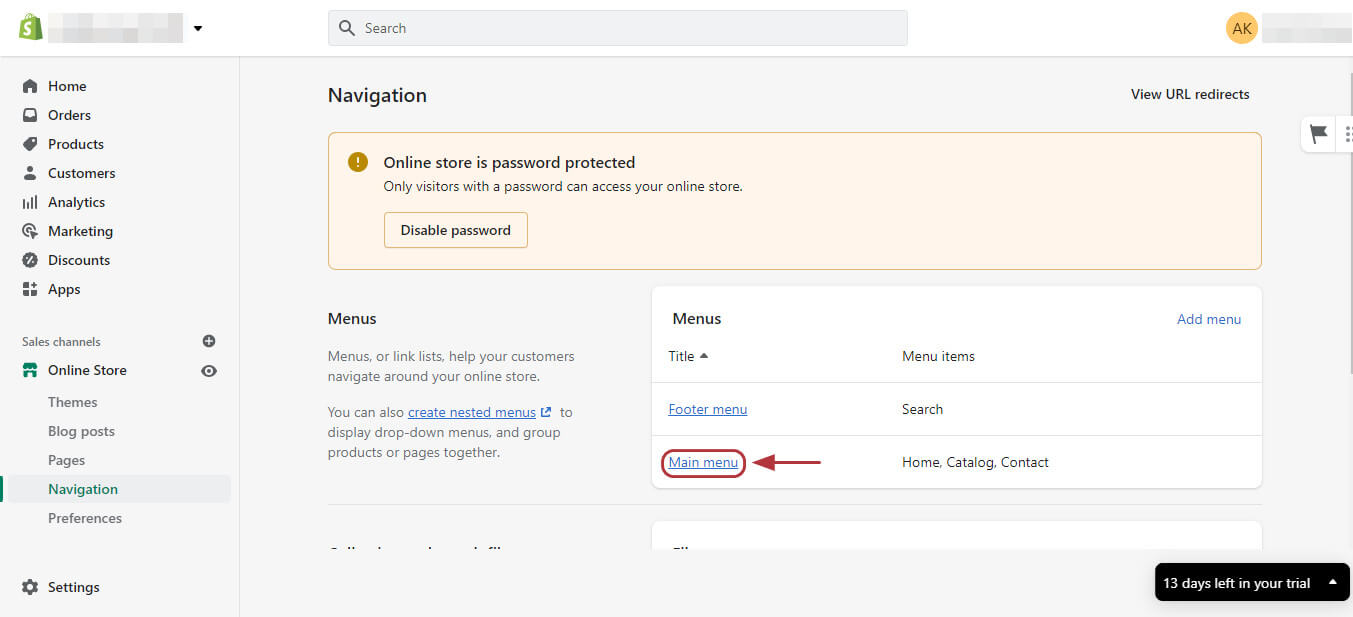
Find the Navigation and click on the Main menu.
Next, choose Add menu item. Then, you will title the name, insert the collection into the link box, and click Add.
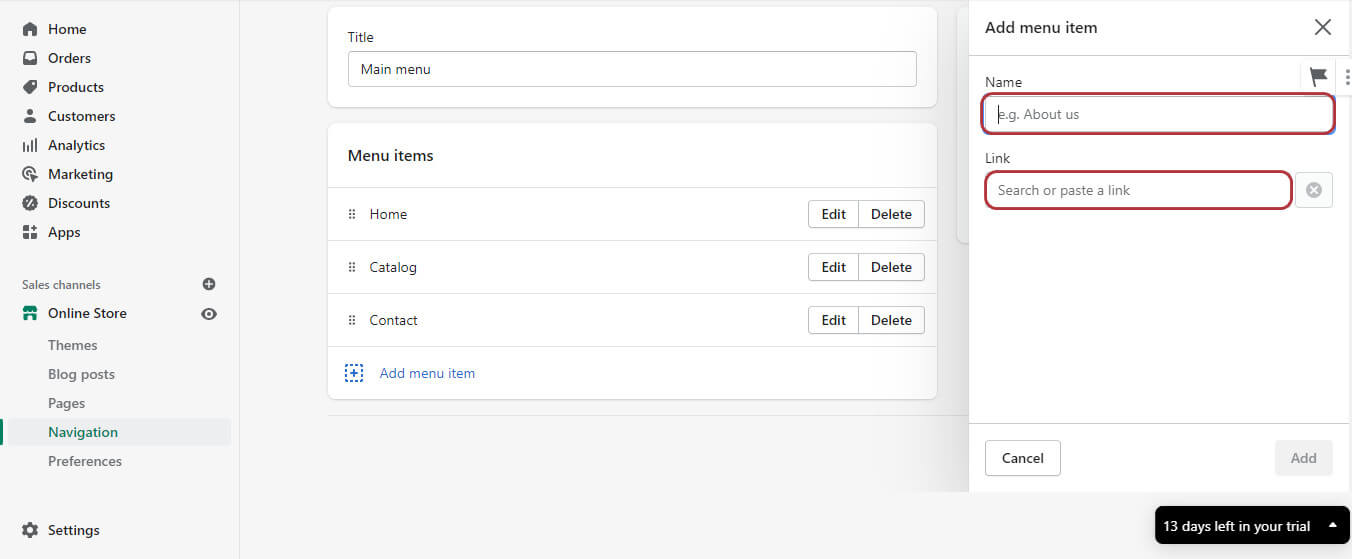
You will title the name, insert the collection into the link box, and click Add.
After saving your modification, you’ve completed adding your collection to the print on demand websites’ navigation.
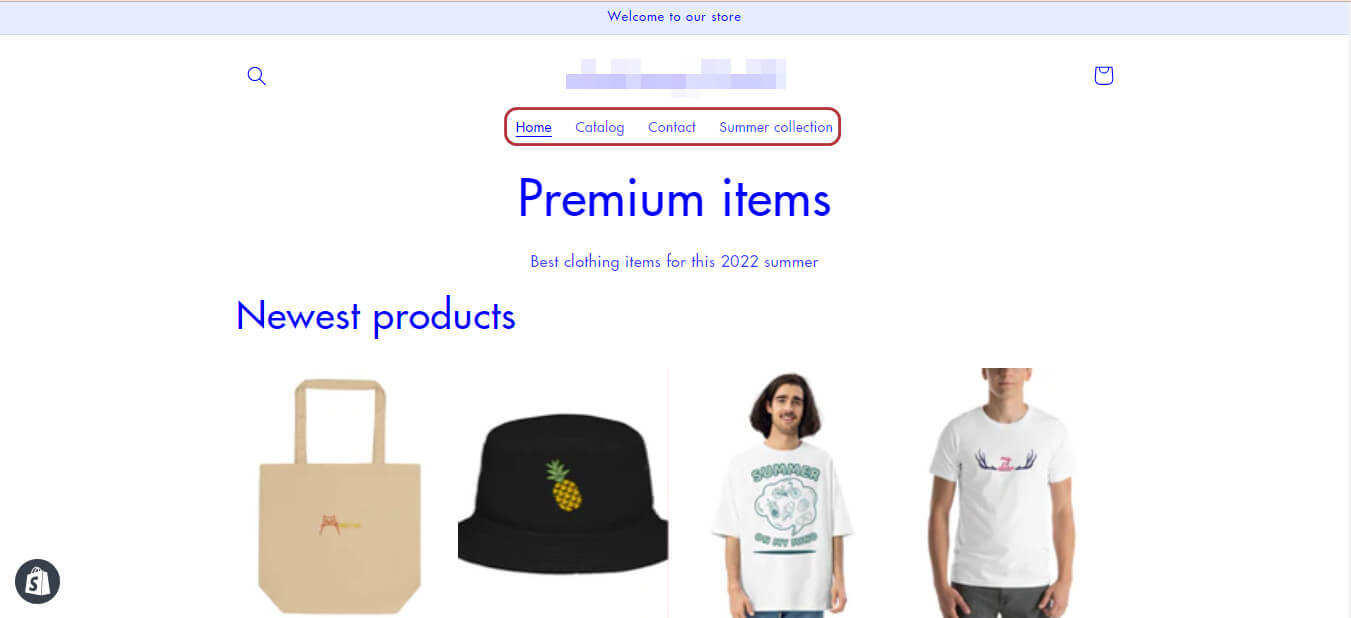
You’ve completed adding your collection to the print on demand websites’ navigation.
Logo
To increase your brand identity, you’ll need to add a logo on your print on demand websites.
Just go back to the store customization dashboard and you will easily find the place to insert your logo in the header part.
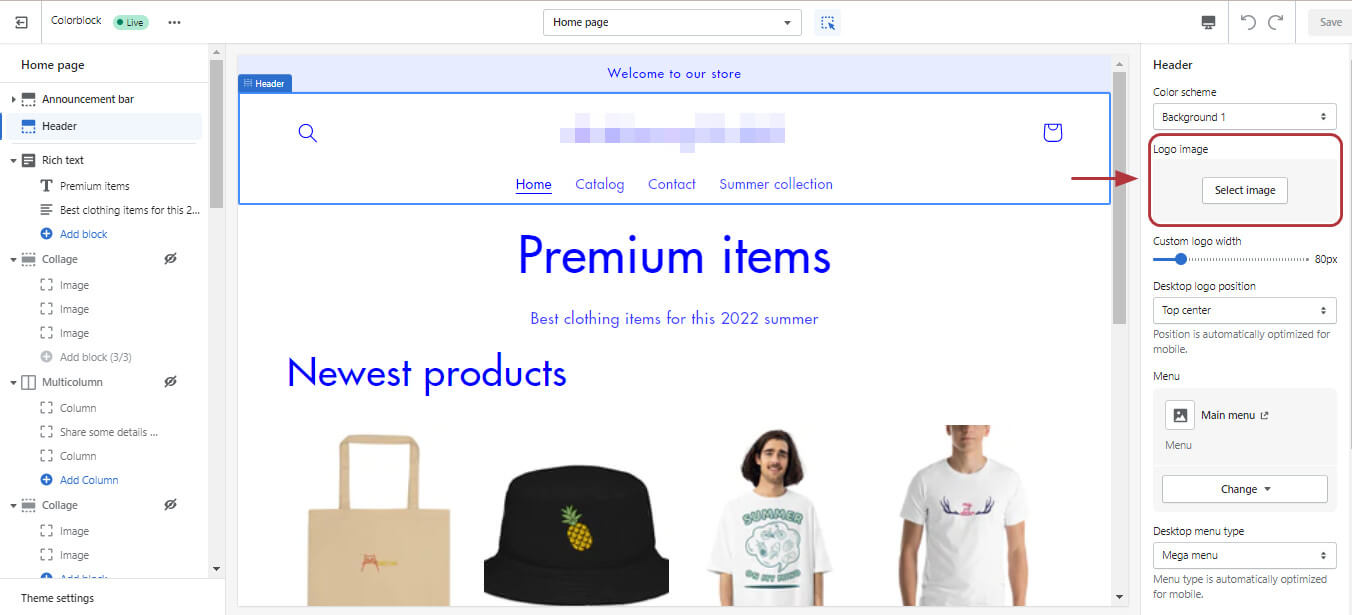
You will easily find the place to insert your logo in the header part.
Final thoughts
In a nutshell, those are all the steps you need to establish basic print on demand websites.
Besides, Shopify also supplies you with more advanced customization tools so that you can polish and elevate your online stores to an upper level.
Just remember that print-on-demand websites are not just the place you put on your products but they’re also the hook to capture your target audience’s attention.
Additionally, you can search how to start an online store in 9 simple steps from Shopify to get more tips for yourself and customize the perfect print-on-demand websites for your business.


