Table of Contents
What is a ‘Cookie Consent’?
The term ‘cookie consent’ refers to website visitor’s permission to allow a website to place a cookie in their browser to gather specific data about them (which can then be used to deliver personalized experiences or display ads).
“Forrester stated that ePrivacy has an effect on customer engagement, company reputation, and revenue since value-based consumers connect with brands they perceive ethical.”
To make sure you comply with the ePrivacy Directive & GDPR and appear more trustworthy with your prospecting customers when they land on your website, showing cookie consent is a major requirement.
Cookie Consent Banners created with OneSection
With OneSection, your cookie consent banners look good on any screen type!
-
Desktop

-
Tablet

-
Mobile

How to add a cookie consent banner using OneSection?
To showcase a responsive cookie consent banner by OneSection, you can either add it within your Shopify theme editor or right in OneSection app.
Add cookie consent banner from Shopify editor
Step 1: Log in to your Shopify store > Navigate to ‘Online Store’

Step 2: At your Current theme section > Click ‘Customize’

Step 3: Select the page you want to add a testimonial slider

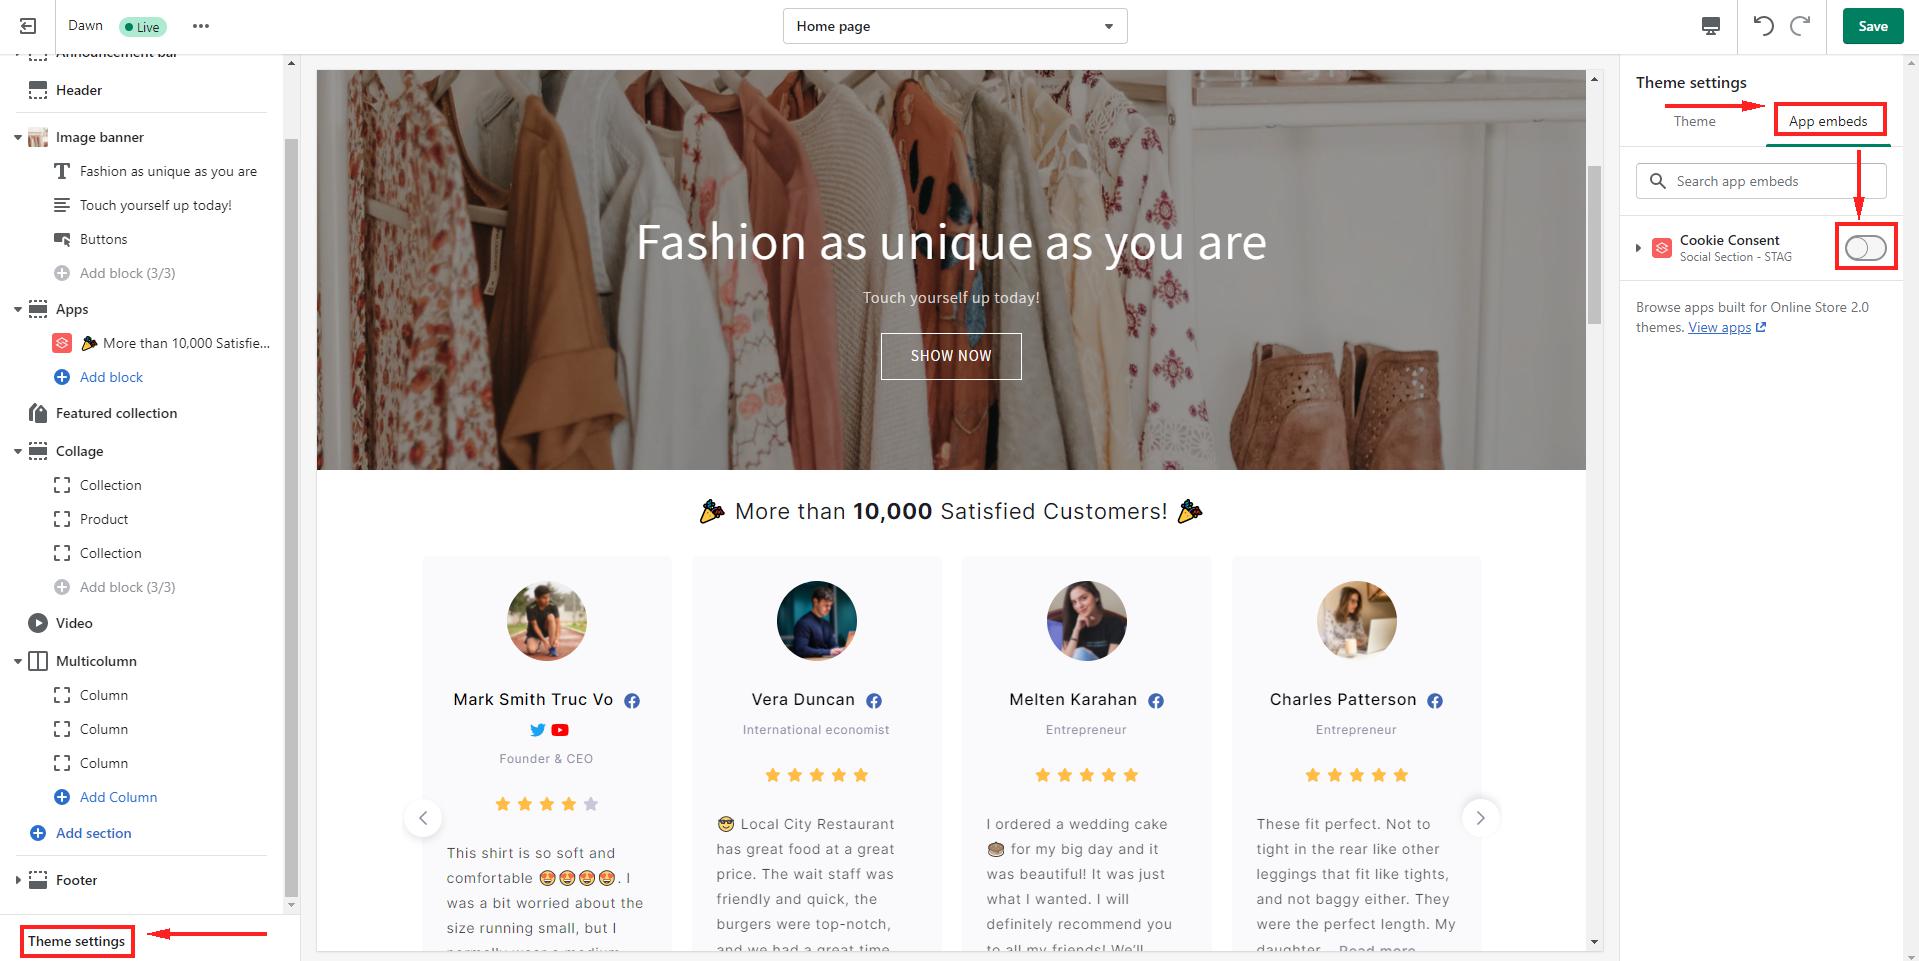
Step 4: Scroll down and click at Theme settings > App embeds > Switch on ‘Cookie Consent’ option.
Step 5: Customize the cookie consent as much as you like from the cookie icon, text, buttons, background color, etc.
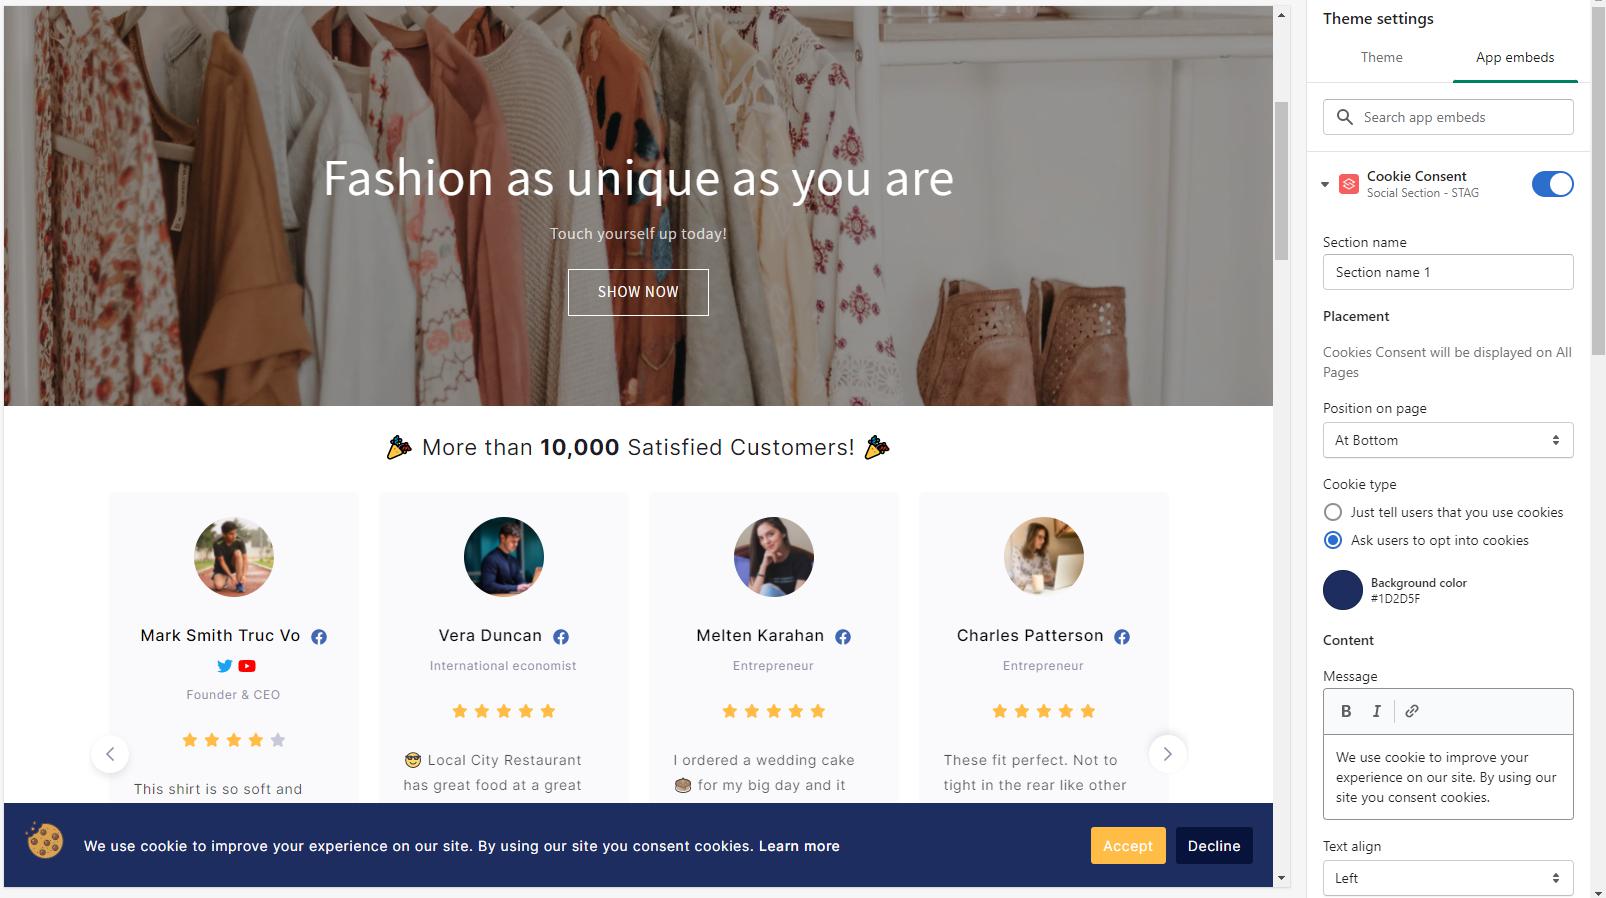
Step 6: Click ‘Save’ and you’re all done!
-
To remove your Cookie Consent
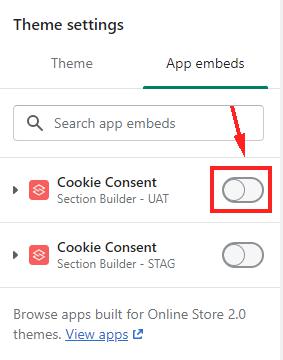
Click on ‘Theme Setting‘ on the sidebar menu > Choose ‘App embeds‘ > Navigate to Cookie consent section > Toggle it off
Add cookie consent banner right in-app
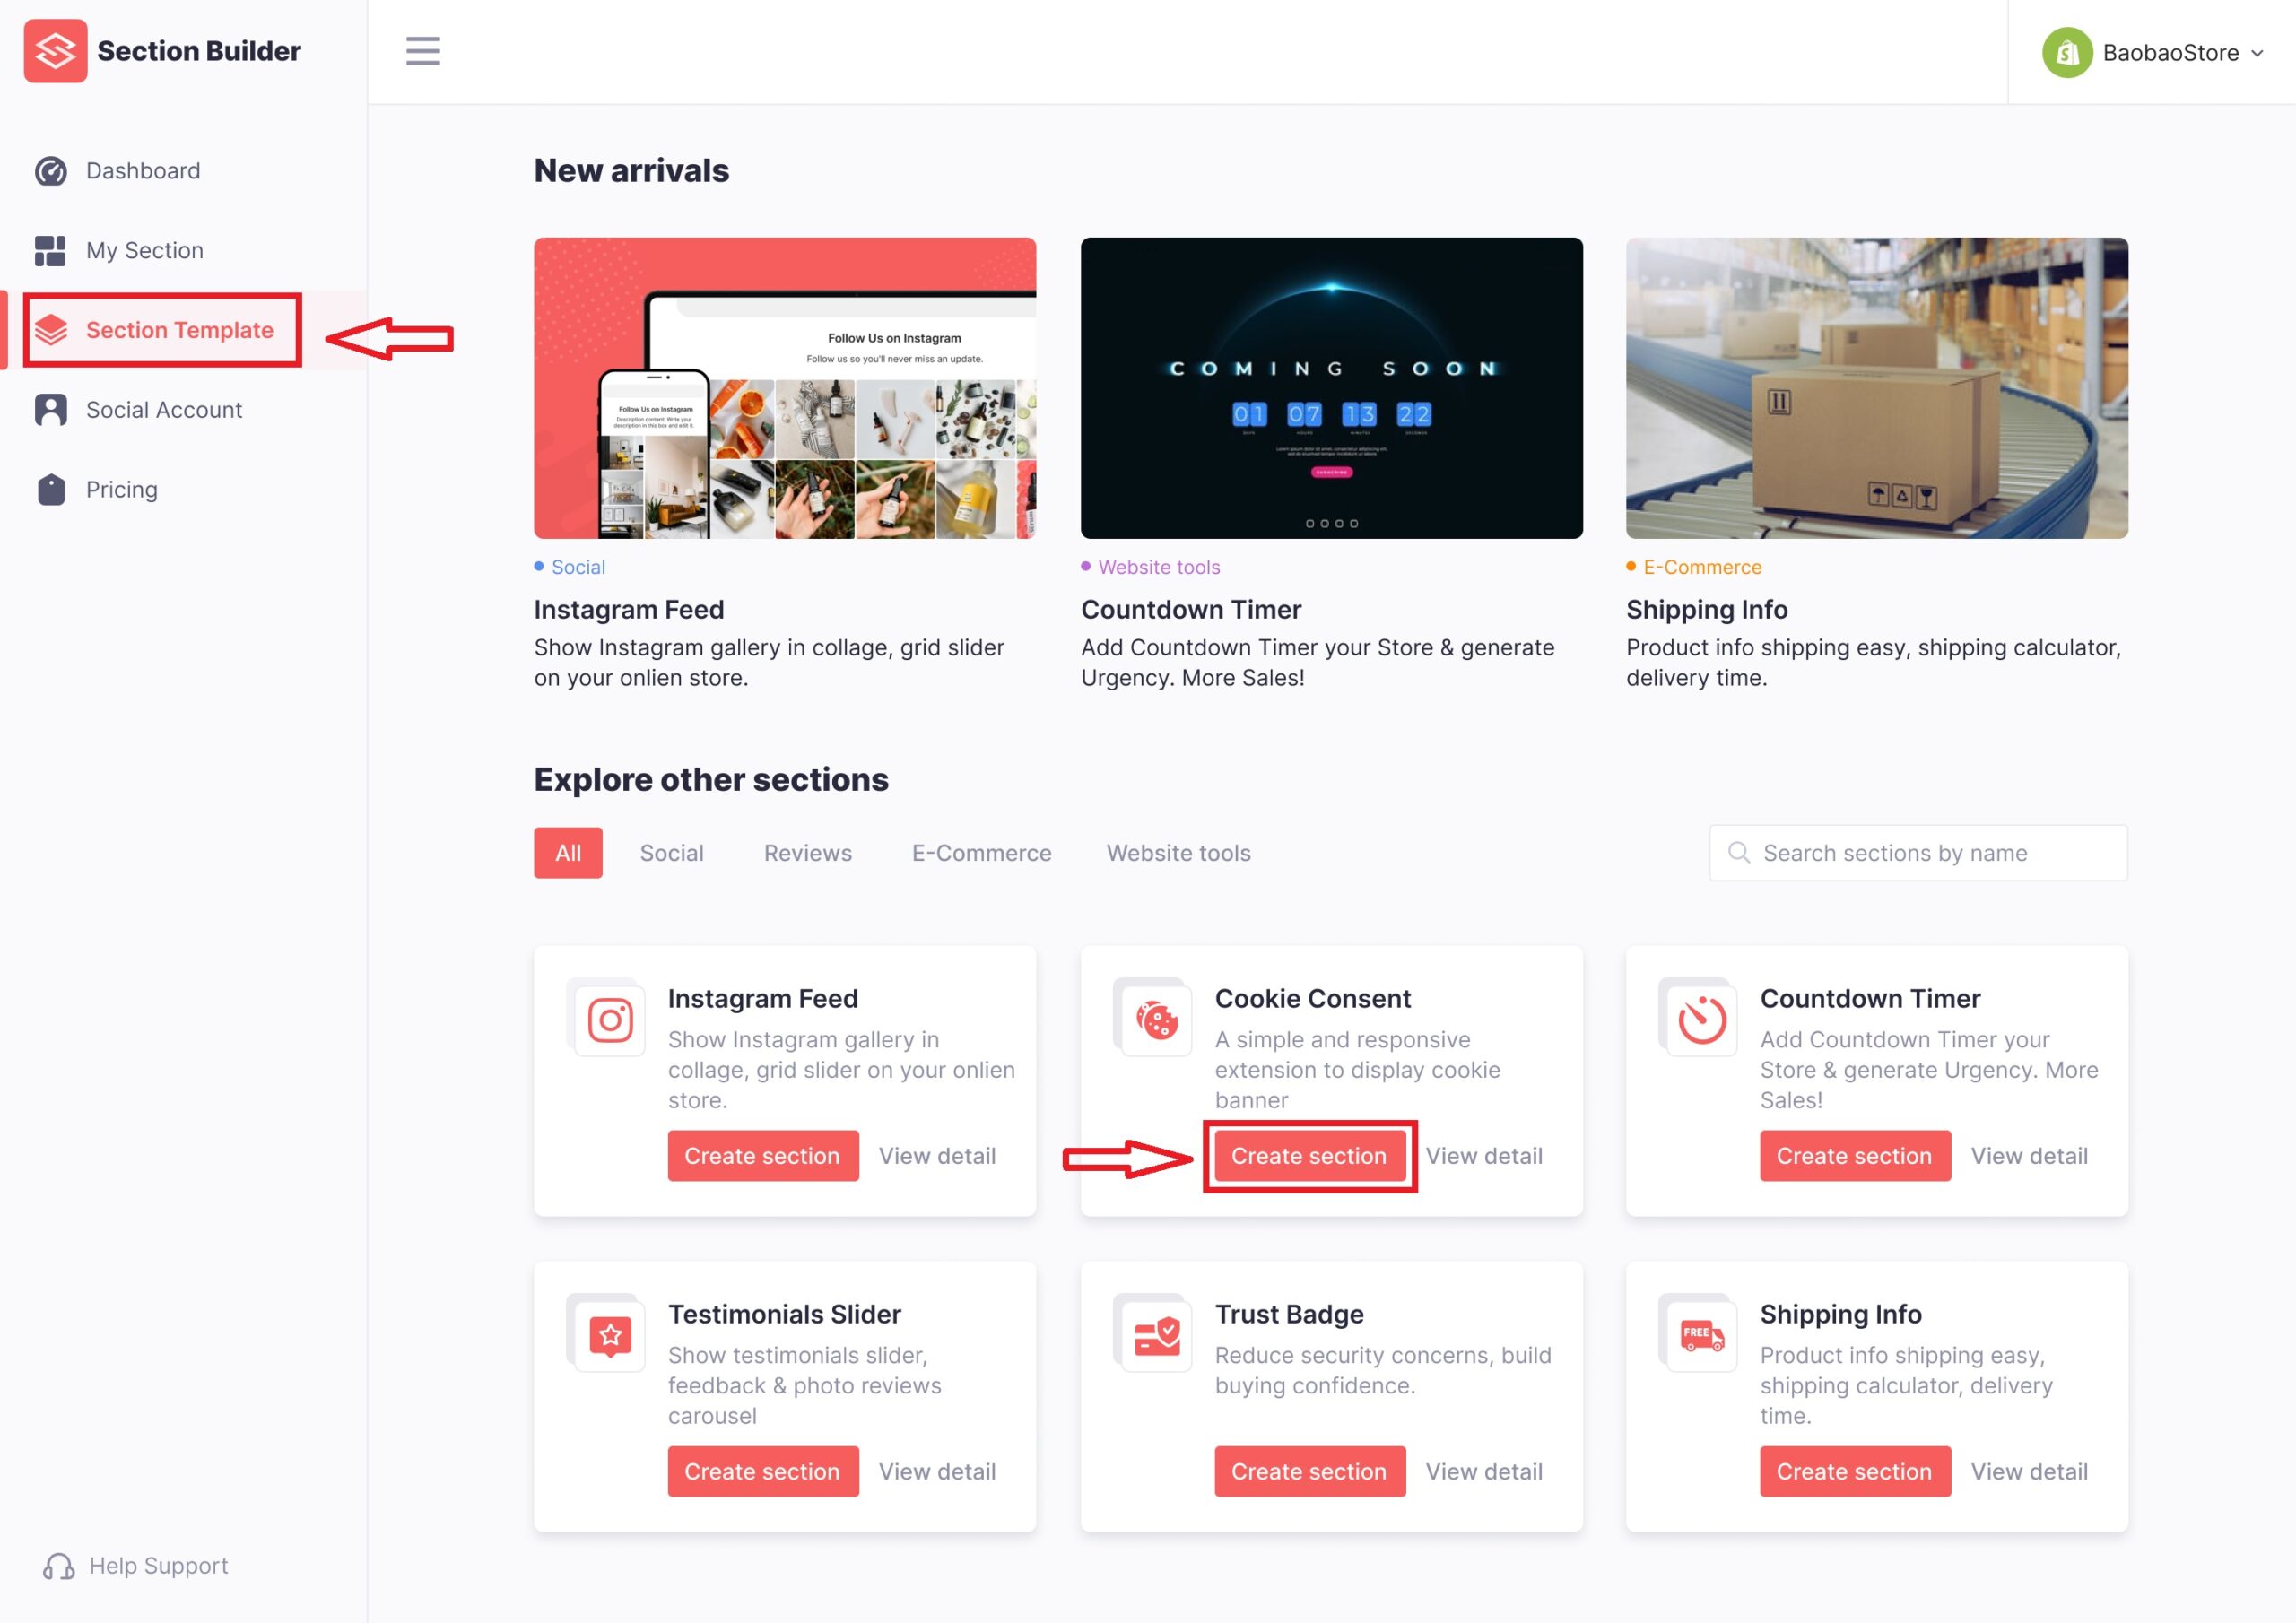
Step 1: Log in to your OneSection account > Click on ‘Section Template’ > Navigate to ‘Cookie Consent’ and click ‘Create section’.
Step 2: Configure your settings
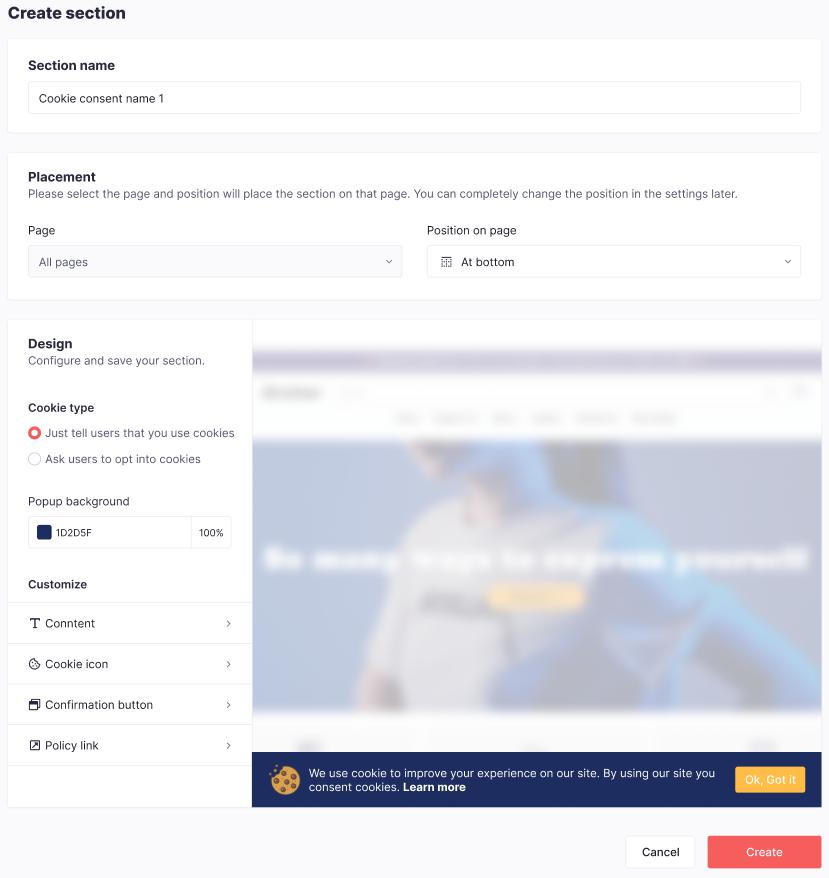
Step 3: Click ‘Create‘ and you’re all set!
Copyright @ OneCommerce.io
